In Part 1 of this article, we introduced you to the concept of ephemeral storage and its use case. We discussed that sometimes it’s possible to configure a database on instance store-backed storage for faster performance.
In Part 2, we will show you how to back up data stored on instance store-backed storage to an AWS EBS volume. In this part, we will launch an EC2 backup instance with instance store-backed root volume. We will install MySQL on the ephemeral storage and setup for automated SQL server backup using N2WS Backup & Recovery. We have provided a step-by-step guide for setting up and performing these functions below.
Step 1: Creating an EC2 Instance with Instance Store Volume Attached

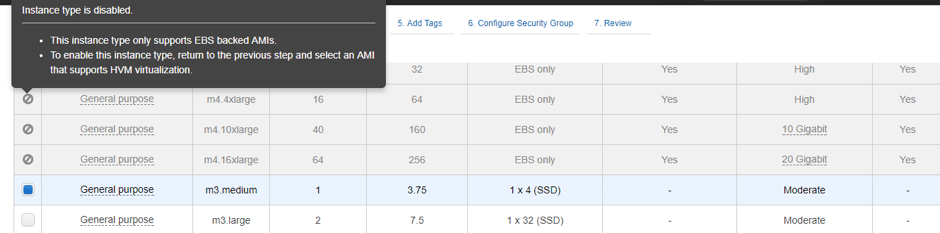

Generally, the instance store AMIs are available under the Custom AMIs section in EC2 launch wizard. Find a suitable AMI and launch an instance with it. First, select the EC2 instance type. The storage type will be Instance Store.
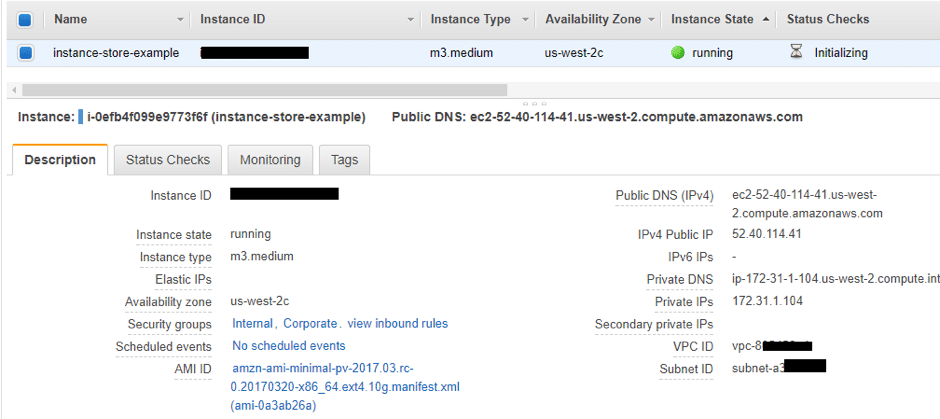
Note: You are not required to specify the size of instance store volume. The size of instance storage is decided based on instance type. Then, launch the instance.
Step 2: Setting up the Database on an EC2 Instance`
Set up a MySQL database on an EC2 instance.
Step 3: Create and Attach an EBS Volume for Persistent Backup
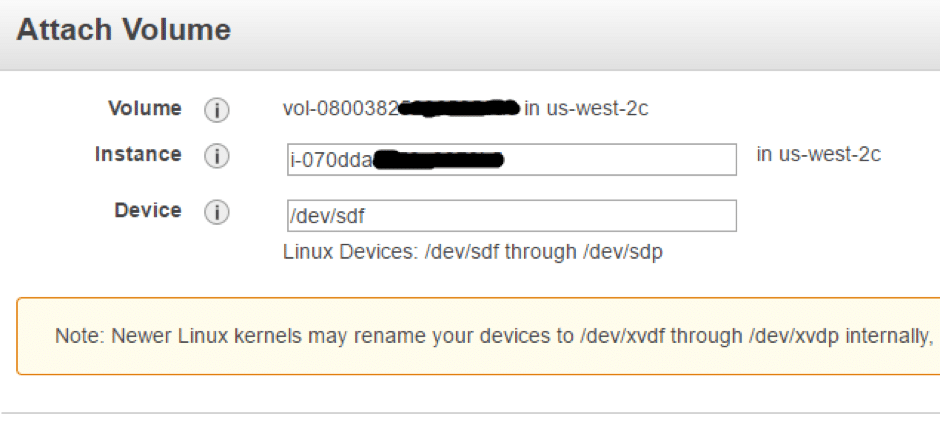
In this step, we will create an EBS volume for backup of MySQL dumps, which will need to be attached to our EC2 instance.
- After you create the EBS volume, attach it to the EC2 instance.
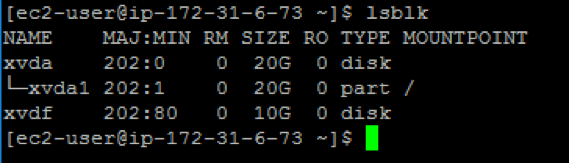
- Next, list storage devices attached to the instance.
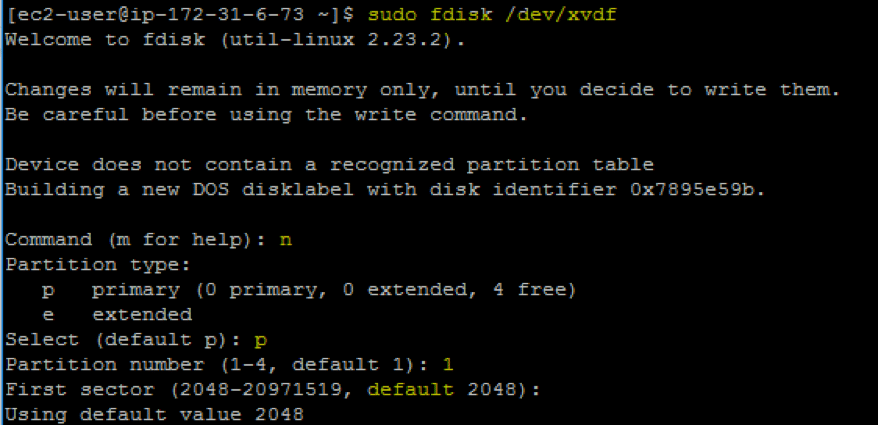
- After that, change the file system format of the EBS volume. You will first need to create a partition table, as shown below.
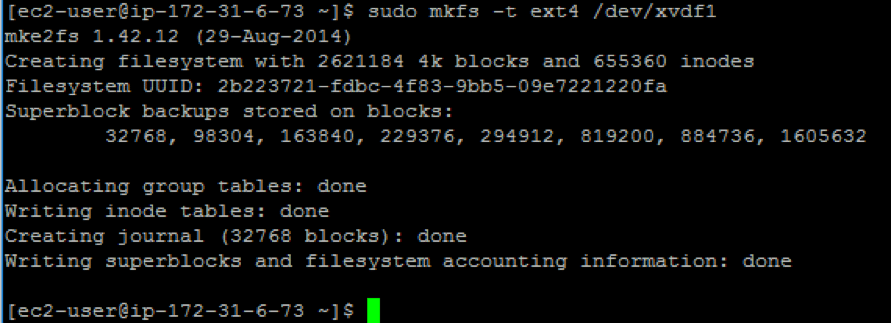
- Once the partition table is ready, you can format the volume of it using the ext4 file system.
Then, create a mount directory where you want to mount the device using the code:
mkdir /home/ec2-user/backup-volume
Open the /etc/fstab file and add a new line at the end of the file.
/dev/xvdf1 /home/ec2-user/backup-volume ext4 defaults,nofail 0 2
This step is important, as it will ensure that the EBS volume is attached automatically on instance restart.
Once you have added the new line, save and run the following command to execute changes in the /etc/fstab file.:
sudo mount -a
Step 4: Create a Script That Will Take MySQL Dump and Store It in EBS Volume
This script is to be created on instance-store instance’s home directory /home/ec2-user. The motive of this script is to take backups directly to the EBS volume that was mounted in the previous steps. Create a file named db-backup.sh and copy and paste the following the content in it:
#!/bin/sh
# DB credentials
mysqluser=""
mysqlpassword=""
dbname="test"
now="$(date +'%d_%m_%Y_%H_%M_%S')"
filename="db_backup_$now".gz
#Backup location
backupfolder="/home/ec2-user/backup-volume"
fullpathbackupfile="$backupfolder/$filename"
#Log file location
logfile="$backupfolder/"backup_log_"$(date +'%Y_%m')".txt
#Remove old backups
find $backupfolder -type f -name "*.gz"  -exec rm {} \; >> "$logfile"
echo "deleted all files,operation finished at $(date +'%d-%m-%Y %H:%M:%S')" >> "$logfile"
#Take mysql dump
echo "mysqldump started at $(date +'%d-%m-%Y %H:%M:%S')" >> "$logfile"
mysqldump --user="$mysqluser" --password="mysqlpassword" --default-character-set=utf8 "$dbname" | gzip > "$fullpathbackupfile"
echo "mysqldump finished at $(date +'%d-%m-%Y %H:%M:%S')" >> "$logfile"
echo "*****************" >> "$logfile"
exit 0
Please note that you will be required to provide a mysql username, mysql password, and database name in the code above before executing it. The “before script” will execute the script shown above and will take MySQL data backup and store it on the EBS volume before the EBS volume backup process is executed.
Step 5: Create the “Before Script” on the N2WS Instance
The “before script” is launched by the N2WS before the EBS snapshot is taken. This script is typically used to move applications into backup mode. It is also commonly used to copy and transfer data onto a disk or to set up a backup target before a snapshot is taken. This state will be maintained for a very short time—only until the snapshots of the policy are fired.
Here we will use the db-backup.sh script that we created earlier in a “before script” to take backup. We will use the script created in step 4 to take MySQL DB dump and store it directly into the AWS EBS volume. This script will be executed by the “before script” of the N2WS and it will perform the following steps:
- SSH onto N2WS server with user cpmuser.
- Navigate to /cpmdata/scripts.
- Create a directory name with your username. In this article, we are using “admin” as the user, so we made the directory name “admin.”
- Create “before script” in /cpmdata/scripts/admin. The naming convention for the “before script” is “before_<Policy Name>.sh”. For example, add the code below to the before_Backuppolicy.sh file:
#!/bin/bash
ssh -i <location of pem file to SSH>  <user-name>@<IP Address EC2 instance where your rsync backup script> "db-backup.sh"

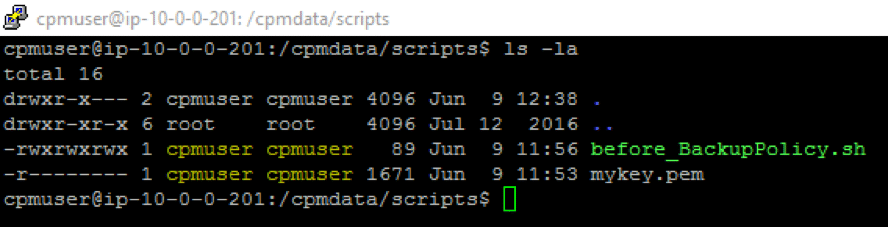
The code above will SSH into the EC2 instance and execute the backup script before the actual backup policy is executed. This code will execute the db-backup.sh script on our target EC2 instance where we’ve attached the EBS for backup of dumps. The /cpmdata/scripts should look like this with proper permissions and file ownership:
Step 6: Configure a N2WS Automated Backup
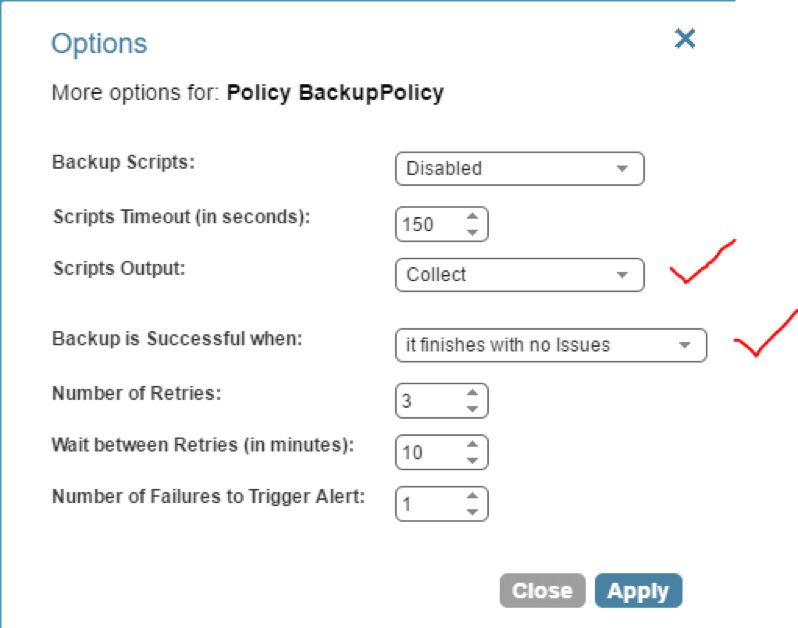
To configure Auto Backup, create a policy in the N2WS and configure it to run with the configurations shown in the picture below: After you’ve created the policy, configure the N2WS server instance to execute this policy after the “before script.” The “before script” was created in step 5.
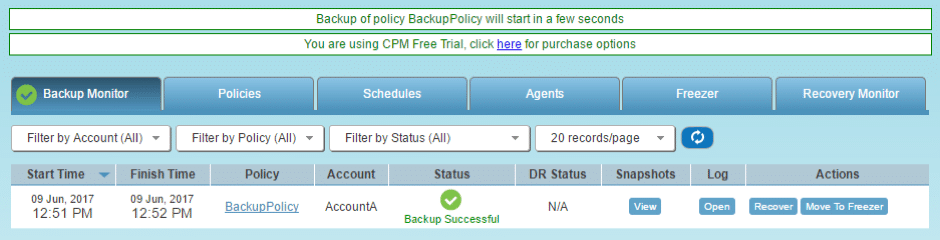
Once this has been done, we are ready to execute the backup policy and see if it’s able to execute the “before script” as intended. The last thing to do is to check if the snapshot was taken properly. You can view the output of the log file and console to verify this.
By following all of these steps, you’ve successfully managed to back up MySQL data from an instance store-backed storage to a persistent EBS volume with the help of N2WS Backup & Recovery and “before scripts.”
Conclusion
Instances with ephemeral storage can be scaled horizontally when they are under load balancing and part of auto scaling, but they can’t be scaled vertically for disk storage. You are also unable to change configurations like RAM or CPU once these instances are launched.
This is the reason why ephemeral storage should be used for special use cases once you have a thorough understanding of your business requirements. Even though instance store is a temporary storage and EBS is persistent storage, you should never rely only on EBS storage for backup alone.
Although the chances are slim, it is possible for data to be corrupted or lost on EBS volumes due to an internal issue or disk corruption. We recommend performing consistent backups of EBS volume using snapshot to avoid any data loss.
In this article, we showed how N2WS Backup & Recovery can help you set up an EC2 automated backup of your instance storage MySQL data to EBS storage. N2WS offers options for before, after, and completed scripts that help achieve application-consistent backup. The “before script” is useful to execute a specific function before a backup policy is executed, as this way one can set up to take the backup of MySQL data from ephemeral storage to EBS volume before the creation of the EBS volume snapshot.
N2WS is an enterprise-class backup, recovery, and disaster recovery solution for AWS EC2. It uses existing AWS EBS volume and AWS RDS database snapshot abilities to automatically take snapshots at regular intervals. Additionally, you can set up policies and schedule backups for various targets.
N2WS helps manage snapshots with policies. For example, if you have multiple snapshots, the older ones may be irrelevant. With N2WS, you can configure a policy to delete the snapshots after a certain period. This also helps in cost savings and effective backup management. Try N2WS Backup & Recovery for FREE!