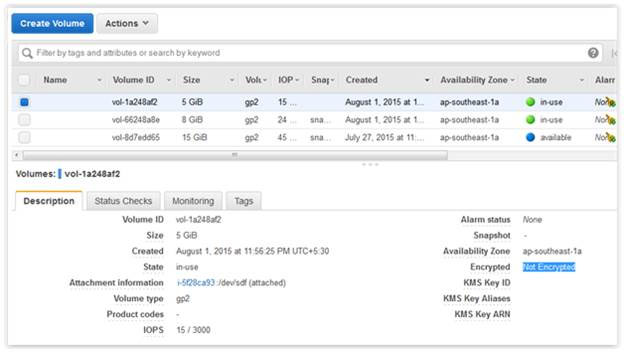
AWS EBS, which provides data persistence ,also offers an easy to use 256 bit key based encryption mechanism for EBS volumes. It builds, manages and secures a key management service for data owners. AWS EBS encryption uses AWS’ own key management service known as AWS KMS. And AWS KMS customer master keys (CMK) are used to create encrypted volumes as well as snapshots of encrypted volumes. When users create encrypted volumes in specific regions, AWS KMS creates a default CMK automatically. Users are allowed to create their own CMKs with KMS and use them during encryption. Data that is stored at rest on the AWS EBS backup volume, along with I/O (in-transit) on disk and snapshots that are created from the volume, are encrypted, too. In this article, we will show you how to migrate data from an unencrypted volume to an encrypted one. Therefore, we will use an Amazon Linux instance and attach an additional 5GB data volume (unencrypted) to the instance.  You can describe your volume details with the AWS CLI: aws ec2 describe-volumes
  This volume is mounted as an additional data volume to a directory called “unencrypt”
  Below are the contents of the data volume.
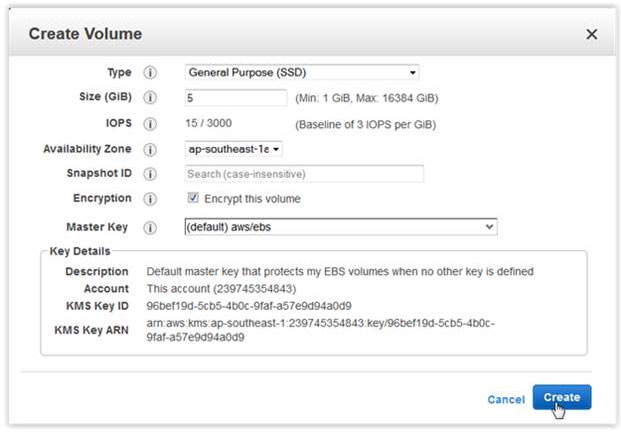
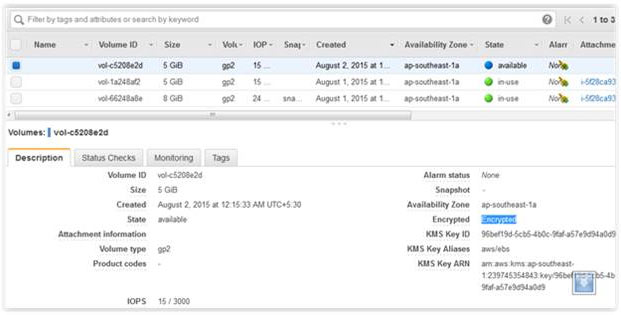
  You can move this data to an encrypted volume by first creating a new encrypted EBS volume using the AWS Management Console. As shown below, you can do this with the KMS CMK:


The new volume will behave like a raw, unformatted block device. We will first copy all the content from old unencrypted volume to new encrypted volume., You can use the dd command as shown below that will copy one disk to another byte by byte. dd if/dev/xdf of=/dev/xvdg bs=64K conv=noerror,sync

- ‘noerror’ parameter instructs dd command to continue operation, ignoring all read errors. If not specified then default behavior for dd is to halt at any error.
- ‘sync’ parameter fills input blocks with zeroes if there were any read errors, so data offsets stay in sync.
- ‘bs’ is to set the block size. It defaults to 512 bytes, which is the “classic” block size for older drives. Its recommended to use bigger value like 64K,128K
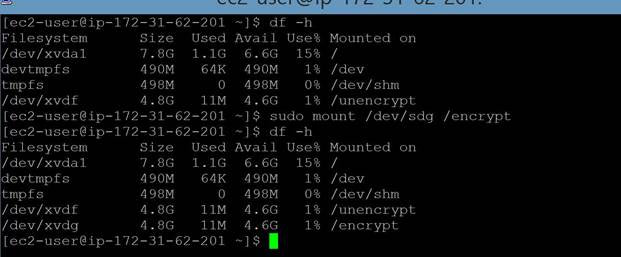
Next, you need to mount the new volume after copying content. 

Read Also