
Now more than ever, organizations need backup solutions that enable easy storage across clouds efficiently and cost-effectively. N2W provides a robust cloud-native backup solution for AWS and Azure environments and allows customers to integrate Wasabi storage providing a seamless, cost-optimized approach to cloud data protection. By leveraging Wasabi’s S3-compatible storage repositories, businesses can now automate their archiving processes, eliminating manual intervention, significantly reduce storage costs and maintain worry-free processes knowing they can restore near-instaneously.
Benefits of Streamlining Cross-Cloud Backup: N2WS and Wasabi Integration
This powerful combination of cross-cloud protection not only isolates backup data from production environments in completely separate clouds but also provides protection against vendor lock-in. With automated rapid recovery capabilities, enhanced cross-cloud protection strategies, and built-in compliance for regulatory requirements, the N2W-Wasabi integration represents a ridiculously easy approach to cloud backup management, prioritizing hands-free management and affordability.
This guide walks you through the process of configuring N2W to store your backups in Wasabi Hot Cloud Storage, offering a cost-effective secondary storage solution for your critical data.
Note: The restoration process varies depending on your specific environment and configuration. If you encounter any issues during recovery, we recommend contacting your backup software’s technical support team for application-specific assistance.
Before You Begin
Ensure you have:
- An active Wasabi Hot Cloud Storage account
- Root user access to the Wasabi Console
- Access to your N2W instance
- A properly configured N2W worker instance (check the Worker Configuration section in your N2W console)
Step 1: Set Up Your Wasabi Storage Bucket
First, you’ll need to create a dedicated storage bucket in Wasabi:
- Sign in to the Wasabi Console as the root user
- Create a new bucket following Wasabi’s standard bucket creation process
- Make note of your new bucket’s name
- Important: Do NOT enable Versioning or Object Lock features, as they are not currently supported by N2W
Step 2: Create an IAM Policy in Wasabi
Next, you’ll create an access policy to secure your bucket:
- Choose a username for your integration (alphanumeric characters and these special characters are allowed: +, =, ., @, -, _)
- Create a new policy in the Wasabi Console using the template below
- Replace the placeholder values in the policy:
ACCOUNT_NUMBER: Your Wasabi account number (found in Settings > Account ID)USER_NAME: The username you’ve chosenBUCKET_NAME: Your bucket name (use lowercase)
jsonCopy{
  "Version": "2012-10-17",
  "Statement": [
    {
      "Effect": "Allow",
      "Action": "s3:ListAllMyBuckets",
      "Resource": "arn:aws:s3:::"
    },
    {
      "Effect": "Allow",
      "Action": "iam:GetUser",
      "Resource": "arn:aws:iam::ACCOUNT_NUMBER:user/USER_NAME"
    },
    {
      "Effect": "Allow",
      "Action": "s3:*",
      "Resource": [
        "arn:aws:s3:::BUCKET_NAME",
        "arn:aws:s3:::BUCKET_NAME/*"
      ]
    }
  ]
}
Step 3: Create a Wasabi User Account
Now, create a user account with API access:
- In the Wasabi Console, follow the process to create a new user and access and secret keys following the instructions in Creating a User Account and Access Keys
- Select “Programmatic (create API keys)” under access type
- Skip group assignment unless needed for your organization
- Assign the IAM policy you created in Step 2
- When prompted, download the Access and Secret keys and store them securely
Step 4: Connect N2W to Your Wasabi Account
With your Wasabi account prepared, configure N2W:
- Log in to your N2W instance
- Navigate to Accounts > New > Wasabi Account
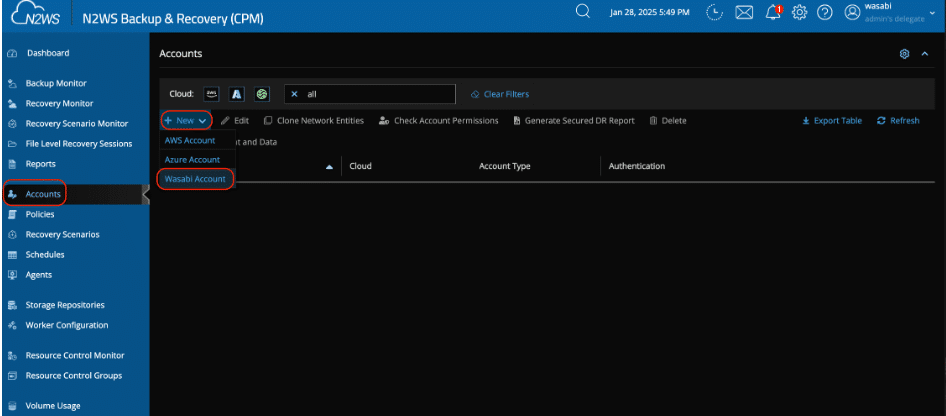
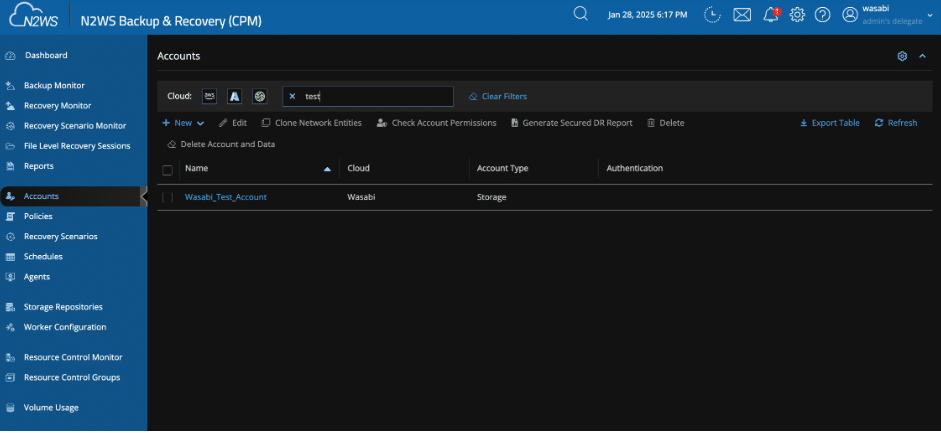
3. Enter a descriptive name for this Wasabi connection, along with the access and secret keys generated for the user above. Click Save.

4. You will now be able to see your Wasabi account.
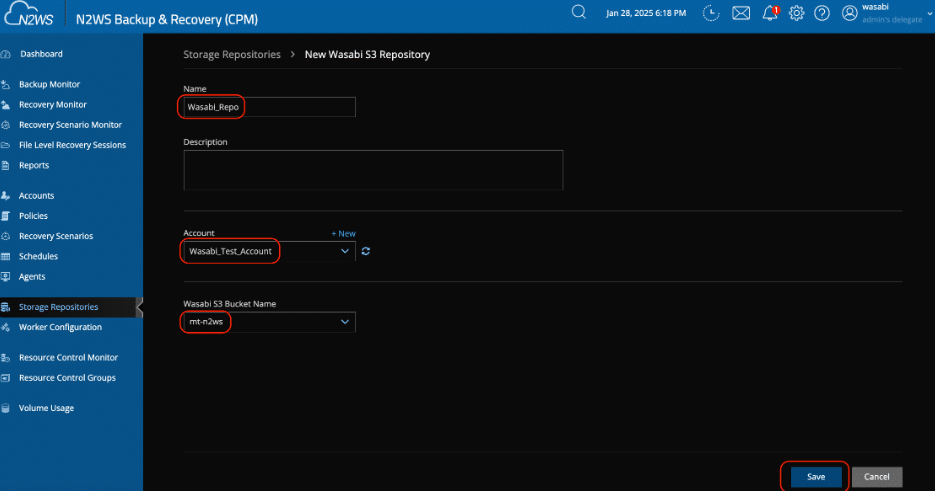
Step 5: Create a Storage Repository in N2W
Set up a storage location for your backups:
- Navigate to Storage Repositories > New > Wasabi S3 Repository
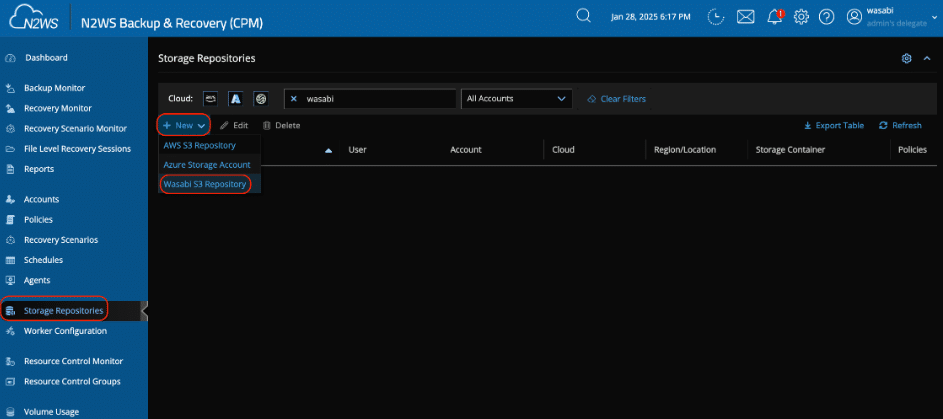
2. Give your repository a meaningful name. Select your Wasabi account and bucket from the dropdown menus. Click Save.
Step 6: Configure Your Backup Policy
Now, set up a backup policy that utilizes your Wasabi storage:
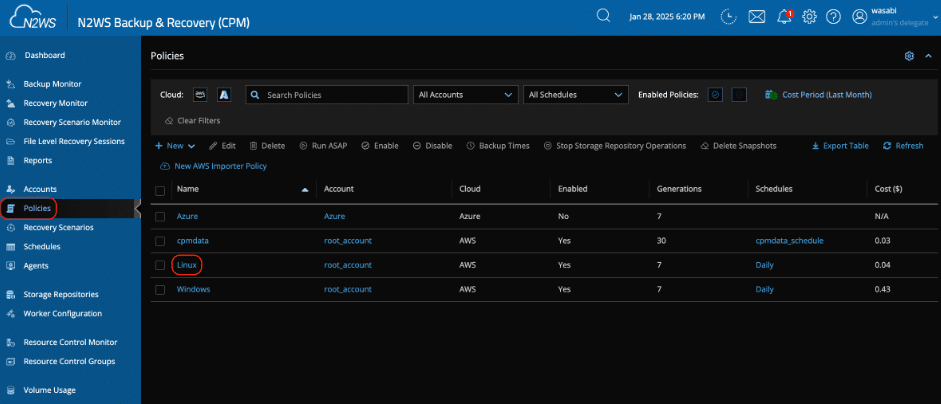
- Navigate to Policies and either:
- Select an existing policy to modify, or
- Create a new policy (below we’ve created a policy named Linux).
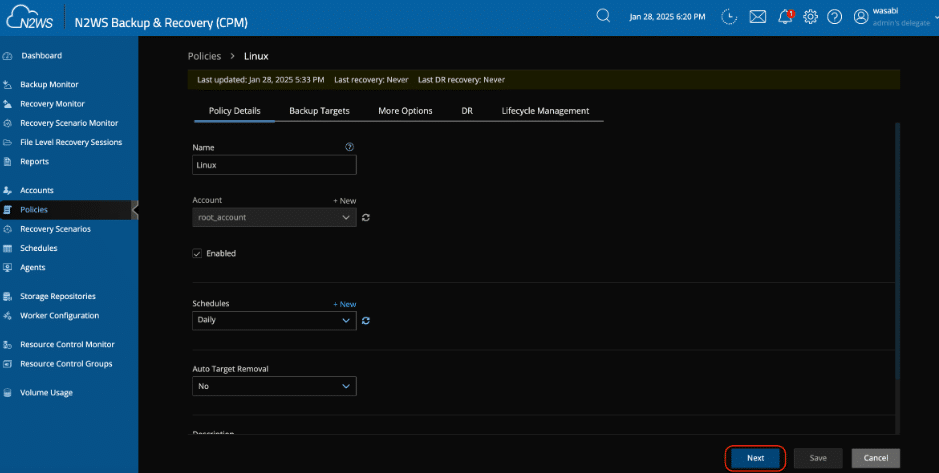
2. Update the Policy Details if needed, then click Next
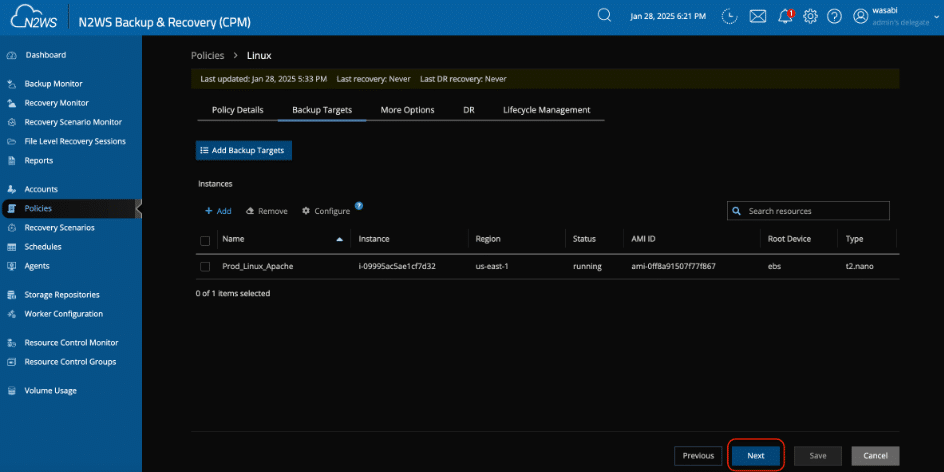
3. On the Backup Targets screen, add or modify your AWS/Azure instances as needed. Click Next.
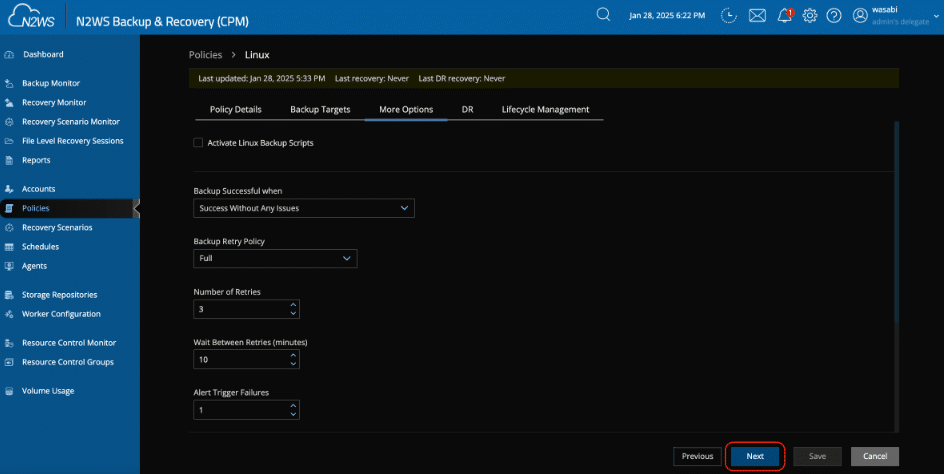
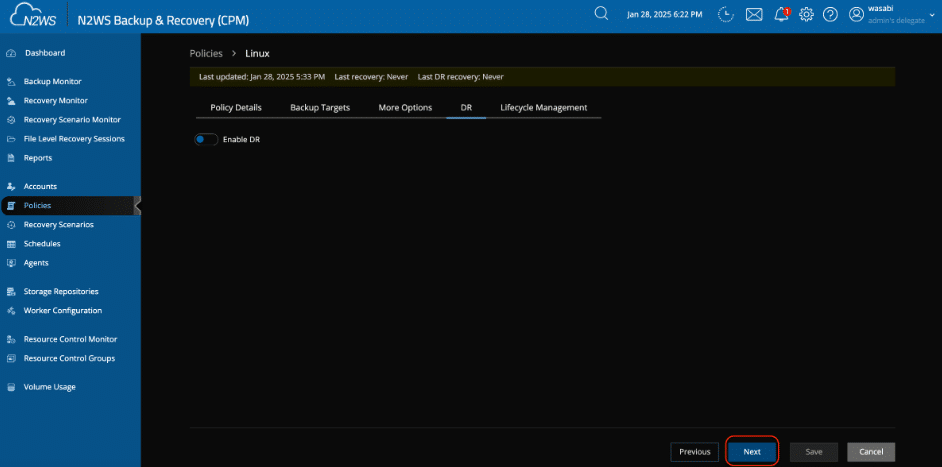
4. Continue through the wizard, adjusting options as desired and click Next.
5. Enable Disaster Recovery (DR)
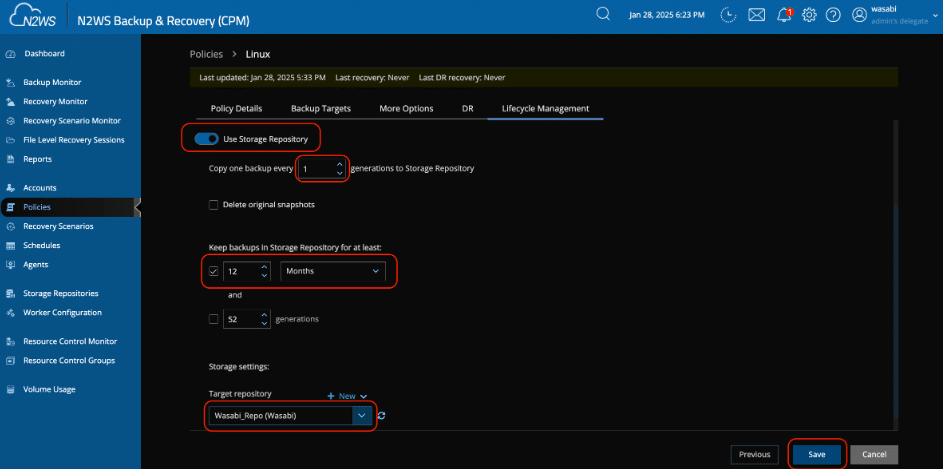
6. When you reach the Lifecycle Management screen:
a) Set your desired retention period for snapshots in AWS/Azure
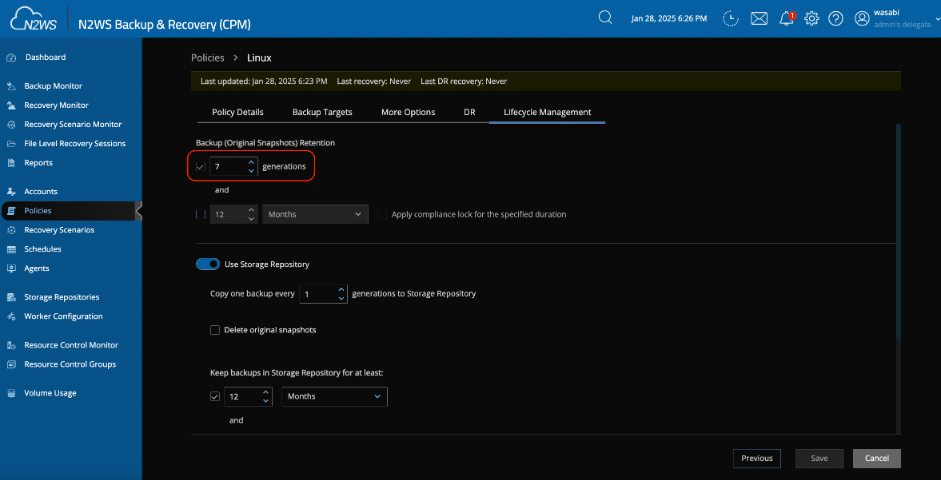
b) Enable “Use Storage Repository”
c) Set “Copy one backup every ‘x’ generations to Storage Repository” to ‘1’ (recommended)
d) Configure “Keep Backups in Storage Repository for at least” to match your retention requirements
e) Select your Wasabi repository as the target and click Save.
Step 7: Perform a Test Backup
Verify your configuration with a test backup:
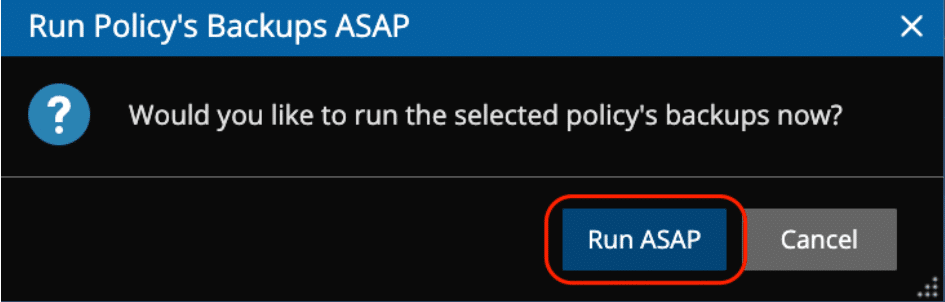
- From the Policies screen, select your newly configured policy and click Run ASAP.
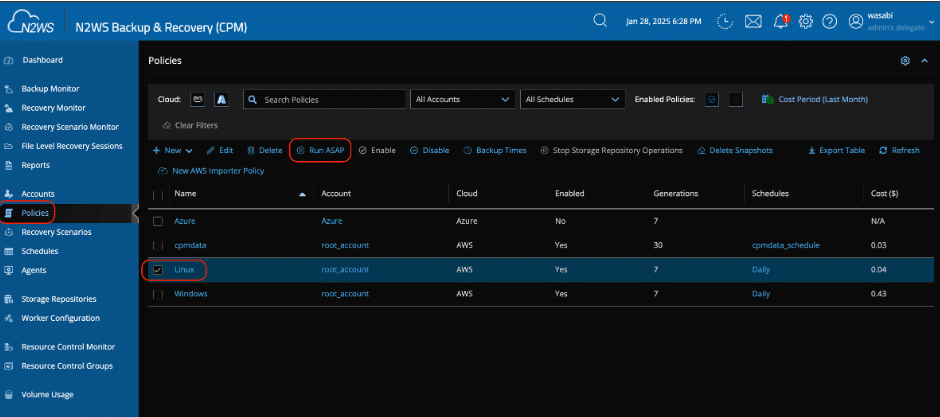
2. Click Run ASAP, then confirm
3. Monitor the backup process in the Backup Monitor tab. The backup process will show “Successful” for the snapshot phase, then “Storing to Storage Repository” during the Wasabi upload.
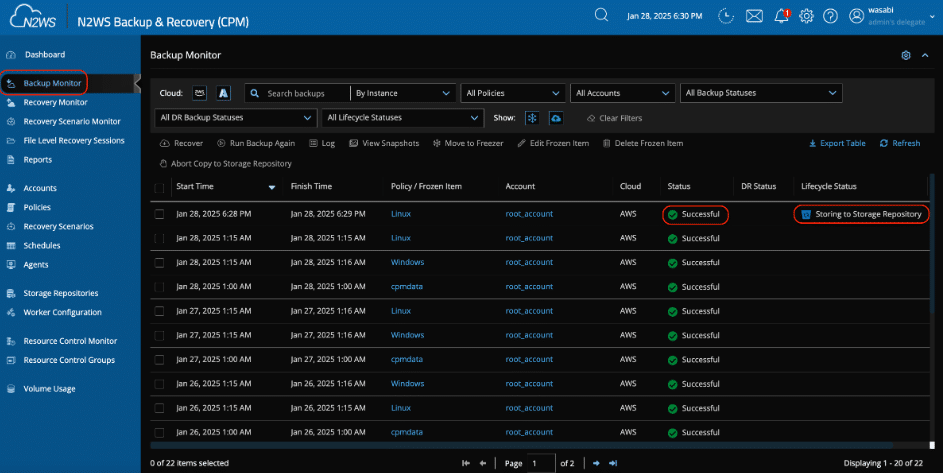
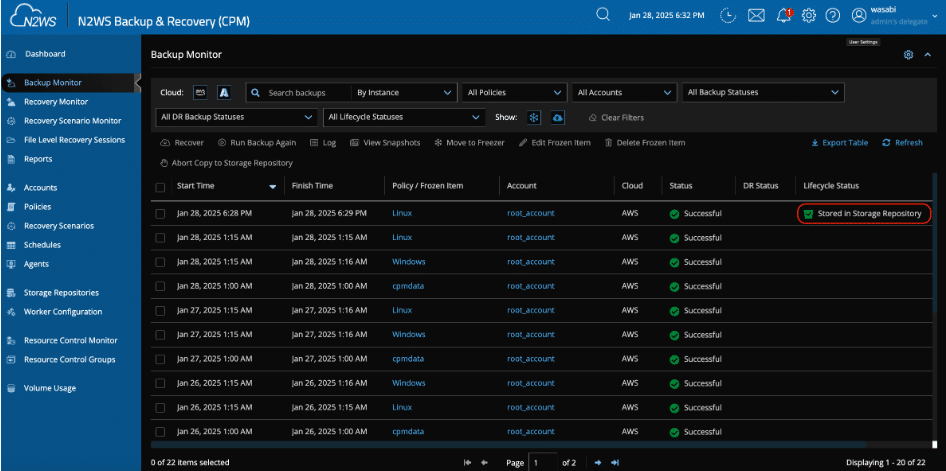
Once complete, you’ll see “Stored to Storage Repository”
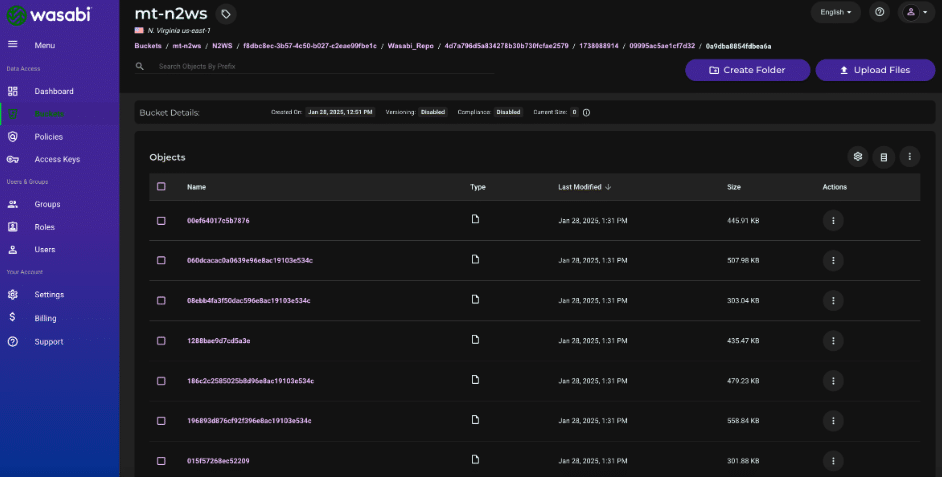
4. Verify the backup files in your Wasabi bucket by logging into the Wasabi console and browsing your bucket contents
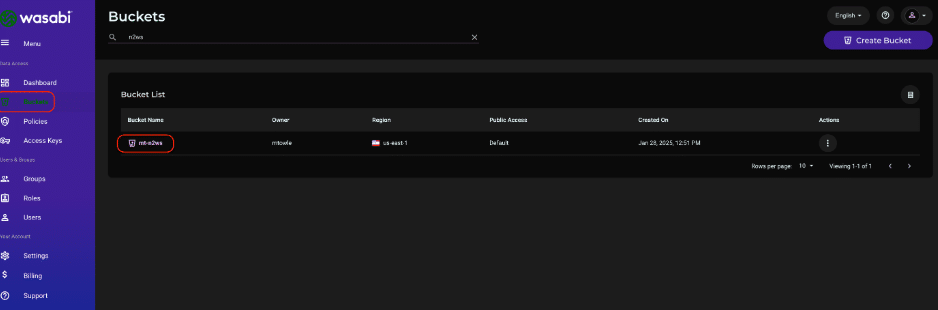
5. Click on folder names until you reach a folder that has multiple objects. This verifies that your N2W backups are stored in your bucket.
Step 8: Perform a Test Restore
To ensure your backups are recoverable:
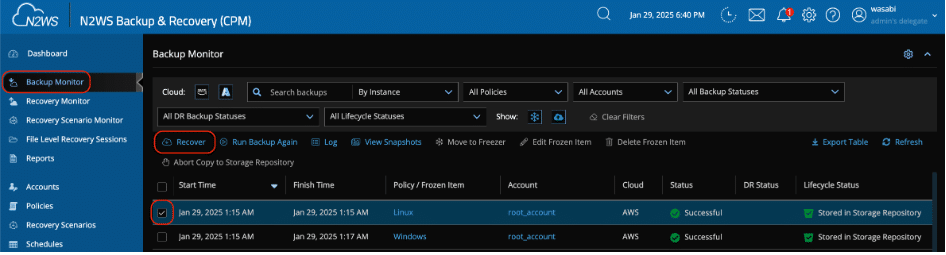
- In your N2W instance, navigate to the Backup Monitor tab. Select the test backup you created earlier and click Recover (Note this process will not overwrite any of your existing instances).
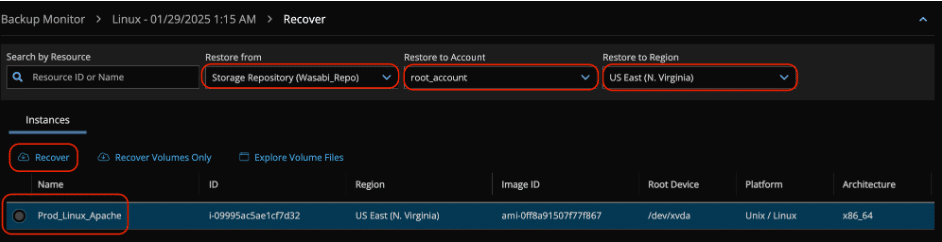
2. Select the instance to recover and configure:
- Set “Restore from” to your Wasabi repository
- Choose the appropriate account under “Restore to Account”
- Select the correct AWS/Azure region under “Restore to Region”
3. Select “Image” for the “Launch from” setting
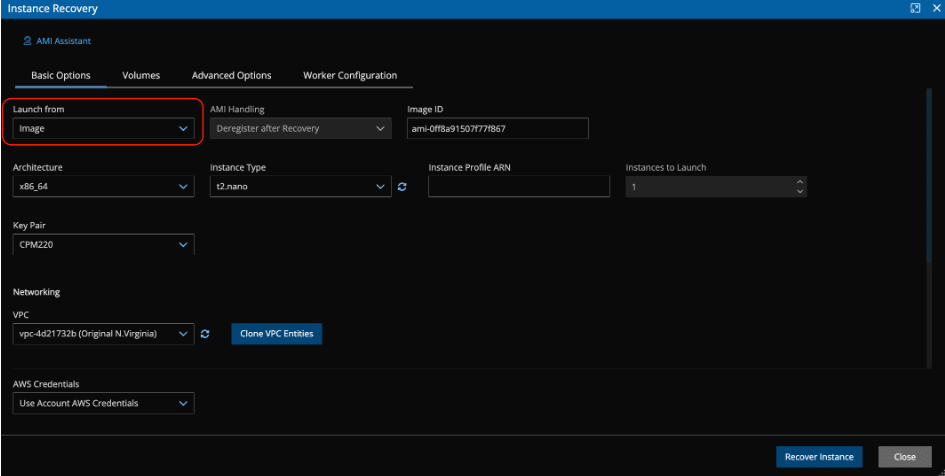
4. Change the Primary Private IP to be an unused IP in the VPC subnet. In this example we are using 172.31.42.254. Ensure that it is unused before proceeding, then click Recover Instance.
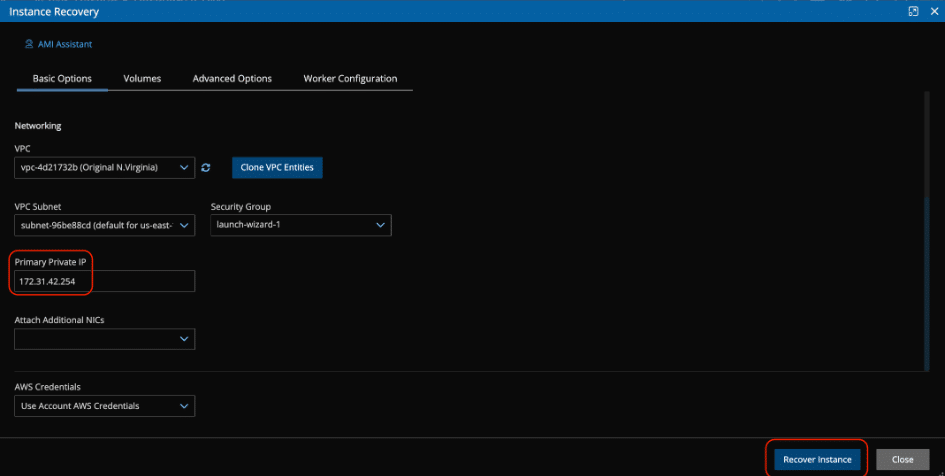
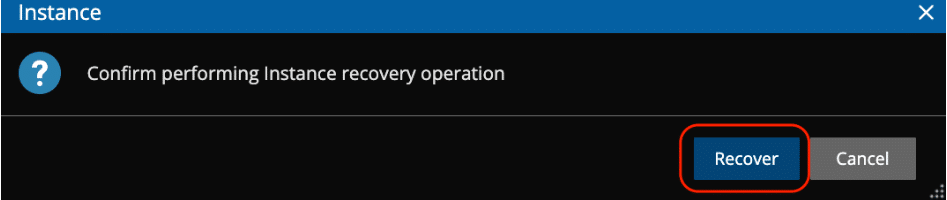
5. Click Recover Instance, then confirm
6. Monitor the recovery process in the Recovery Monitor tab. You will see the restore status as “Initializing recovery.”

7. Refresh the page until you see “Recovery succeeded”

Support Resources
For assistance with this integration:
- Contact N2WS Support: support@n2ws.com
- Contact Wasabi Support: support@wasabi.com