
What Is Azure Disk Backup?
Azure Disk Backup is a cloud-based solution provided by Microsoft Azure for backing up Azure managed disks. It enables organizations to protect their disk data with point-in-time backups, without requiring additional backup infrastructure.
This service is integrated with the Azure platform, providing a way to protect both data disks and operating system disks used by Azure virtual machines (VMs), and supporting custom backup policies for specific recovery needs. The service supports incremental backups, which optimize storage utilization by only saving the changes made since the last backup.
This is part of a series of articles about Azure backup
In this article:
- How Azure Disk Backup Works
- Key Benefits of Azure Disk Backup
- Azure Backup Disk Limitations
- Tutorial: Backup Azure Managed Disks
- Best Practices for Successful Azure Disk Backup
How Azure Disk Backup Works
Azure Disk Backup uses incremental snapshots to create point-in-time backups of Azure managed disks. Backups are stored within the same tenant and remain in the subscription as snapshots, rather than being moved to separate vault storage. Administrators define backup policies that control the frequency and retention of these snapshots.
Policies support hourly backups (at intervals from 1 to 12 hours) or daily backups. Retention is constrained by a maximum of 500 snapshots per disk—450 allocated for scheduled backups and 50 for on-demand backups. Once a disk is associated with a policy, Azure Backup manages the creation of incremental snapshots. The first snapshot captures the entire used space of the disk, and subsequent ones save only the changes (deltas), reducing storage requirements.
The service uses a Backup Vault to organize and manage backup instances. Each instance provides visibility into backup health, supports on-demand backup execution, and allows restoring disks to a specified resource group. Snapshots remain within the subscription, enabling fast restores without data transfer across regions or tiers.
Access control is managed through a system-assigned managed identity for the Backup Vault. This identity requires Azure role-based access control (RBAC) permissions on source disks, snapshot resource groups, and target restore locations to automate backup and restore operations.
Key Benefits of Azure Disk Backup
Azure Disk Backup offers a way to protect Azure-managed disks without requiring additional infrastructure. It’s suitable for environments with security constraints, frequent backups, or applications that don’t support traditional VM backup:
- Agentless and secure: Works without installing agents or scripts, relying instead on Azure-native APIs.
- Crash-consistent backups: Captures disk state without pausing workloads, but does not guarantee application-level consistency.
- Frequent backups: Supports multiple backups per day, suitable for workloads requiring high recovery point granularity.
- Incremental snapshots: Stores only changes since the last backup, reducing storage usage and backup times.
- Selective disk backup: Allows backing up specific disks (e.g., OS or data disks) instead of the entire VM.
- Cluster support: Compatible with shared disks in Windows and Linux cluster configurations.
- No VSS dependency: Does not require Volume Shadow Copy Service, making it usable for applications that don’t support application-consistent backups.
- Container storage support: Works with persistent disks in AKS clusters.
- Lightweight VM support: Can protect single-disk VMs or workloads not supported by Azure VM Backup.
Azure Backup Disk Limitations
While Azure Disk Backup simplifies protection for managed disks, it comes with certain constraints that organizations should understand before adopting it:
- Unsupported configurations: The service does not cover all disk scenarios. Disks in specialized configurations, such as unmanaged disks, encrypted disks without Key Vault integration, or disks attached to custom operating systems without supported agents, may not be eligible for backup. Shared disks or those used with network-attached storage may require additional setup or alternative protection strategies.
- Cost considerations for long-term retention: Retaining a large number of recovery points over time increases storage consumption, which can lead to higher costs. This is particularly important for organizations with compliance requirements for long-term data retention. Using lower-cost storage tiers, such as archive storage, or pruning unnecessary snapshots can help control expenses.
- Potential performance impact: Creating snapshots of active disks may introduce temporary performance overhead. This can affect workloads during backup operations, especially in environments with high I/O activity. Scheduling backups during off-peak hours and optimizing policies can minimize these effects.
- Cross-region restore challenges: Azure Disk Backup stores snapshots within the same region and subscription, making cross-region restores more complex. Transferring data to another region can incur additional costs and latency. Organizations with cross-region disaster recovery needs should consider combining this service with Azure Site Recovery to ensure availability across regions.
Related content: Read our guide to Azure storage costs
Tutorial: Backup Azure Managed Disks
1. Create a Backup Vault
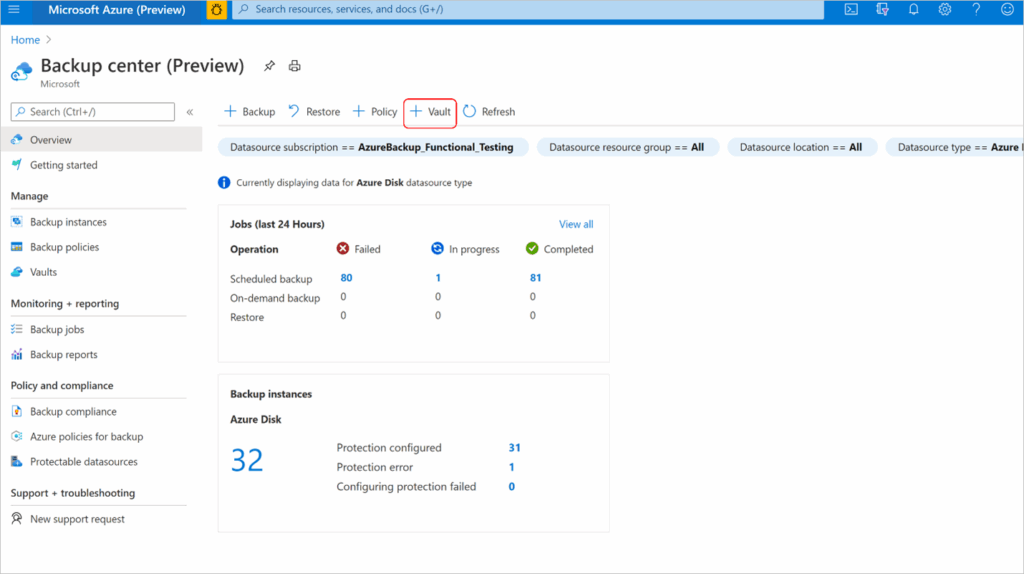
To start, sign in to the Azure portal, and search for Backup center in the search bar. From the Backup center page, select Vault, then choose Backup vault and proceed.
In the Basics tab, fill in the required details including subscription, resource group, name of the backup vault, region, and storage redundancy settings. After reviewing the configuration, select Review + create to finalize and deploy the vault.
Backup vaults organize and manage backup data and operate within the Azure Resource Manager model. While redundancy settings can be specified, Azure Disk Backup currently only supports snapshot-based operational tier backups, not storage tier backups.
2. Create a Backup Policy
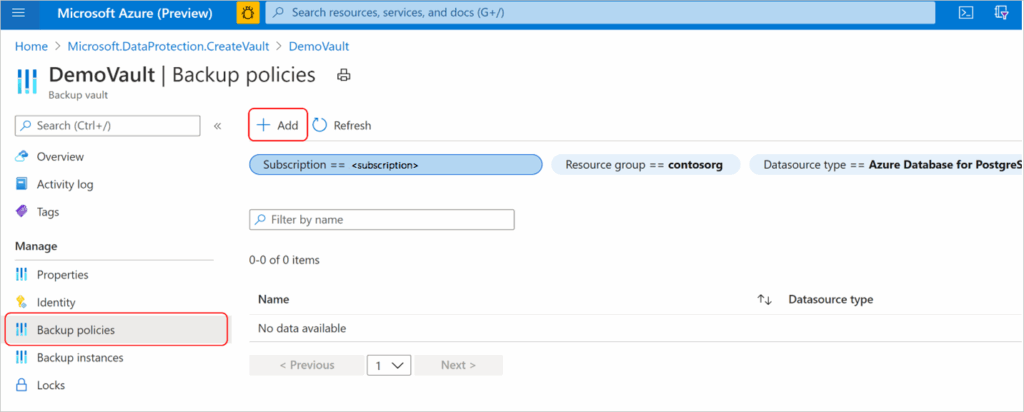
Once the backup vault is ready, go to Backup policies under the vault and select Add. Provide a name for the policy and set the Datasource type to Azure Disk.
In the Backup policy tab, select a backup frequency. Choose Hourly for more frequent snapshots (1, 2, 4, 6, 8, or 12-hour intervals), or Daily to specify a backup time once per day. Then, configure retention settings based on recovery objectives. You can modify the default retention rule or add new ones—each rule defines how long certain recovery points are retained.
Due to the snapshot cap of 500 per disk (450 for scheduled, 50 for on-demand), retention must be managed carefully. For example, a 12-hour frequency allows a maximum retention of around 225 days. Finalize the policy by selecting Review + create.
3. Configure Backup
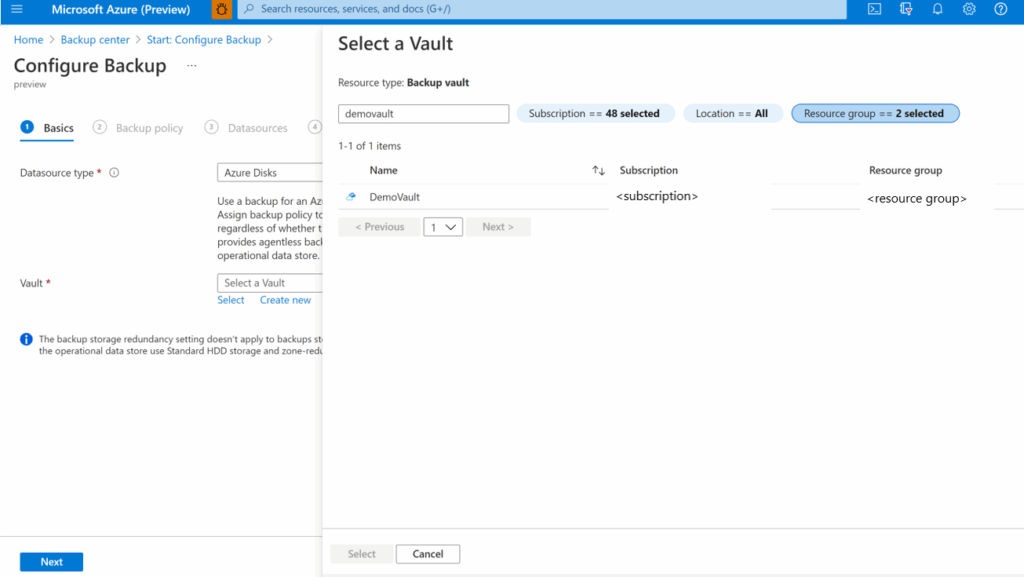
To configure a disk for backup, return to Backup center and select + Backup.
- Choose Azure Disks as the Datasource type, and then select the backup vault you created. Continue to the Backup Policy tab and select your policy.
- On the Datasources tab, use + Add/Edit to pick one or more managed disks. Note that each disk is treated as an individual backup instance. Only disks from the same subscription can be selected via the portal.
- Next, choose a Snapshot Resource Group where snapshots will be stored. It’s recommended to use a separate resource group from the source disk for security and ease of management. This group must be in the same subscription and region as the source disk.
- After selection, click Validate. Validation checks role assignments and disk compatibility. If errors occur, such as missing roles, select Add missing roles and follow the prompts to automatically assign the required permissions:
- Disk Backup Reader role on the source disk
- Disk Snapshot Contributor role on the snapshot resource group
These permissions are granted using the backup vault’s managed identity.
- Once validation succeeds, proceed to the Review and configure tab and finalize by clicking Configure backup.
4. Run an On-Demand Backup
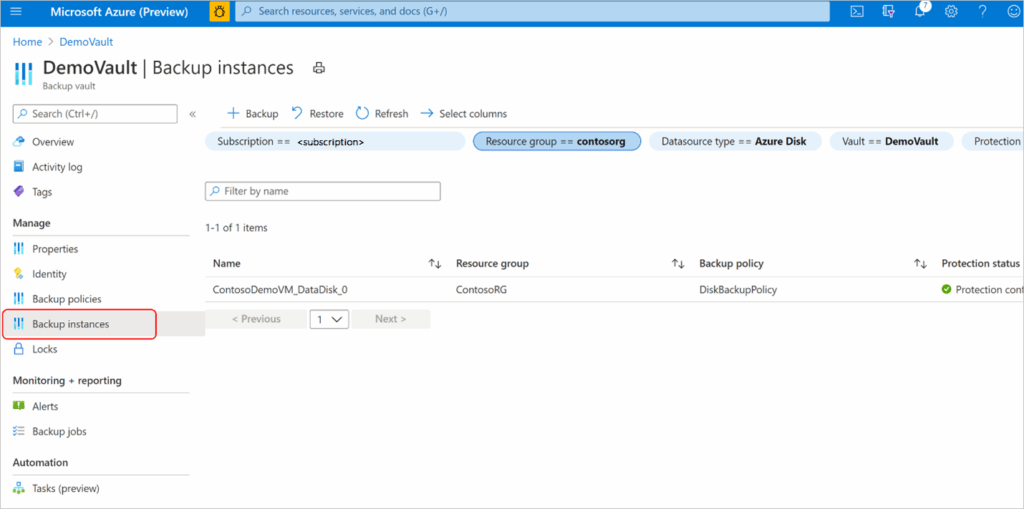
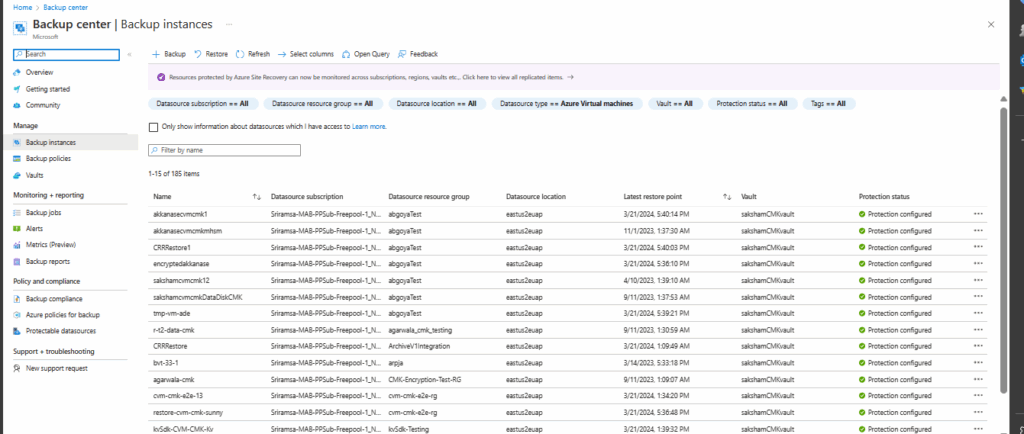
Go to Backup instances in the backup vault and select the instance associated with your disk.
In the backup instance screen, select Backup to initiate a manual backup. You’ll be prompted to select a retention rule defined in your policy. Once selected, click Backup now to start the backup operation. This snapshot will count toward the 50 on-demand snapshot limit.
5. Track a Backup Operation
Each backup action, scheduled or on-demand, is tracked as a job. From the Backup instance page, a dashboard shows recent jobs from the past seven days.
To see detailed job information, select View all. You’ll get a list of backup and restore jobs with their current status. Click on any job to see detailed progress and logs, useful for troubleshooting or verifying successful completion.
Best Practices for Successful Azure Disk Backup
Organizations should consider the following practices when backing up disks on Azure.
1. Snapshot Management
Organizations should routinely review and prune old snapshots, retaining only those required for compliance or business continuity. Azure Backup policies automate much of this, but manual review ensures alignment with current needs and prevents orphaned snapshots that incur unnecessary Azure backup costs.
In addition to regular deletion of outdated snapshots, proper tagging and documentation make recovery operations more efficient. Tags can indicate the purpose or data contents of each snapshot, helping administrators quickly identify the appropriate restore point during an incident. Consistent practices reduce confusion and lower the risk of restoring obsolete or irrelevant data.
2. Minimize Cross-Region Dependencies
Minimizing cross-region dependencies improves backup performance and reduces complexity during restoration. It is best practice to keep both the Backup vault and protected disks in the same Azure region unless regulatory requirements dictate otherwise. Backups conducted within the same region are faster and less susceptible to network latency or regional outages.
Cross-region backup is necessary for Azure disaster recovery, but it should be implemented with explicit strategies and cost considerations in mind. Use Azure’s geo-redundant storage options selectively and pair them with monitoring to ensure cross-region restore processes are tested and reliable. Limit complexity by documenting exceptions to the standard backup architecture.
3. Schedule Backups Outside of Business Hours
Backup operations generate snapshot processes and data transfer activities, which can compete for I/O or bandwidth if performed during periods of high system utilization. Align backup schedules with maintenance windows or off-peak usage periods to optimize system responsiveness and end-user experience.
Careful scheduling also reduces contention for Azure backup resources, streamlining backup completion and minimizing disruptions. When backup operations must occur during business hours, use incremental backups to limit I/O impact. Regularly reassess time windows as business requirements or operating hours change to maintain efficiency.
4. Monitor for Silent Failures
Silent failures, where backup operations appear to complete but do not result in a usable backup, represent a significant risk to data protection strategies. It is crucial to set up monitoring systems that not only track the completion status of backup jobs but also verify backup integrity. Using Azure Monitor, administrators can configure alerts for incomplete, failed, or abnormally fast backup jobs—potential indicators of silent issues.
Establishing routine manual audits or test restores provides an additional safeguard against silent failures. These processes help identify systemic issues with backup policies, permissions, or infrastructure changes before an actual recovery event is needed. Consistent monitoring and periodic validation workflows are essential components of a resilient backup environment.
5. Periodically Test Recovery Plans
Testing recovery plans is a necessary step to ensure that backups can be restored when needed. Schedule regular exercises to restore managed disks from point-in-time backups to new or test virtual machines. Validate that data is intact, applications function as expected, and any post-recovery configurations can be performed successfully.
Document and analyze the results of each recovery test, noting the time taken, any errors encountered, and lessons learned. Use this information to refine backup and restore processes, address procedural gaps, and adjust RPO and recovery time objectives (RTO) as the environment or requirements evolve.
Optimizing Azure Backup with N2W
Azure Disk Backup gives you a solid foundation for same-region, point-in-time snapshots—but if your recovery strategy stops there, you’re leaving a lot on the table. N2W for Azure takes things much further, helping you reduce costs, recover faster, and protect data across clouds.
💸 Save BIG with Built-in Features
- Azure Data Lifecycle Management: Save over 80% on storage and licensing with per-VM pricing and automated retention policies utilizing affordable Azure Blob Storage tiering.
- Incremental, Immediate Archiving: Archive only deltas—not entire disks—to Azure Blob, AWS S3, or Wasabi for long-term, low-cost storage.
🔐 Protect Your Cloud with True Air-Gapping
- Cross-Cloud Backup & Restore: Copy your backups between Azure, AWS, and Wasabi—no vendor lock-in, no single point of failure.
- Immutable & Encrypted: Lock your backups against ransomware and accidental deletion with true immutability and air-gapped DR accounts.
- Unified Console: Monitor, manage, and automate everything from a single dashboard—no toggling required.
⚡ Recover Faster Than The Flash
- Near-Zero RTO: Restore entire VMs, disks, or even individual files in seconds, not hours.
- Pre-Planned Recovery Scenarios: Automate failover/failback for seamless DR.
- Agentless SQL Protection: Backup Azure SQL Servers with application-consistent snapshots—no agents, no extra steps.
TL;DR: Azure’s native backup tools are a good start—but N2W gives you a full-featured backup & DR strategy with better control, deeper automation, and serious cost savings.
🎯 Start your 30-day free trial and experience multi-cloud backup that’s ridiculously easy, fast, and secure.