
A step-by-step guide to backing up your resources using AWS Backup was presented in the previous article in this series. That post described how to create a vault, how to choose or create a backup plan and its rules, and how to assign desired resources.
This article will walk you through how to restore the backup using the web UI and how to both backup and restore your resources using the AWS CLI instead of the AWS web console.
Restoring Your Resources Using the AWS Web UI: A Step-By-Step Guide
Let’s pick up where we left off in the previous article. Open the AWS Backup dashboard. There, you’ll have the option to restore the backups that have been made.
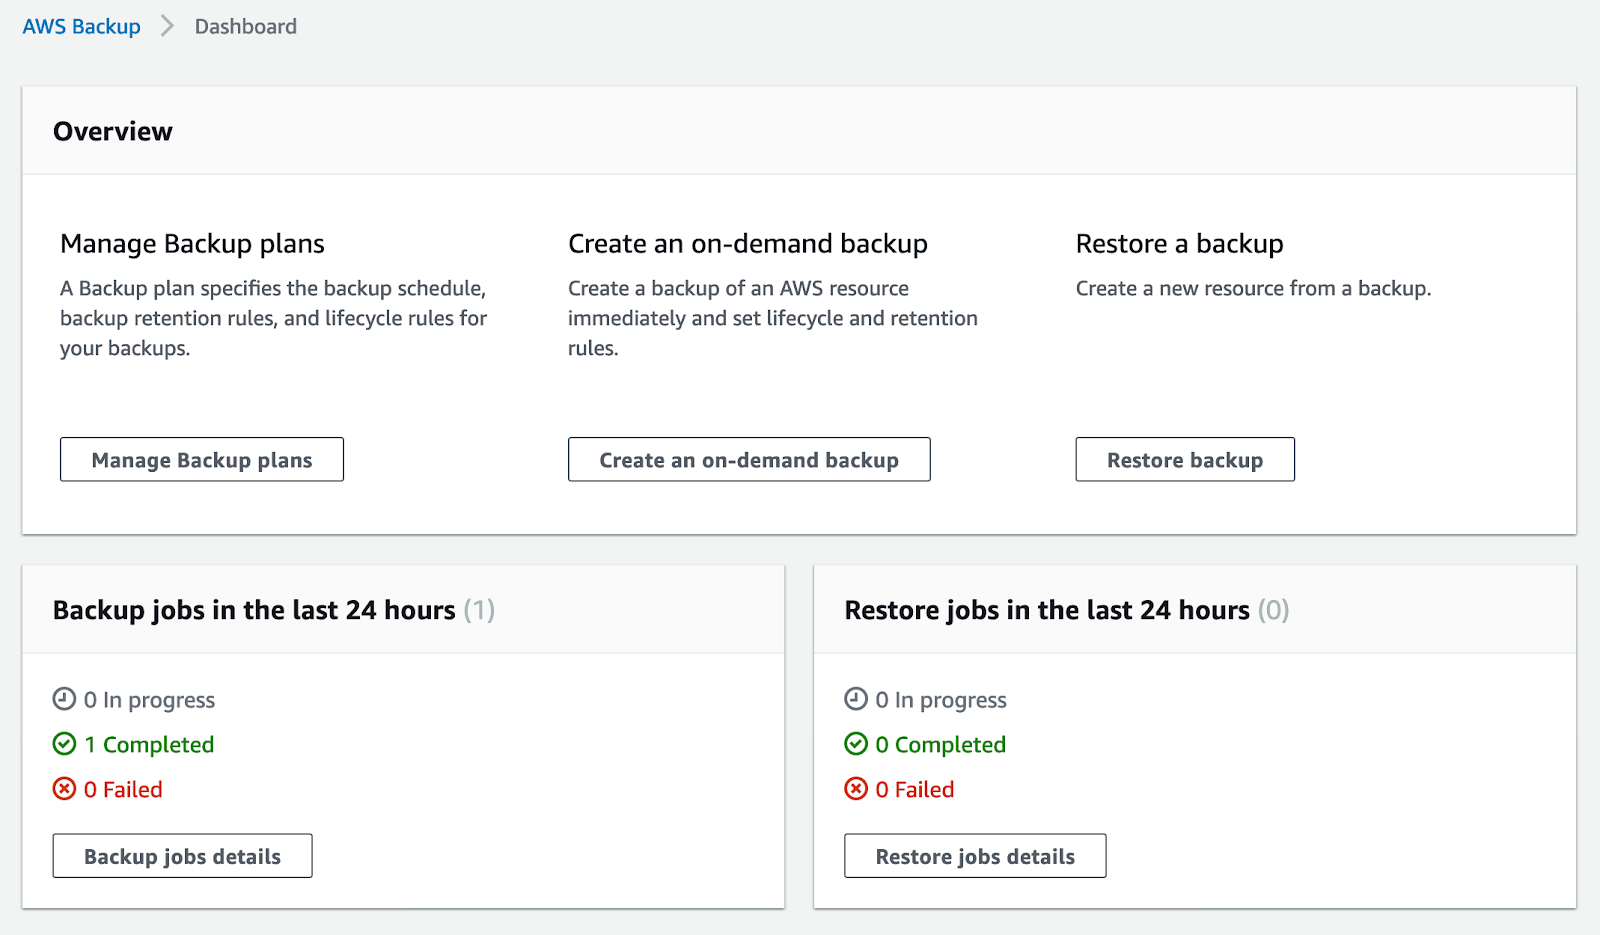
At the moment, we only have one resource configured for backups—our EBS volume.

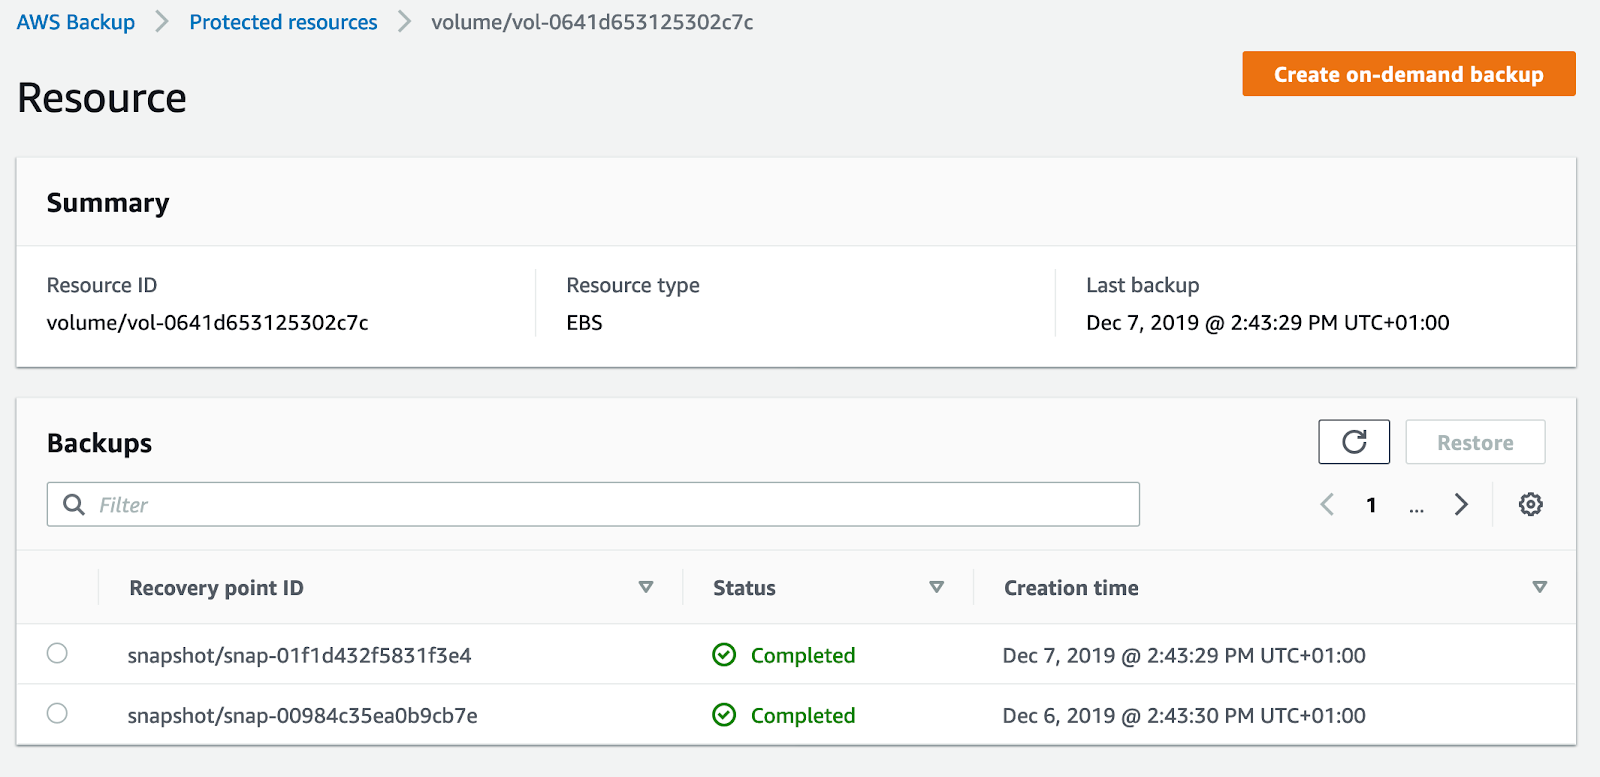
If we open the resource, we can see that two backups have been completed over the past two days. In this example, we’re going to restore the first backup that was made. Choose the older recovery point, and click on “Restore.”
Several options exist here. First, since we backed up an EBS volume, we can either restore it as an EBS volume or as a Storage Gateway volume. The latter option can be very useful in Disaster Recovery (DR) scenarios. Next, you can choose the volume type that it will be restored as. Even if you backed up a General Purpose (gp2) volume, at this point, you have the option to switch it to a Provisioned IOPS (io1) volume or any other type of volume. Because you also pick the desired volume size here, you can increase volume capacity at this step and prevent the need to modify the volume later. You can also choose your Availability Zone (AZ) here, something worth doing if you are using specific AZs in your business environment.
Finally, you can specify an IAM role that AWS Backup will assume. You can use the default here.
When you are done with the configuration, click on “Restore backup.”

The restoration process will now begin. You can watch its progress under the “Jobs” tab. The process of restoring a volume usually takes a couple of minutes.

When restoration is complete, the status shown on the screen will change, and your new resource ID will appear.

You can find the new volume using its ID. As you can see in the screenshot above, the volume is available for use.

Backing Up Your Resources Using the AWS CLI: A Step-By-Step Guide
Whether you can’t access the AWS web UI or you simply want to introduce automation into various processes, knowing how to use the AWS CLI to backup and restore resources is very handy. It’s a bit less intuitive than working with the web UI, but, since the AWS CLI is a powerful tool for DevOps engineers, it’s worth learning how to use it. Additionally, some features, like adding notifications for the vault, are only available through the CLI.
Preparing the AWS CLI for Use
Using the AWS CLI requires some basic preparation. You need to set up permissions, which will vary depending on where you are going to use the tool. If you use it from your local computer, you need to generate AWS keys (an access key ID and a secret access key that you will add to the configuration). If you use an AWS instance to run the AWS CLI, you will need to attach an IAM role with necessary privileges to the instance. For security purposes, roles are always a safer option, as keys can get lost and end up in the wrong hands.
All of the commands that we will be using can be found in the backup section of the AWS CLI documentation.
Creating a Backup Vault
Before we create a backup vault, we need to determine which vaults are available. The command aws backup list-backup-vaults does that.
In the screenshot below, you can see that, at the moment, only the default vault exists.

To create a backup vault, one which we’re going to call “strongbox,” issue the following command: aws backup create-backup-vault –backup-vault-name strongbox.

We can now describe our newly created vault with aws backup describe-backup-vault –backup-vault-name strongbox. Because it is empty right now, there are few details.

Now that the vault is ready, your final step is setting up notifications for the vault. We can add a desired SNS topic to be used each time a specific event occurs. The supported events are:
- BACKUP_JOB_STARTED
- BACKUP_JOB_COMPLETED
- RESTORE_JOB_STARTED
- RESTORE_JOB_COMPLETED
- RECOVERY_POINT_MODIFIED
- BACKUP_PLAN_CREATED
- BACKUP_PLAN_MODIFIED
These events are very useful for tracking AWS Backup processes, especially when you want to ensure that backup jobs have been successfully completed.
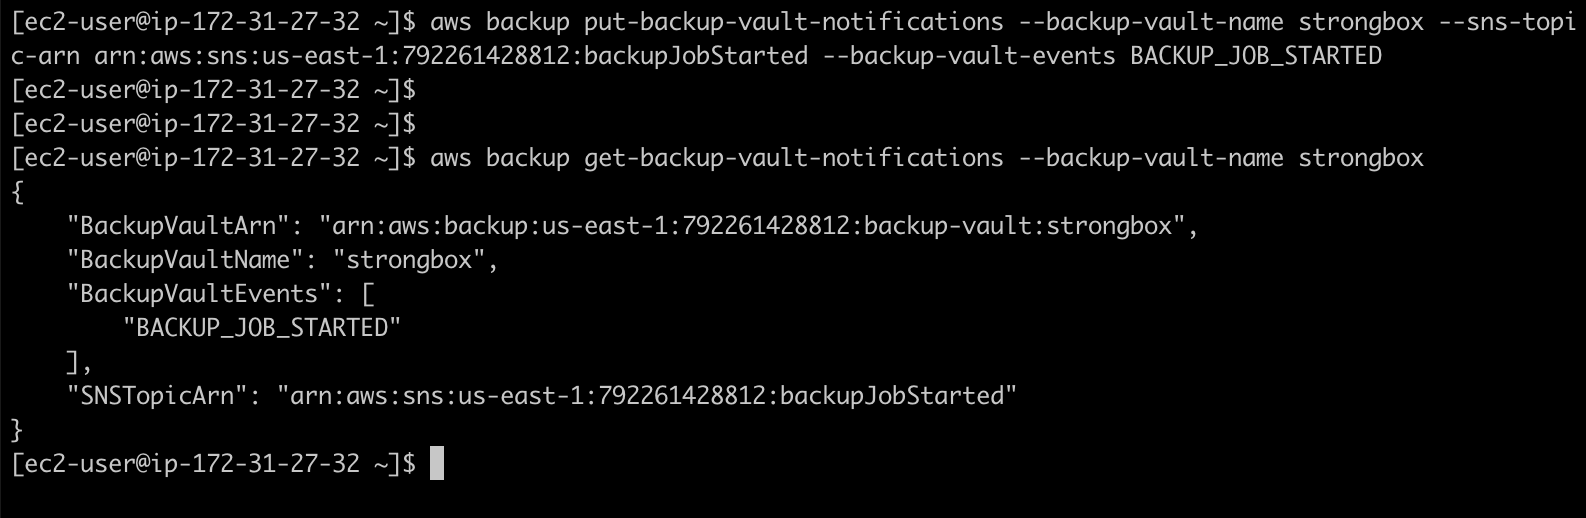
An SNS topic has already been created, so let’s create an event notification that occurs each time a backup job has been started. The command used to do that is aws backup put-backup-vault-notifications –backup-vault-name strongbox –sns-topic-arn yourSNSArn –backup-vault-events BACKUP_JOB_STARTED.
Creating a Backup Plan
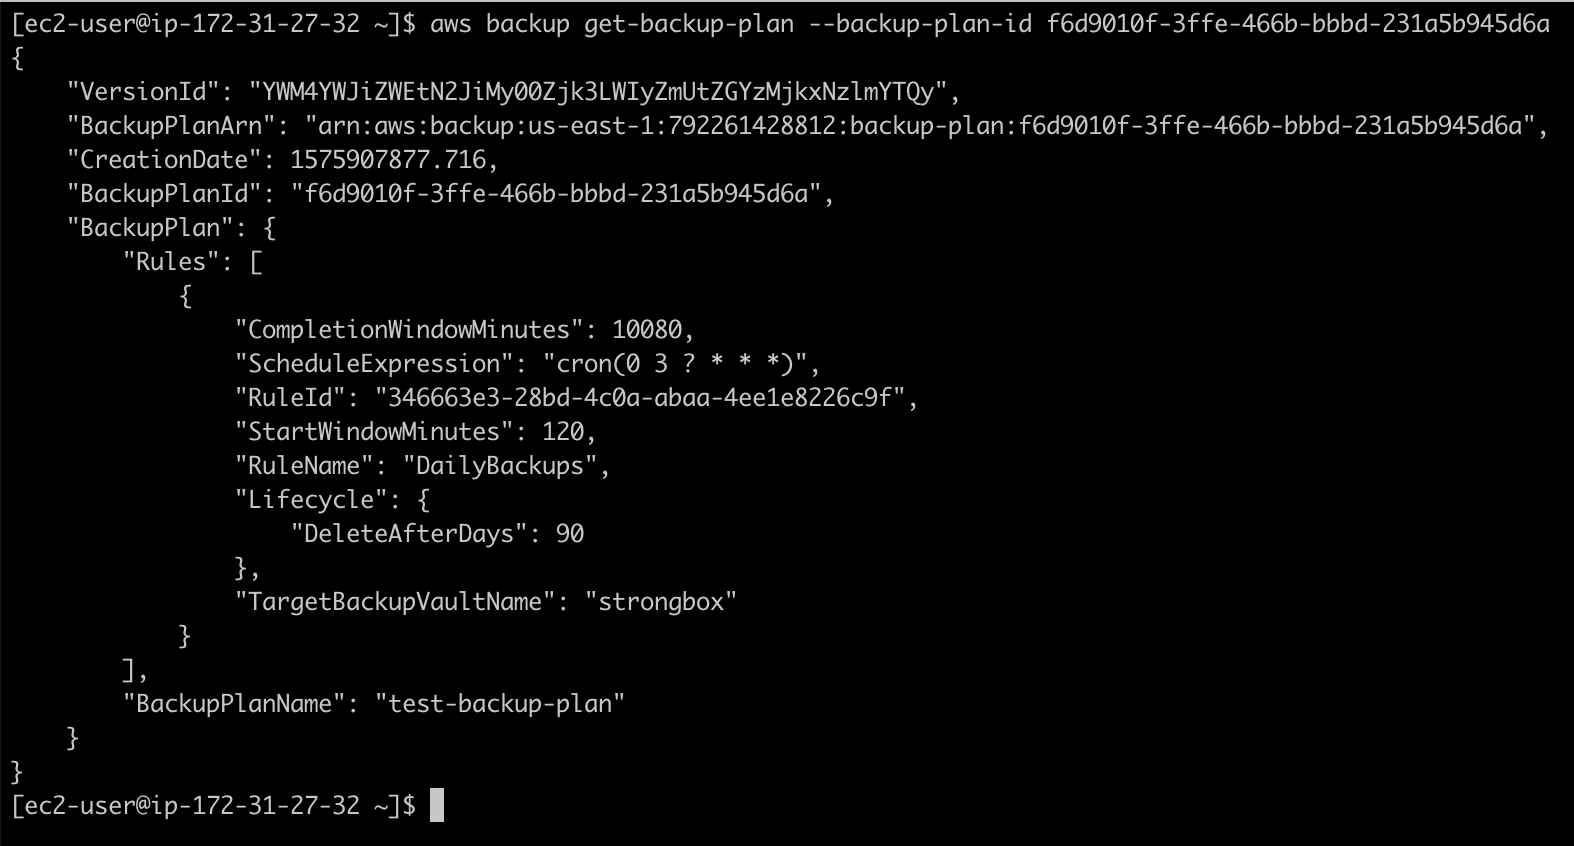
With a new vault and notifications in place, it’s time to create a backup plan. The command below will create a backup plan named “test-backup-plan,” along with a backup rule, “Daily Backups,” which schedules the process to start each day at 3AM with a 2-hour window. The data retention field is already set to delete backups after 90 days.
aws backup create-backup-plan --backup-plan “{\”BackupPlanName\”:\”test-backup-plan\”,\”Rules\”:[{\”RuleName\”:\”DailyBackups\”,\”ScheduleExpression\”,\”cron(0 3 ? * * *)\”,\”StartWindowMinutes\”:120,\”TargetBackupVaultName\”:\”strongbox\”,\”Lifecycle\”:{\”DeleteAfterDays\”:90}}]}”
You should modify these configurations to fit your business needs.

After the backup plan has been created, describe it using its ID with the command aws backup get-backup-plan –backup-plan-id youBackupPlanID. This will show you all the details that have previously been set.
Assigning Resources to Your Backup Plan
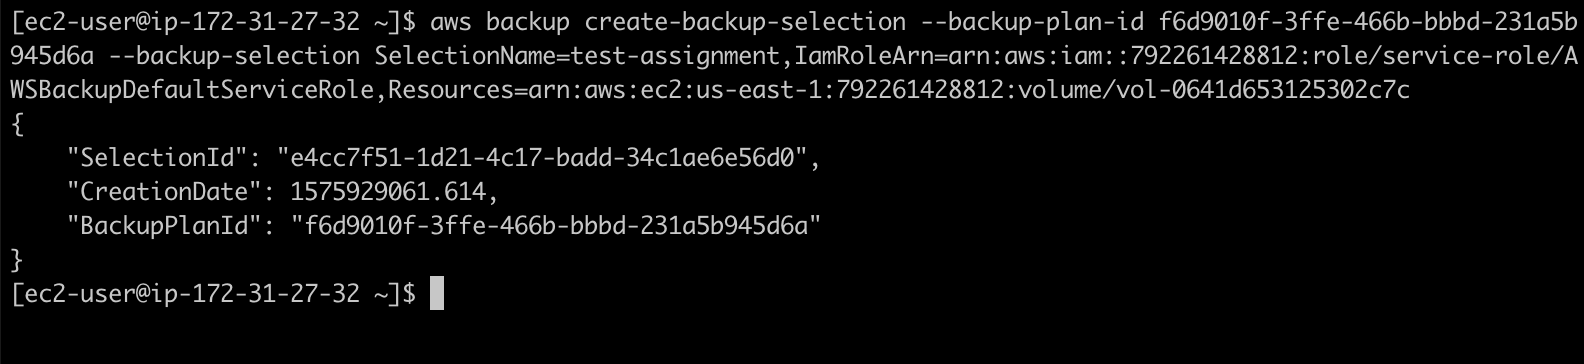
Just as you did when configuring settings with the web UI, you will need to assign resources to the backup plan. The command aws backup create-backup-selection –backup-plan-id yourBackupPlanID –backup-selection SelectionName=test-assignment,IAMRoleArn=yourRoleARN,Resources=yourResourceARN will add this volume, as well as the default backup role, to the existing backup plan. Note that the default role name is “AWSBackupDefaultServiceRole.” In your case, the account number will be different. Of course, you can create your own role instead of using the default one.
Now, all you need to do is wait for the backup window to appear and then monitor the progress of the backup. If you added the same SNS event notification that we did, you will get an email (or have a message sent to the SQS queue, creating a more complex pipeline) as soon as the backup has started.
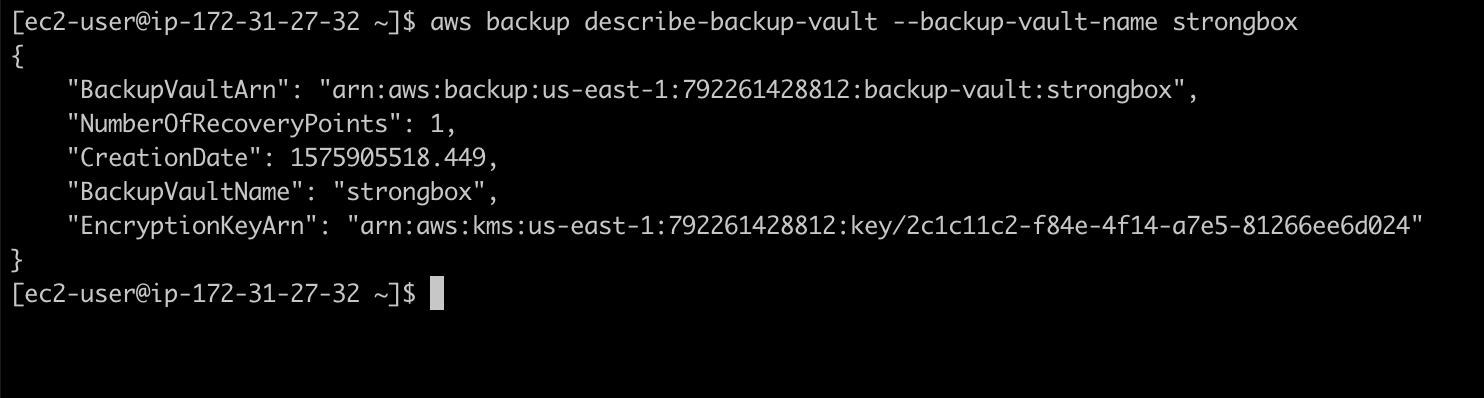
When the backup is complete, you can use the command aws backup describe-backup-vault –backup-vault-name strongbox to see that the newly created vault has a recovery point.
At this point, you can list all backup jobs if you have multiple use parsing by resource-arn. You’ll want to look for a Recovery Point ARN, which you will need to use to restore the data later on.
The command that enables you to do this is aws backup list-backup-jobs –by-resources-arn yourResourceARN –by-backup-vault-name strongbox.

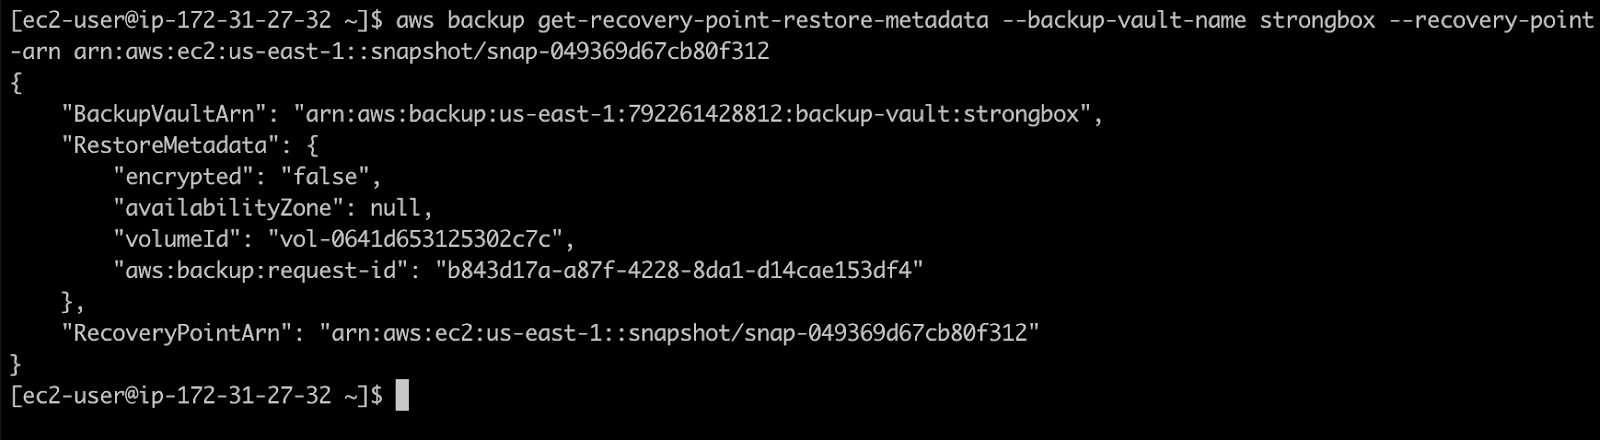
You can also get the restore point metadata, which might contain some important information. You can find out whether or not encryption has been used, which Availability Zone the data was stored in (in our example, none is set; but, since us-east-1c is where our EC2 instance that uses the volume resides, this is the AZ that will hold the restoration), and volume ID. To get the metadata, use the command aws backup get-recovery-point-restore-metadata –backup-vault-name strongbox –recovery-point-arn yourRecoveryPointARN.
Restoring Your Resources Using the AWS CLI: A Step-By-Step Guide
With the AWS CLI, you initiate a restore job by using the command aws backup start-restore-job –recovery-point-arn yourRecoveryPointARN –metadata encrypted=false,availabilityZone=us-east-1c,volumeId=yourVolumeID –iam-role-arn yourIAMRoleARN.

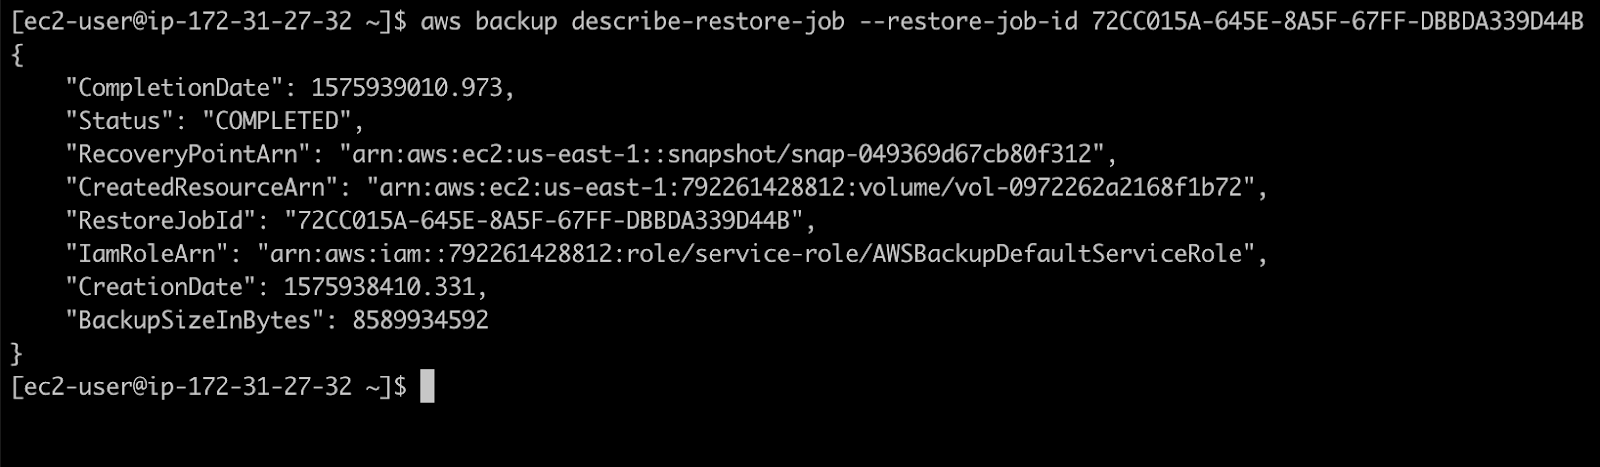
The command aws backup describe-restore-job –restore-job-id yourRestoreJobID will allow you to look at the details of the job being run, including its status (in this case, currently still running).

After the restore is done, the status will change to “completed,” and you will also notice a newly created resource with its resource ARN. In our case, that resource is a restored EBS volume that is now ready to be used.
Summary
The two parts of this article provided detailed how-to guides for backing up and restoring resources with AWS Backup—first, using the AWS web UI, and then using the AWS CLI. While the web UI method is more commonly employed (and is somewhat easier to use), the AWS CLI has its benefits and will often be useful to those skilled at operating within AWS.
While we only used the example of backing up and restoring an EBS volume in this blog post, know that the process is almost the same for restoring a Storage Gateway volume, an RDS database, an EFS volume or a DynamoDB table.
