
Our AWS Backup blog series continues. Our previous articles talked about what to consider for an AWS backup tool and provided a complete overview of AWS Backup. This post will serve as a detailed how-to guide for backing up and restoring your data using AWS Backup and going through all of the steps involved in running backups using the AWS web console. In a future post, we’ll go over how to complete these same processes using the AWS Command Line Interface (CLI).
A Step-By-Step Guide to Backing Up Your Resources Using Web UI
Creating a Backup Vault
Before backing up your resources, you have to prepare a storage repository.
Since all of your backups will be stored in a vault, you must decide whether you want to use the default one or a new one dedicated specifically to backup jobs—perhaps because you want to create a logical separation of resources.
To do this, start by opening AWS Backup using the web UI and going to “Backup vaults.”
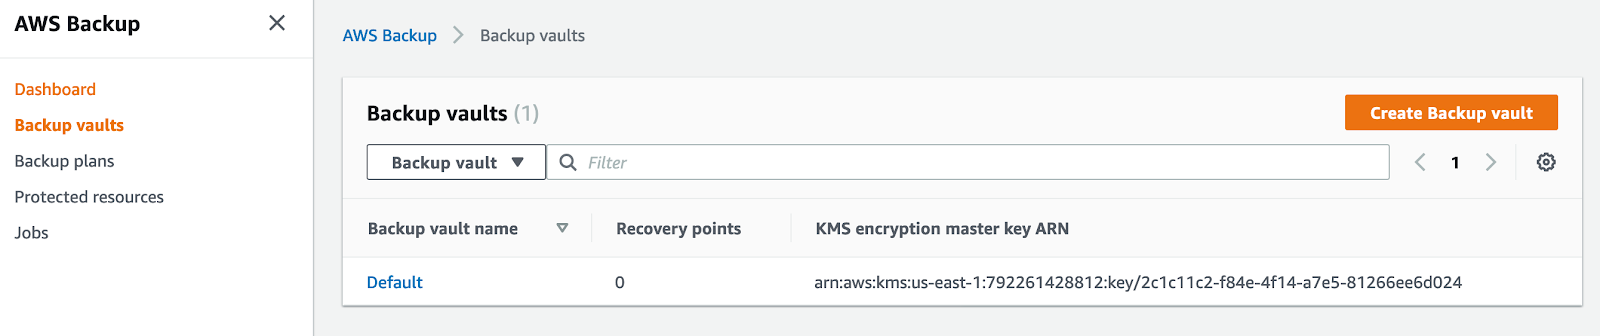
If you decide to use the default vault, you can skip this step. We’re going to create a new vault that we’ll be using later by simply clicking on “Create Backup vault.”
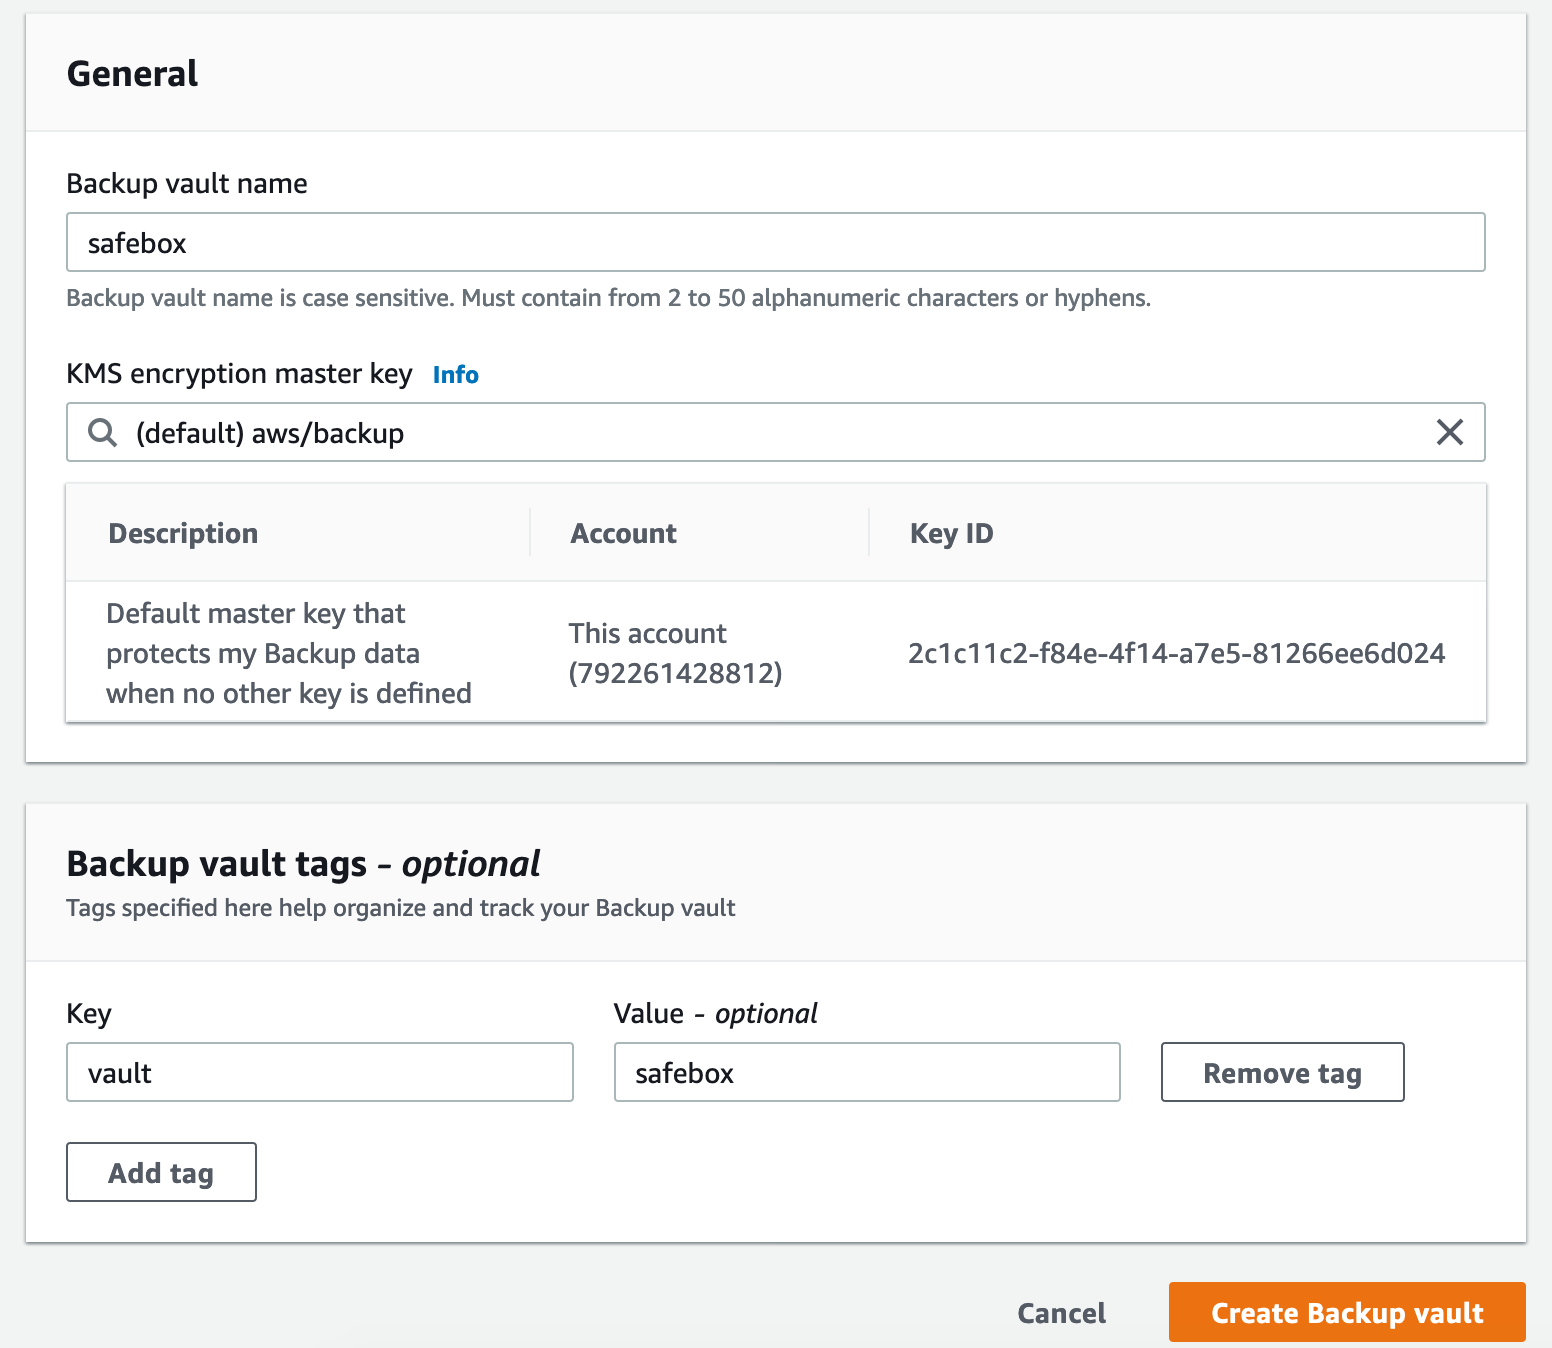
After providing the desired backup vault name, you’ll need to choose the Key Management Service (KMS) encryption master key (which is necessary for safeguarding your other encryption keys) and, if you want to, add some backup vault tags. Adding tags is a good idea if you have multiple vaults in use.
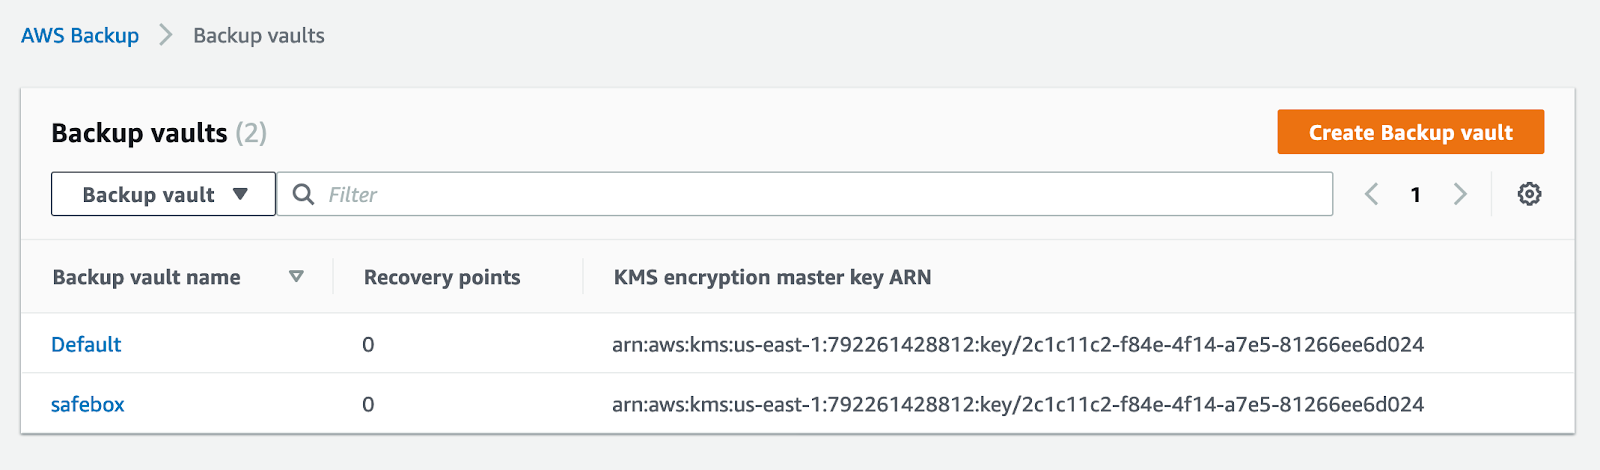
Once you have completed these steps, click on “Create Backup vault.” Now, if you go back to the backup vaults page, you will see that the new vault is ready to be used.
If you open the vault, you will see some basic information inside, such as the vault creation date, the encryption key being used, and the backups that have been performed (since we haven’t done any yet, these are not showing up in the screenshot above).
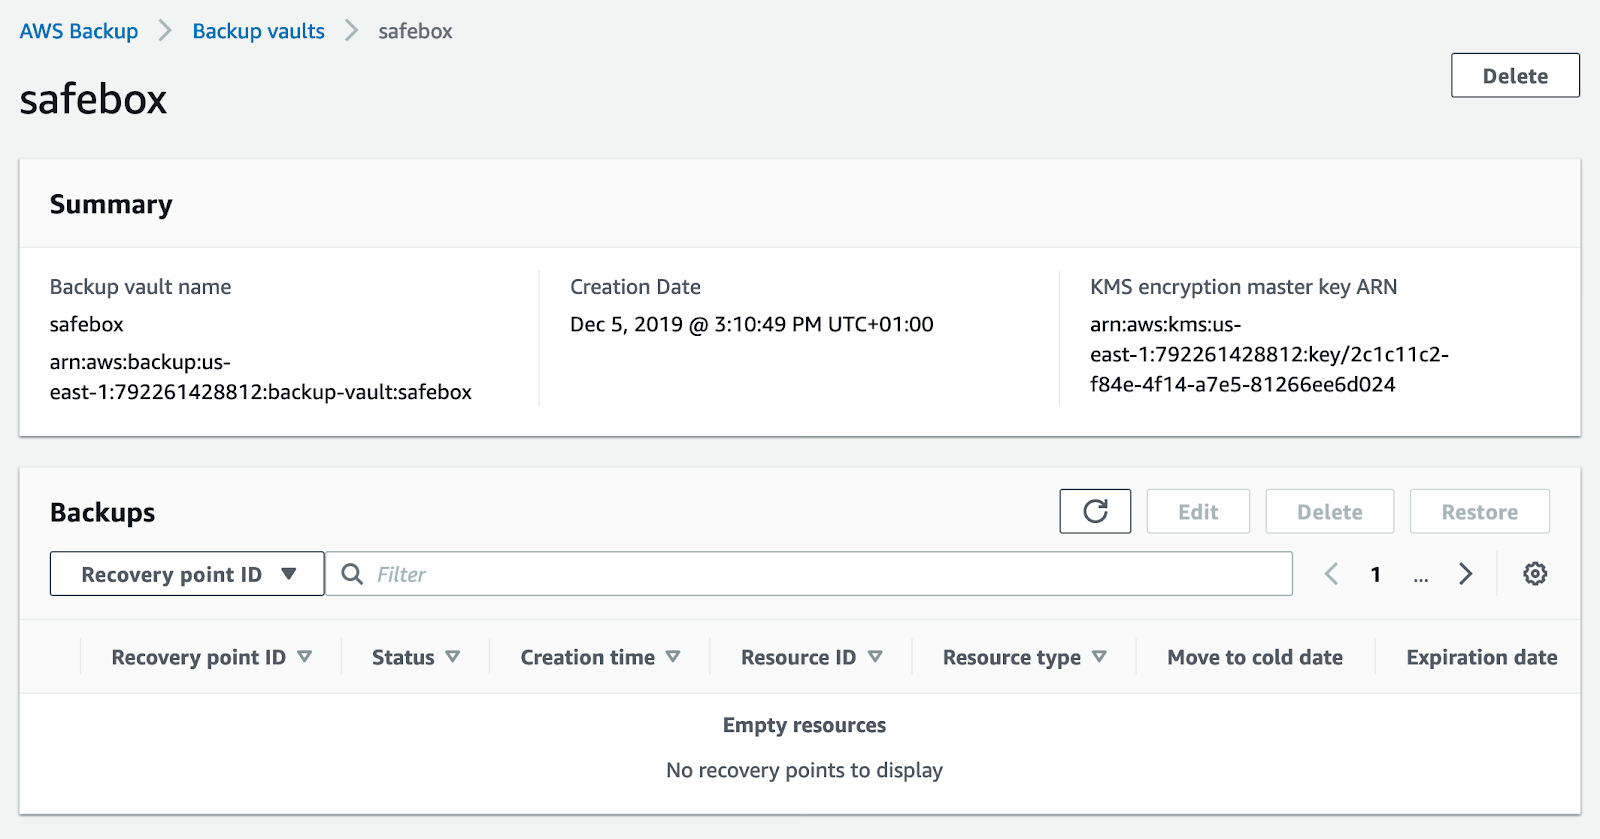
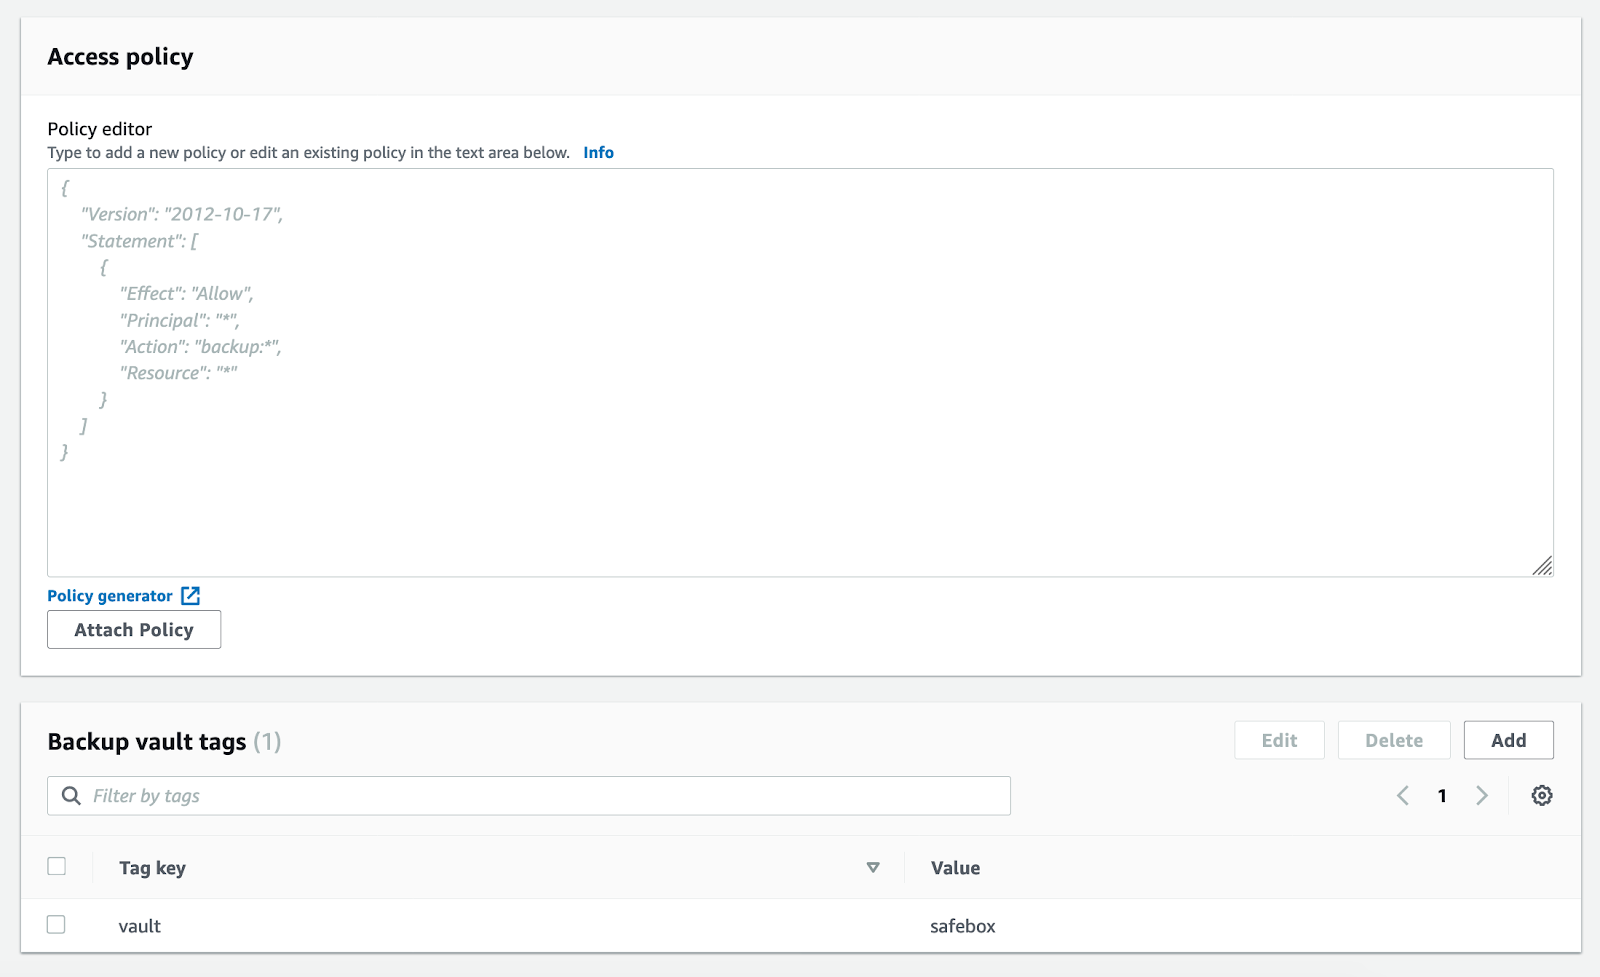
You will also see both the tags (which can be added or removed here) and the access policy on this screen. The access policy allows you to specify who has access to the backups in the vault and what actions they can perform on them. When you first launch AWS Backup, this policy will be blank.
Creating a Backup Plan
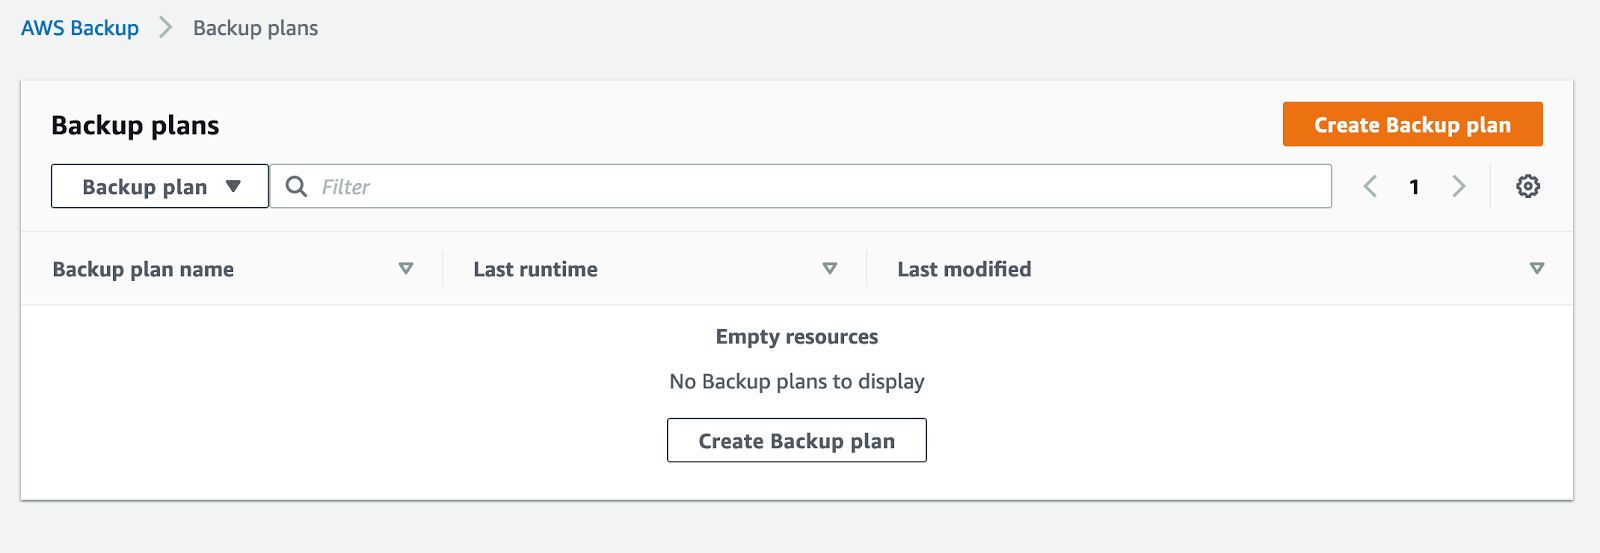
Now that the vault is ready, you can create a backup plan. Open the “Backup plan” tab and click on “Create Backup plan.”
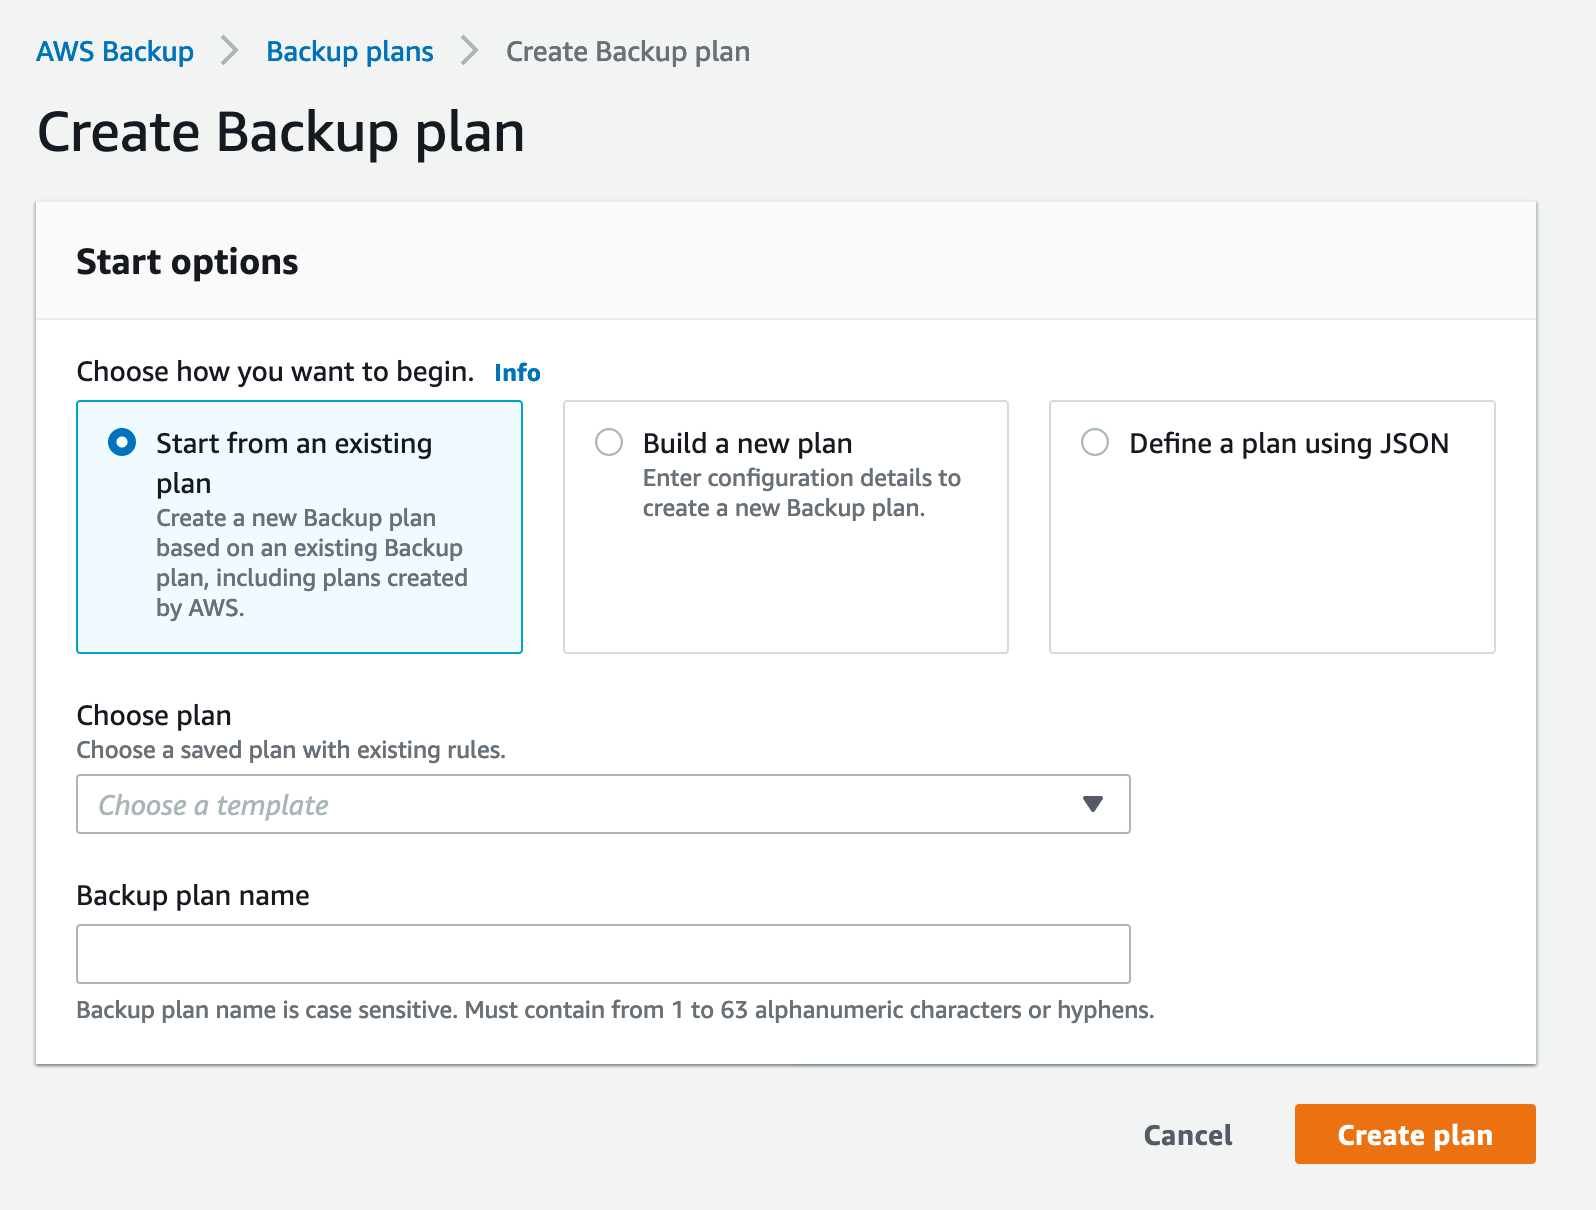
There are three different backup plan options to choose from, as you can see in the screenshot below.
Backup plans use time-based backups. You will need to specify a backup window—the time at which all of your backups jobs will occur. You can use the default time, which is set at 5AM UTC.
Historically, companies have relied heavily on generational backups such as grandfather-father-son (GFS) backup rotation schemes. GFS backups work by keeping multiple backup cycles (typically, there are three), such as daily, weekly, and monthly cycles. Each of these backup cycles is rotated separately, and, some of them, such as the yearly or monthly ones, are backed up offsite as well in order to comply with AWS Disaster Recovery (DR) requirements.
Even though AWS Backup works by creating time-based backups, you can use it to create generational backups if your business needs require them. How to do this will be explained later in this article.
Backup Plan Option 1: “Build a New Plan”
Let’s look at each of the three backup plan options in detail. We’ll start with building a new plan from scratch, since it requires the most work. This option allows you to specify all of the backup configuration details, either by using the recommended defaults or by choosing the specific ones that will best suit your business needs.
Start by naming your backup plan. The name should be something that relates to the resource (or group of resources) being backed up. For instance, if you are making a backup plan for all your RDS instances, you can name it “database backups.”
Next, configure a backup rule. Each AWS backup plan can have one or more rules, each with its own configuration.

Backup rules run on set schedules. We opted for a daily schedule here, but you can also choose weekly, monthly, every 12 hours, or a schedule defined by a custom cron expression. You’ll also need to set up a backup window. Let’s say you don’t want to use the default time. You’d prefer a backup window that starts at 8AM UTC and is open for 2 hours (the minimum is 1 hour, but you can set it as high as 12 hours if needed).
Start by defining the life cycle, a process which consists of two parts. The first is a transition to cold storage (AWS Glacier). Moving backups allow you to save money, so we’re going to choose to move all of the backups to storage after 4 weeks. The second part of defining the life cycle involves data expiration, a business decision that depends on the information you are storing and the kinds of cost savings you are looking to achieve. In our case, we’re choosing to keep the backups for 5 months. After that, they can be removed. Some businesses have to keep backups much longer to stay in compliance with regulations; in fact, they may even skip the data expiration step completely, choosing to retain all backups indefinitely.

After you have defined the life cycle, pick a desired backup vault. We chose the one we created earlier.
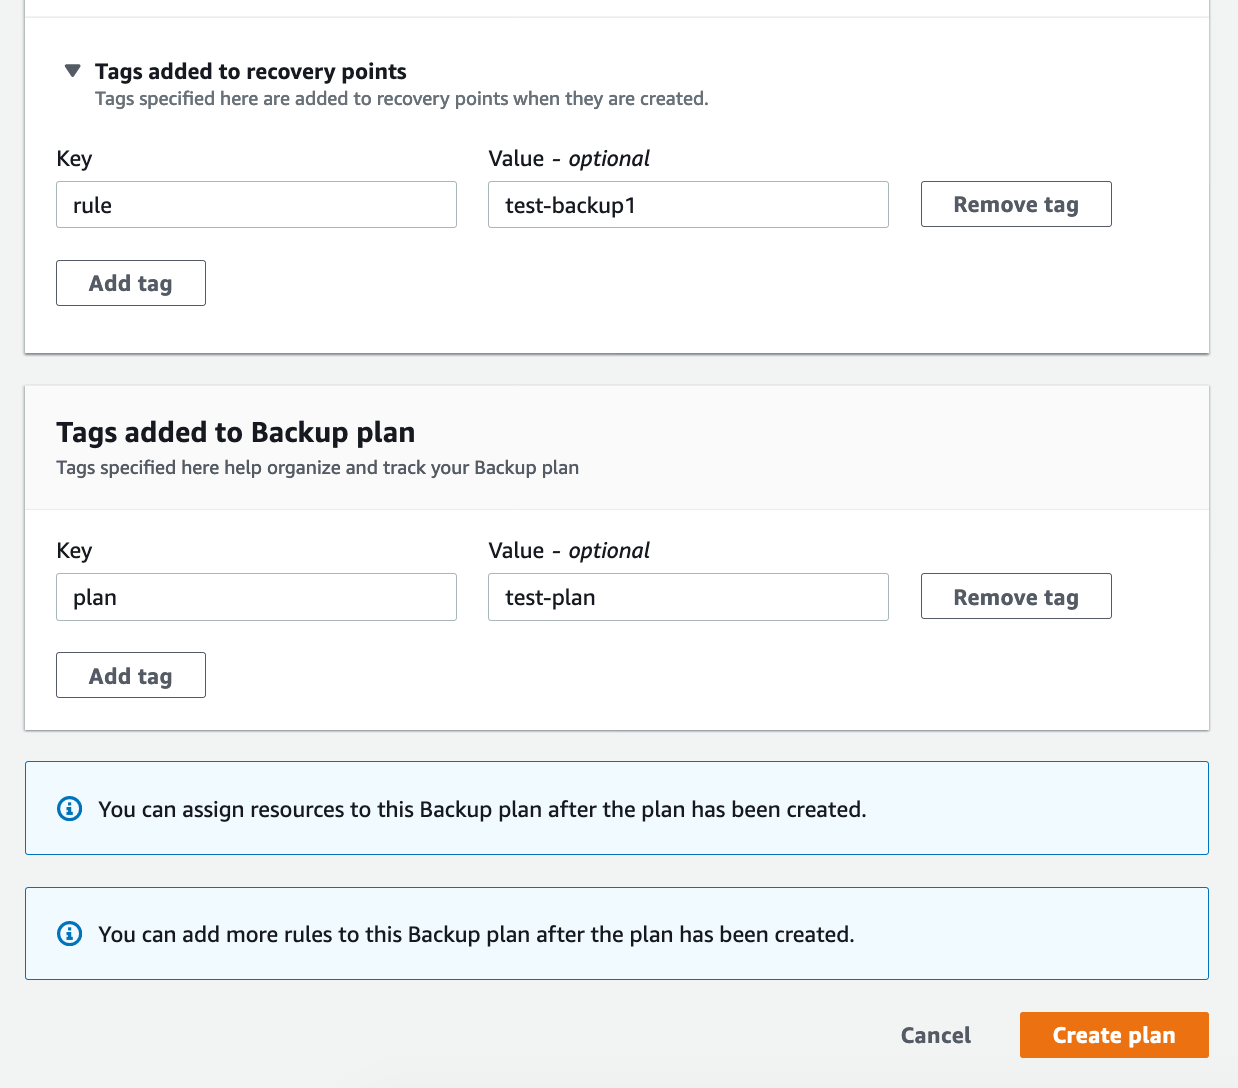
Next, specify the tags that will be added to your recovery points and the tags you want to use for the backup plan itself. Again, this step helps with visibility when organizing files.
Finally, after you have configured everything, click on “Create plan.”
Your new backup plan is now ready.
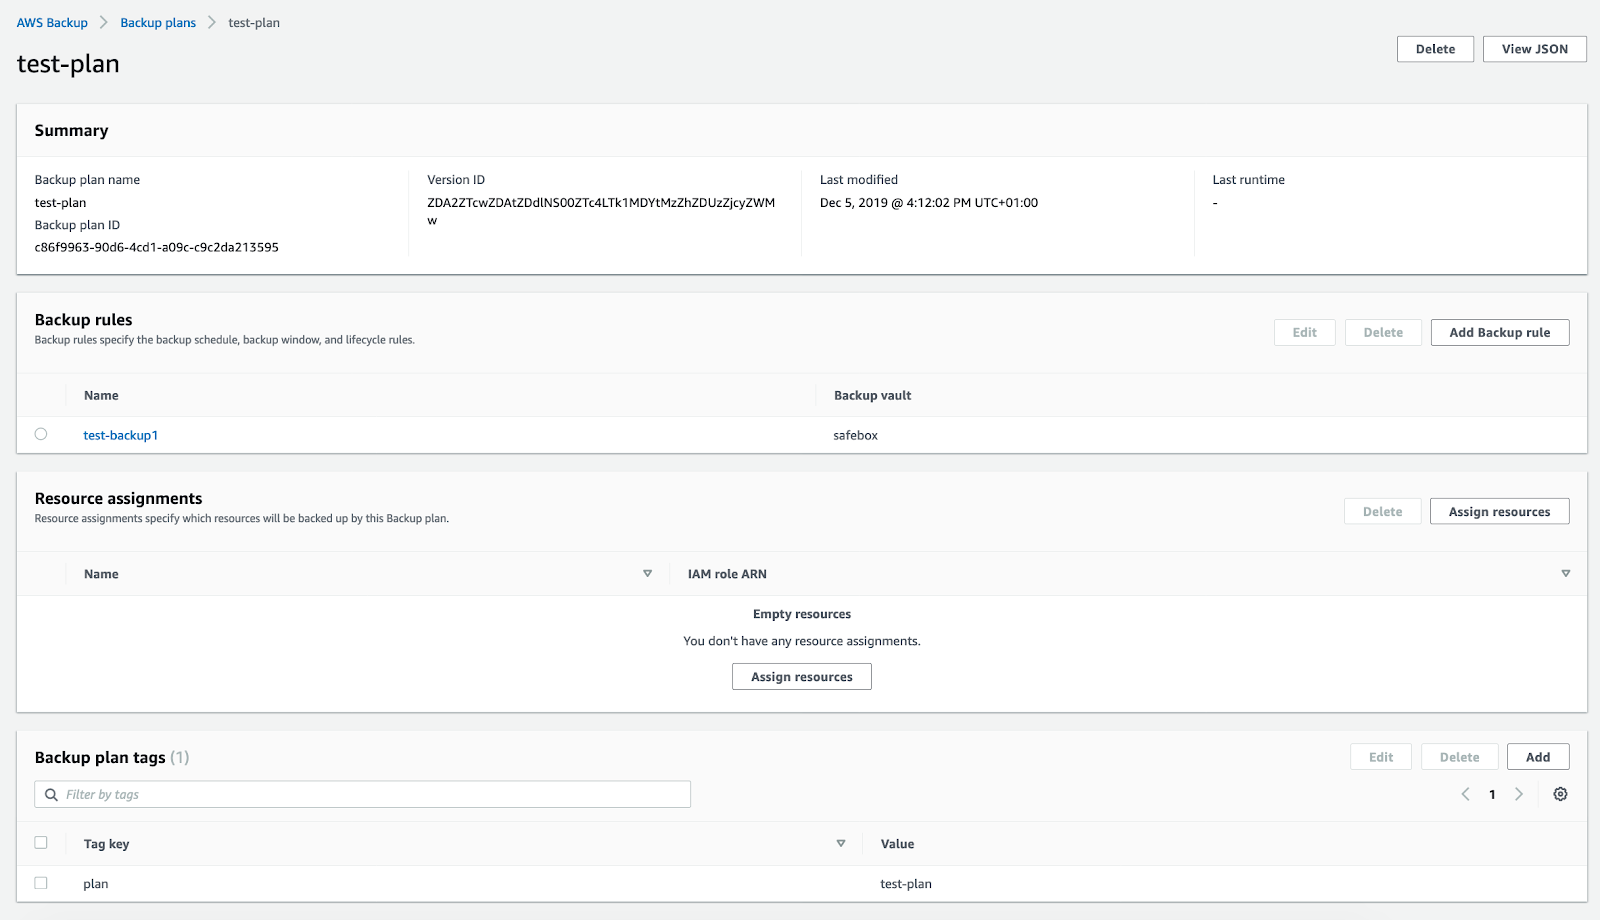
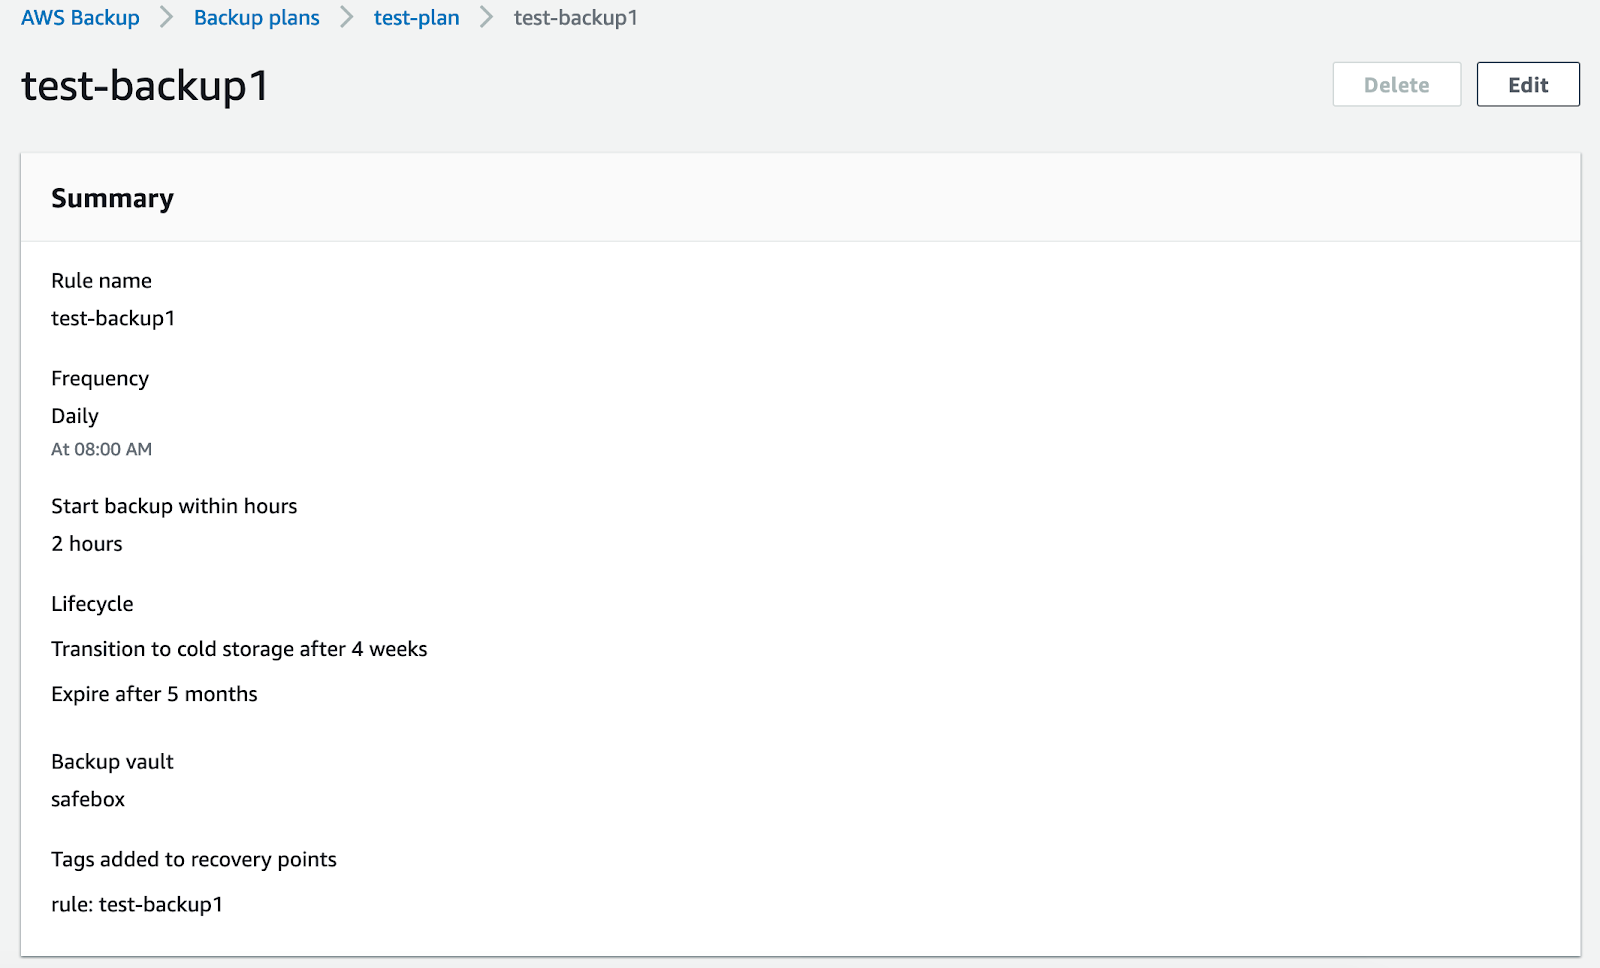
If you click on your backup rule, you can see a summary of it, showing the details of your current configuration.
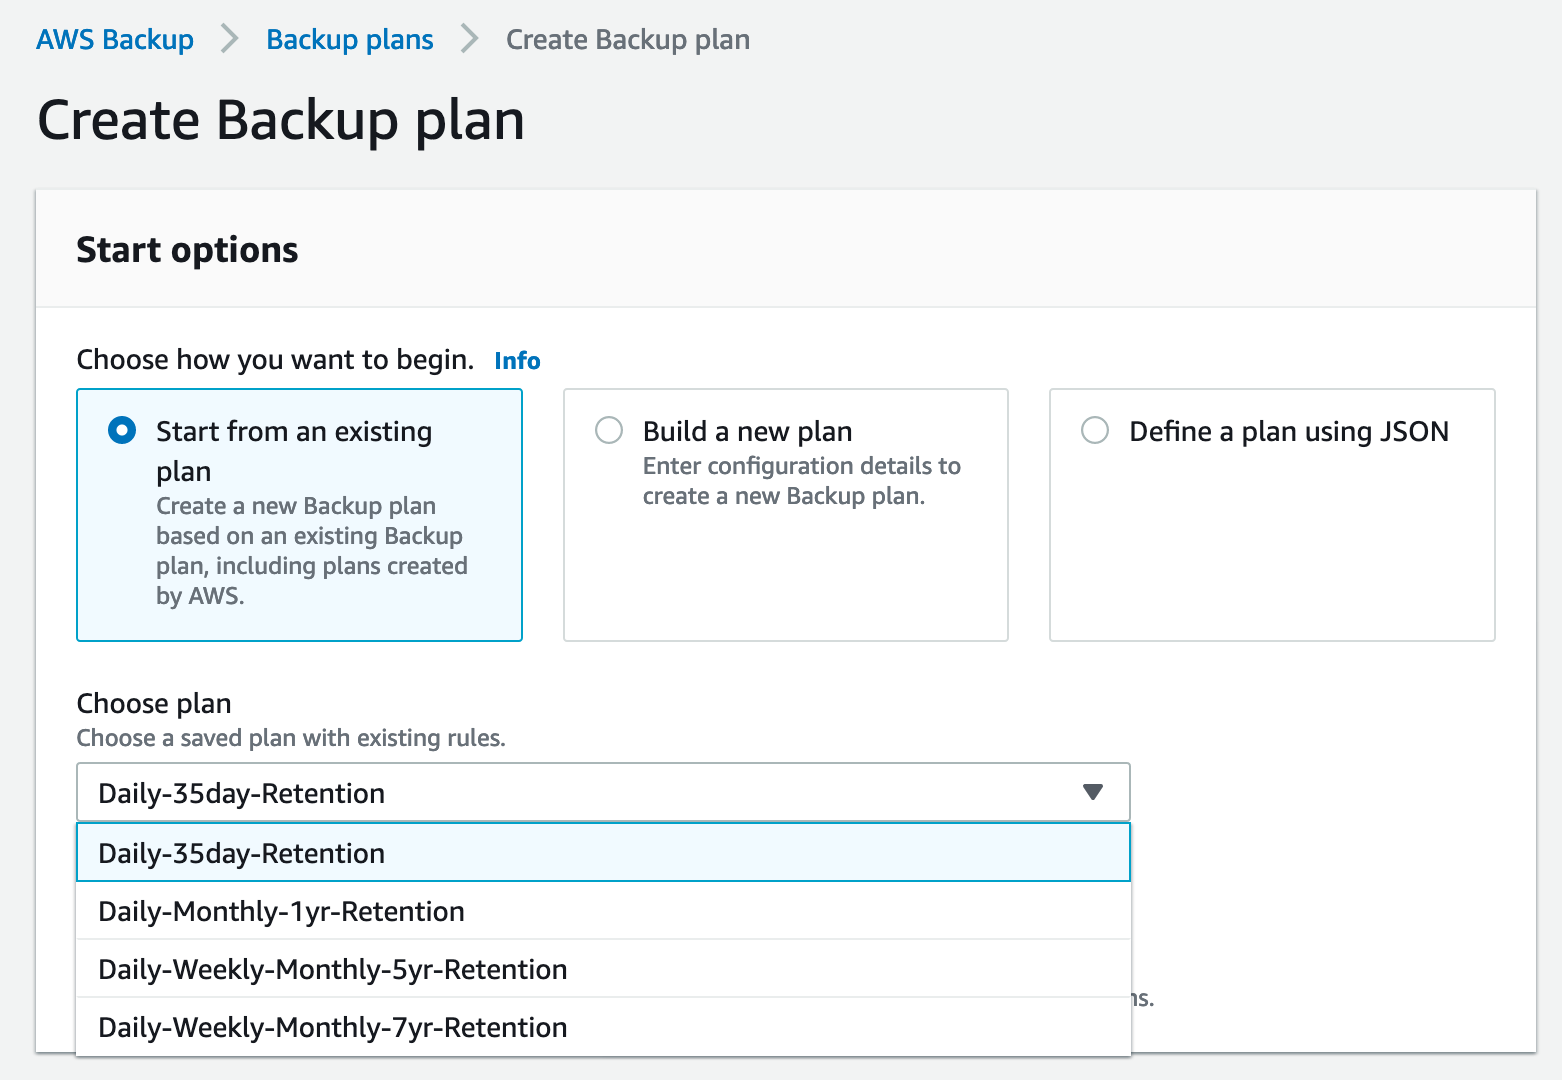
Backup Plan Option 2: “Start from an Existing Plan”
You can create a backup plan from an existing one. This option gives you a premade configuration which you can modify if needed. For example, you can opt for a simple daily backup with a 35-day retention period. You can also employ a more complex plan by selecting the last option under the “Choose plan” drag down menu—daily, weekly, and monthly backups, with a 7-year retention.
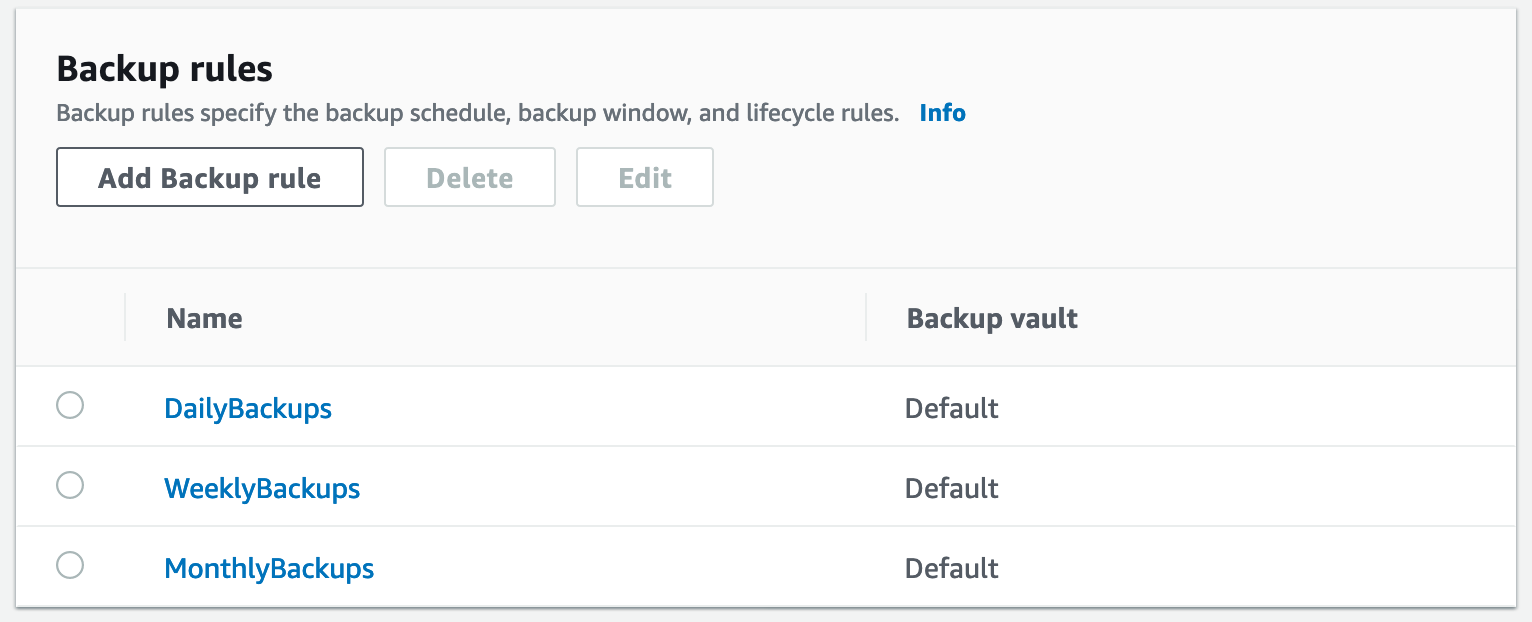
A plan like this will create the GFS rotation described earlier. In the screenshot below, you can see the three distinct backup rules contained within this plan.
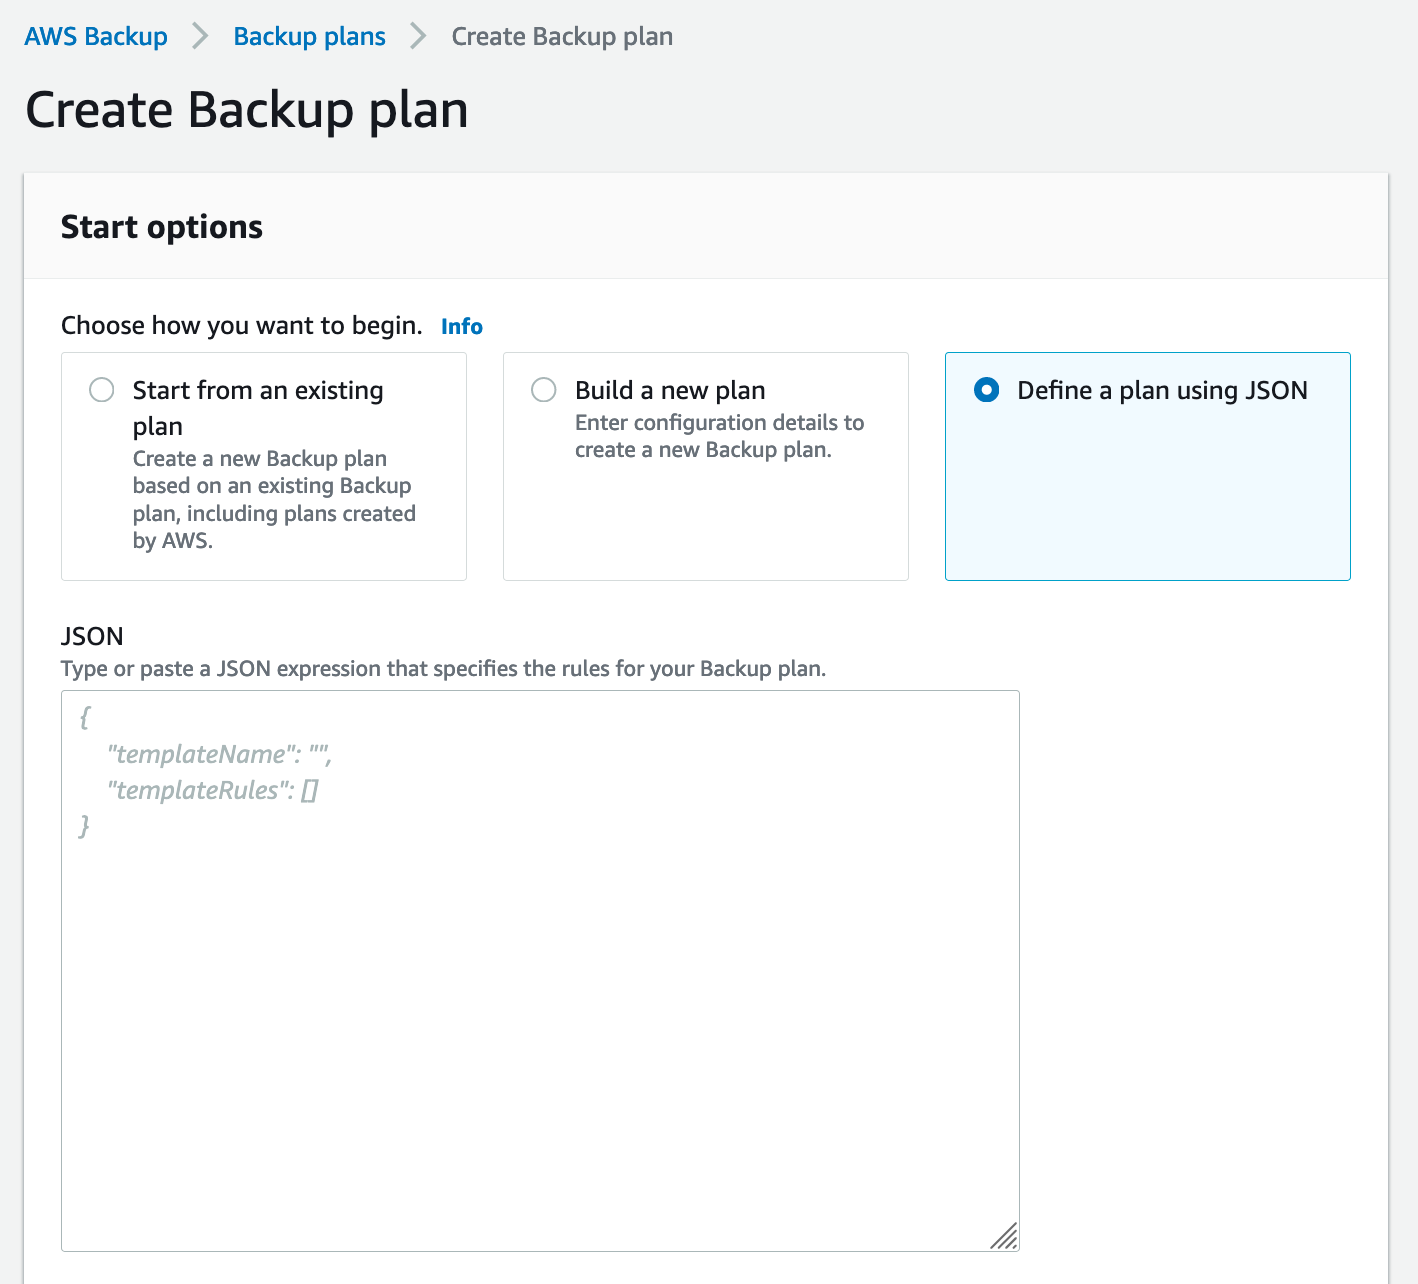
Building a Backup Plan Option 3: “Define a Plan Using JSON”
The last option is to define a plan using JSON (JavaScript Object Notation). This can be especially useful when you are looking to share backup plan configurations with multiple AWS accounts. An alternative way to share backup configurations is by using a basic, consistent template for your plans and modifying it slightly for each use case.
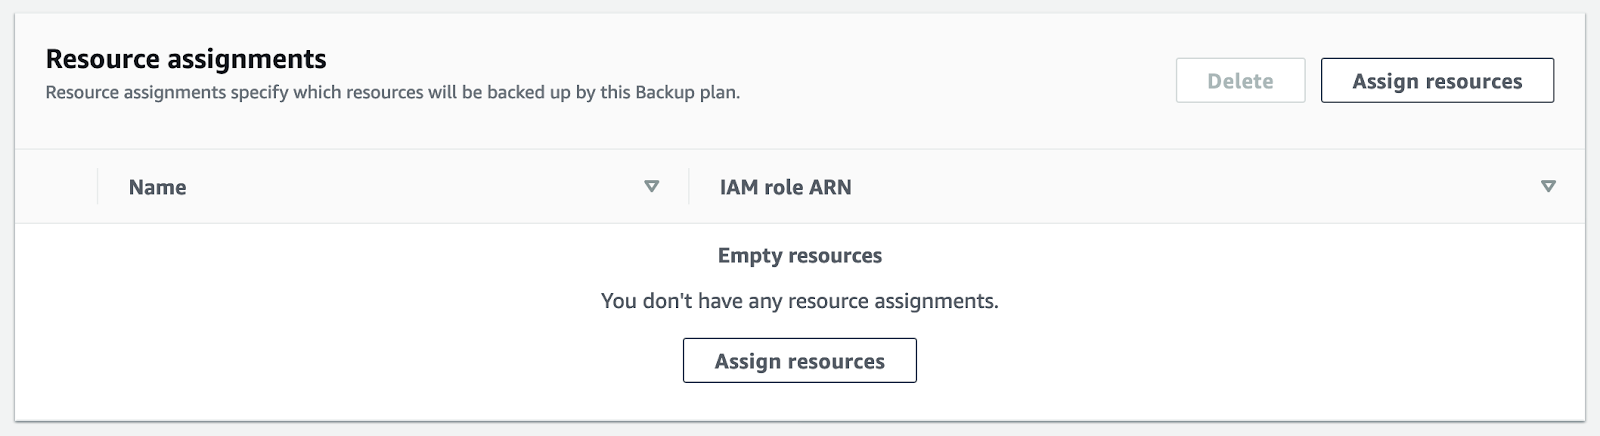
Assigning Resources to Your Backup Plan
After you have created a backup plan, you need to assign the resources that will be backed up. Within your backup plan, open “Assign resources.”
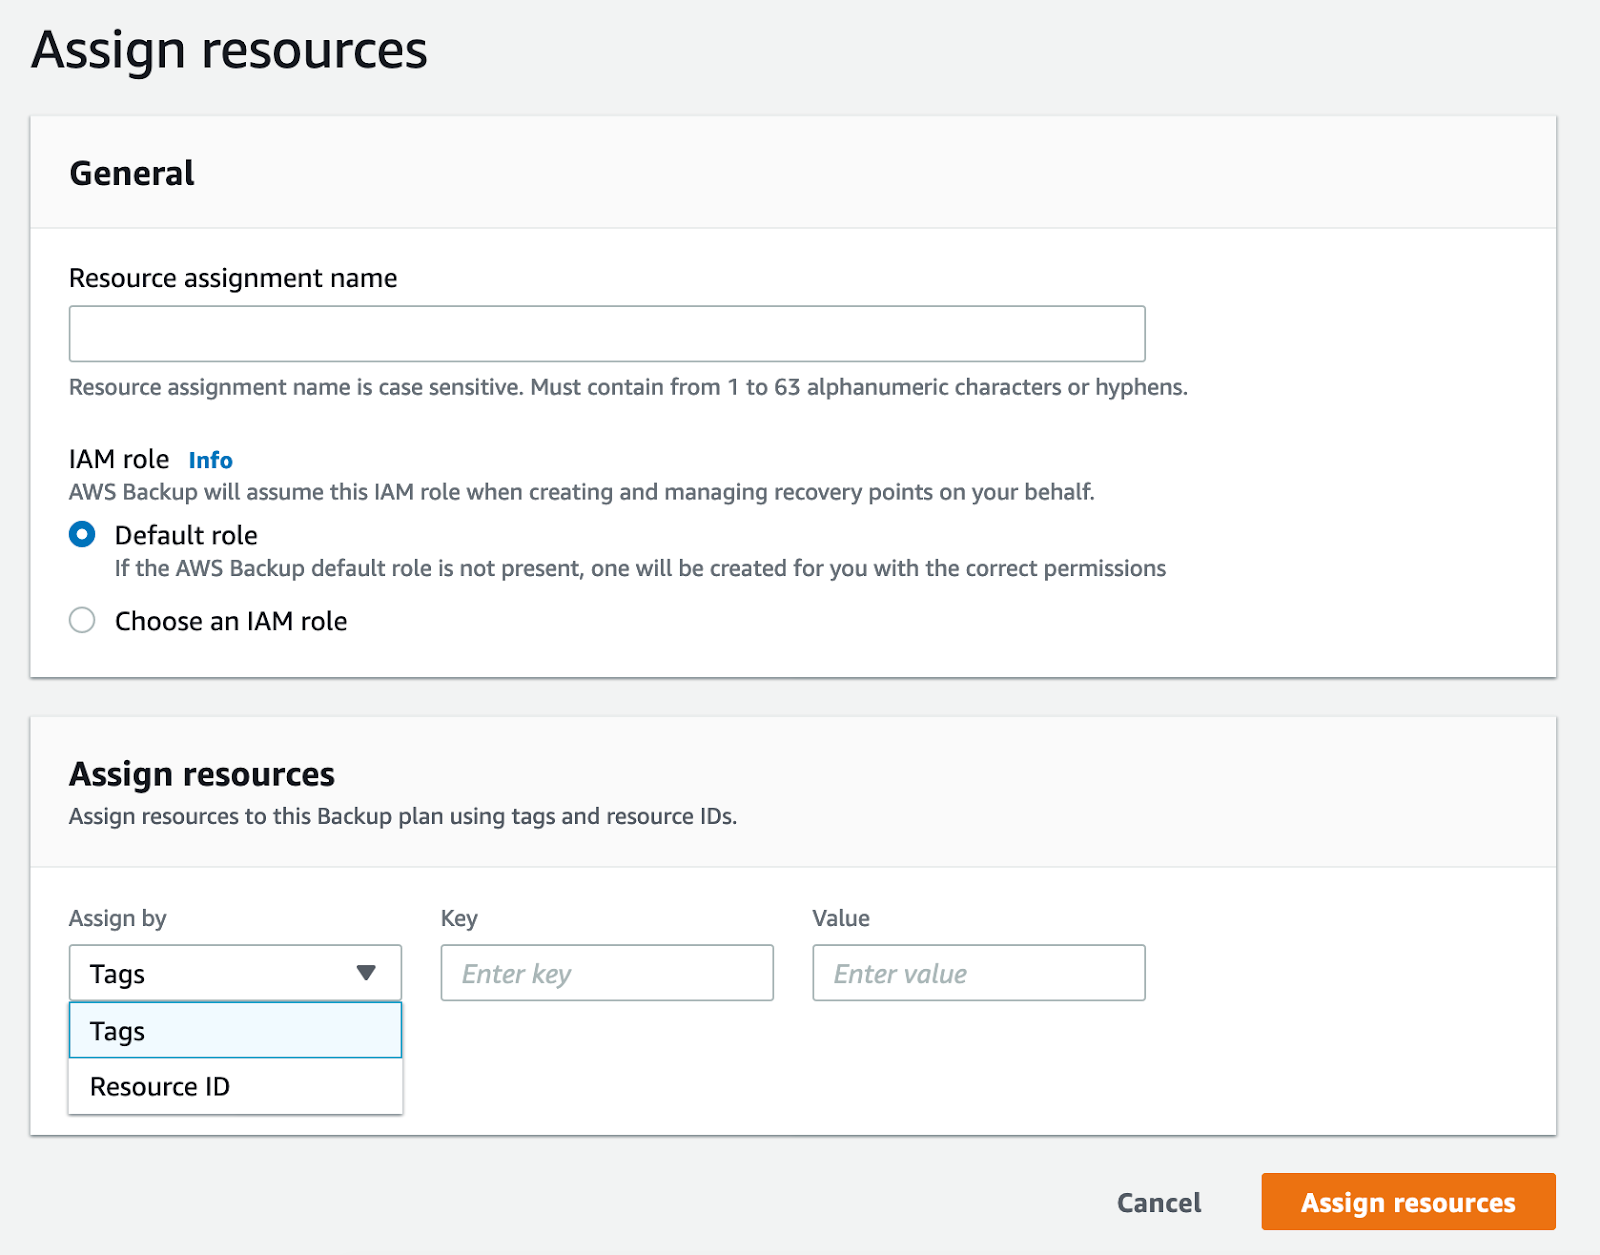
Add a name for your resource assignment. You can leave the default role as IAM.
Resource assignment can be done in two different ways. You can assign resources using IDs, or you can use tags to collect multiple resources at the same time. Assigning individual resources through IDs works when you don’t have many of them or when you want to do a quick backup. It can be somewhat impractical, though, since you need to know your resource ID. If you don’t, you have to go back to your console to find it. Adding resources via tags is a great way to create logical groupings, making it preferable for larger environments. You can use tags to design a complete backup strategy.
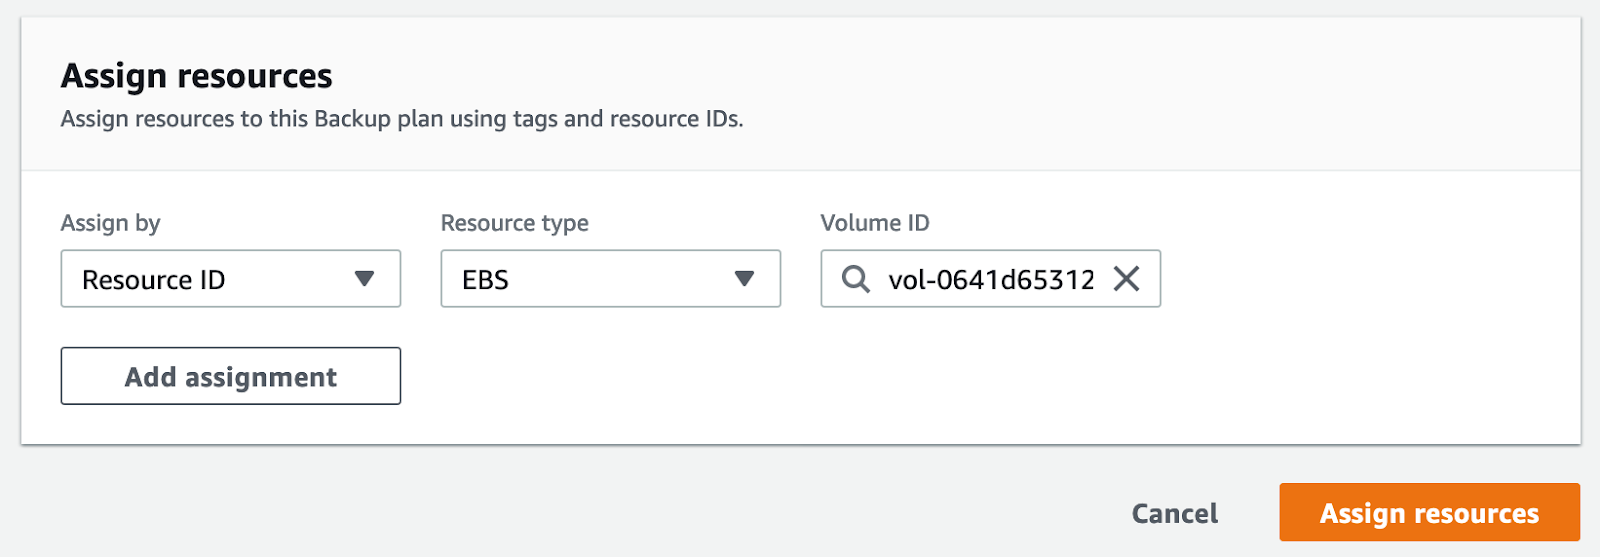
For our example, we will choose a single resource (EBS volume) using its ID and confirm it by clicking “Assign resources.”
Backing Up Resources
This completes the setup process; now, all you need to do is wait for your backup job to start. When it does, you will be able to see that the job is in progress by looking at the console.
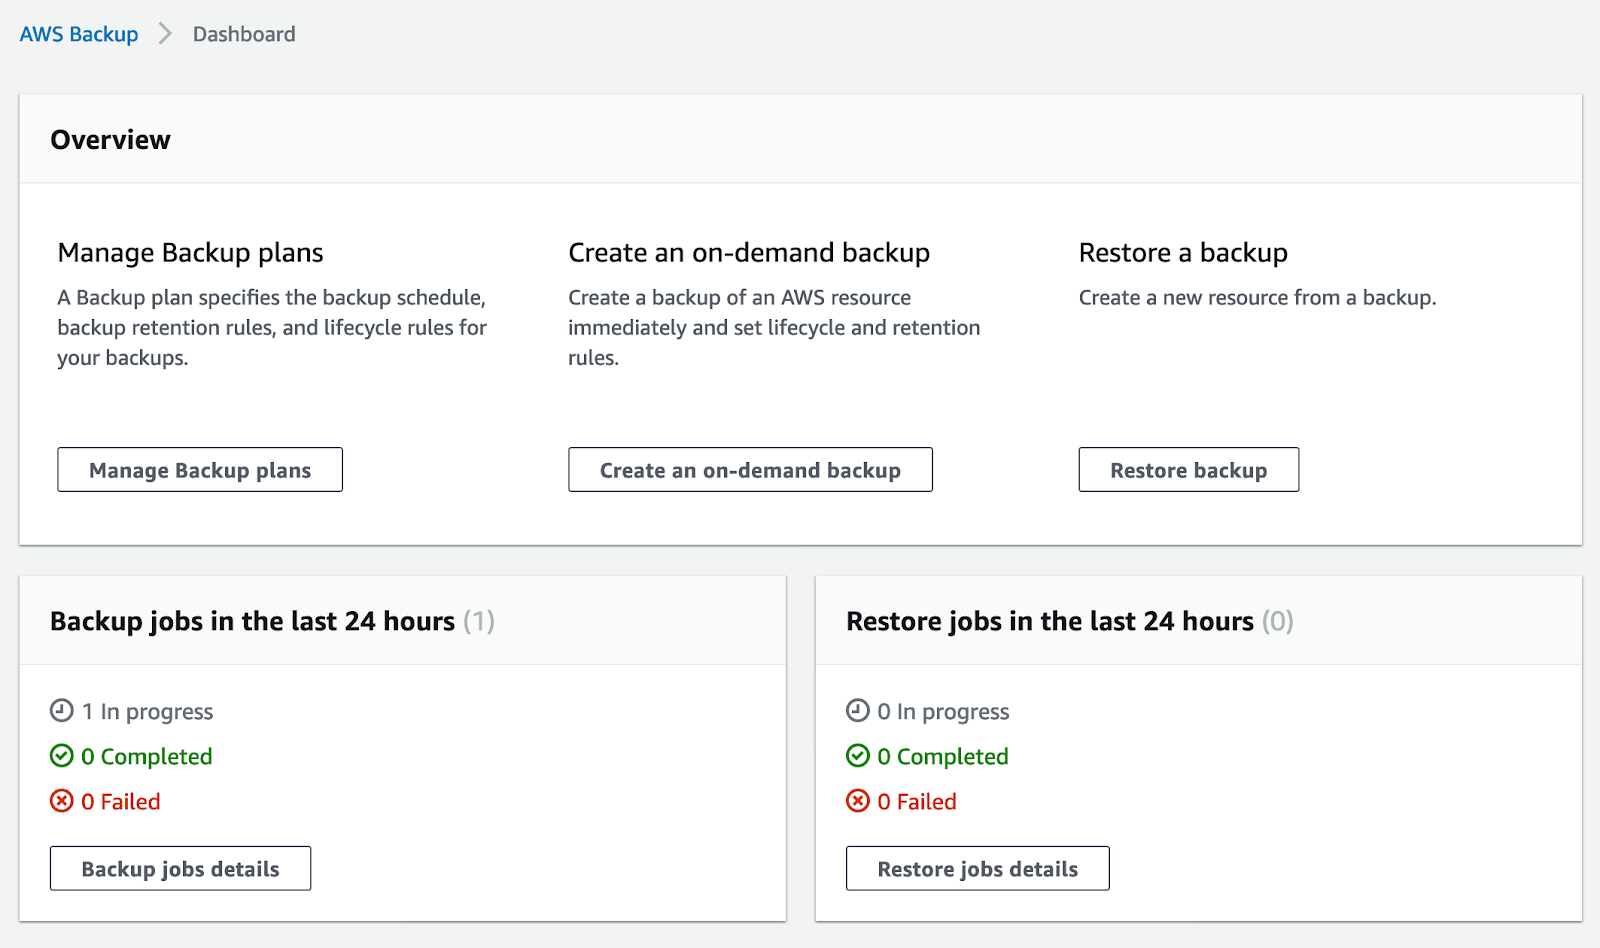
You can also open your “Jobs” tab and look at the details there.

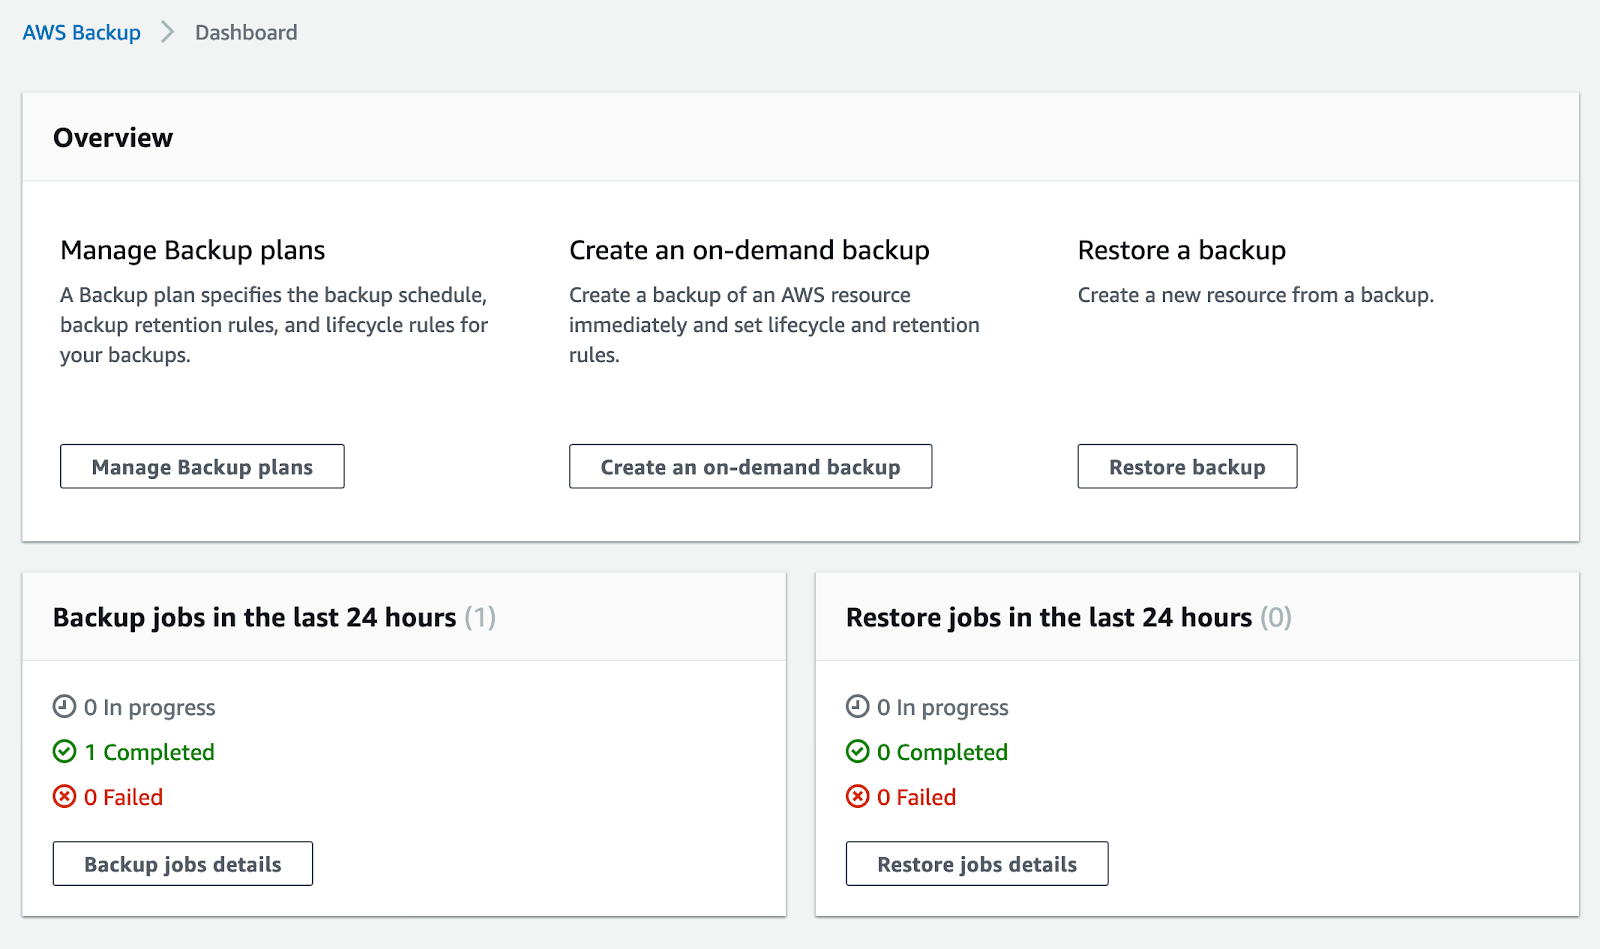
When the backup is complete (or has failed), the dashboard will be updated.
AWS Backup Logs
As with other AWS services, you can keep track of your API calls in AWS Backup using AWS CloudTrail. Amazon CloudTrail provides records of all AWS Backup actions taken by a user or another service. Records show which action was taken, a timestamp for that action, and the IP address of the originating request, among other details. For more information on setting up logging for AWS Backup using AWS CloudTrail, please consult Amazon’s documentation.
AWS Backup: Backing up Options and Restoring them
We provided a step-by-step guide on how to back up your resources using AWS Backup, from creating a vault to making a backup plan, establishing rules, and assigning resources.
The final article in this series will examine the process of restoring the backup we just created. It will also look at how to go through the process of backing up and restoring data using the AWS CLI.