

N2WS Backup & Recovery has evolved over the past decade as a must-have tool for protecting organizations from data loss in the AWS cloud. Aside from the main backup and recovery capabilities, it provides cost-effective cloud management and meets the need for compliance requirements by moving instances to the cost-efficient Amazon S3 repository, and now with v3.0, the ability to archive your snapshots to Amazon Glacier.
Just recently, this latest version of N2WS Backup and Recovery, v3.0, became globally available. This article will summarize the new features included in this version before providing a detailed guide to the most asked about feature—enhanced data lifecycle management using Archive to AWS Glacier.
What’s New in N2WS Backup and Recovery v3.0?
Here’s a list of N2WS Backup and Recovery’s newest features:
- A completely new user interface—includes a new dashboard that provides insight into backups and offers visual representations of costs and savings.
- Recovery Scenarios—allows you to define various sequences of recovery for your backup targets during a recovery session.
- Cost Explorer—shows you the EBS snapshot costs for each of your policies.
- Resource Control cost savings—helps predict your infrastructure’s cost savings.
- Policy Time Zone—enables you to choose the time zone for each of your backup schedules.
- Announcements—updates you via the user interface when needed.
- Enhanced data lifecycle management using Archive to Glacier—helps you reduce your backup costs while staying compliant with regulations by transitioning your Amazon S3-stored backups to Amazon Glacier cost storage.
The lowdown on all new v3.0 N2WS capabilities can be found here while the rest of this post will be dedicated to exploring this last feature, Archive to Glacier.
Enhanced Data Lifecycle Management (DLM) Using Archive to AWS Glacier
For those new to N2WS Backup & Recovery
For those who are new to N2WS Backup & Recovery, in order to start taking advantage of this feature you can trial it today for free, for 30 days. You will need an AWS account. If you don’t already have one, you can sign up quickly and easily here. Once your account is ready to go, you’ll head to the AWS Marketplace v3.0 Free Trial Edition.
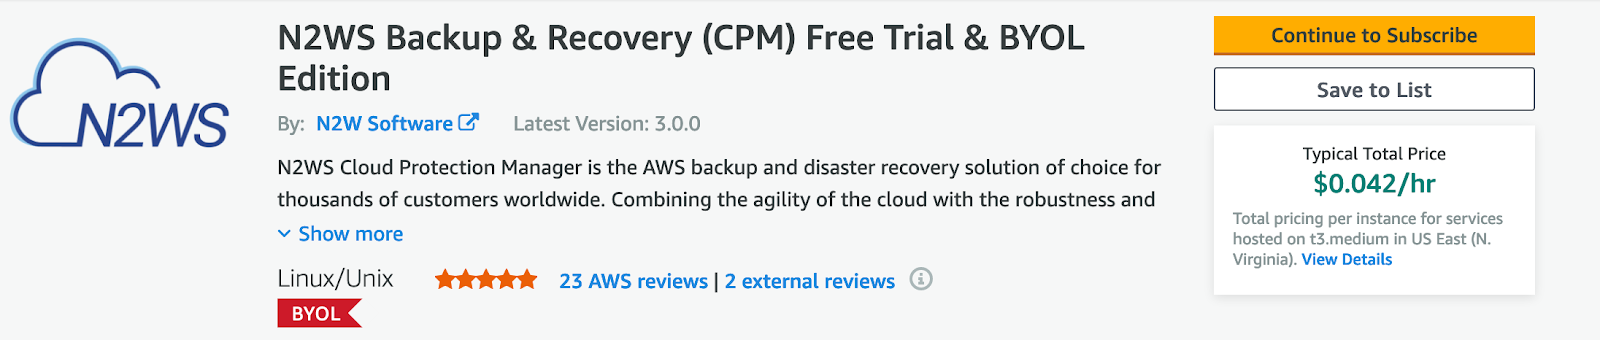
Follow the instructions on the screen and the usual deployment steps. Again, make sure you pick the 3.0.0 version, which is now the default. Our short video install guide will guide you through the process.
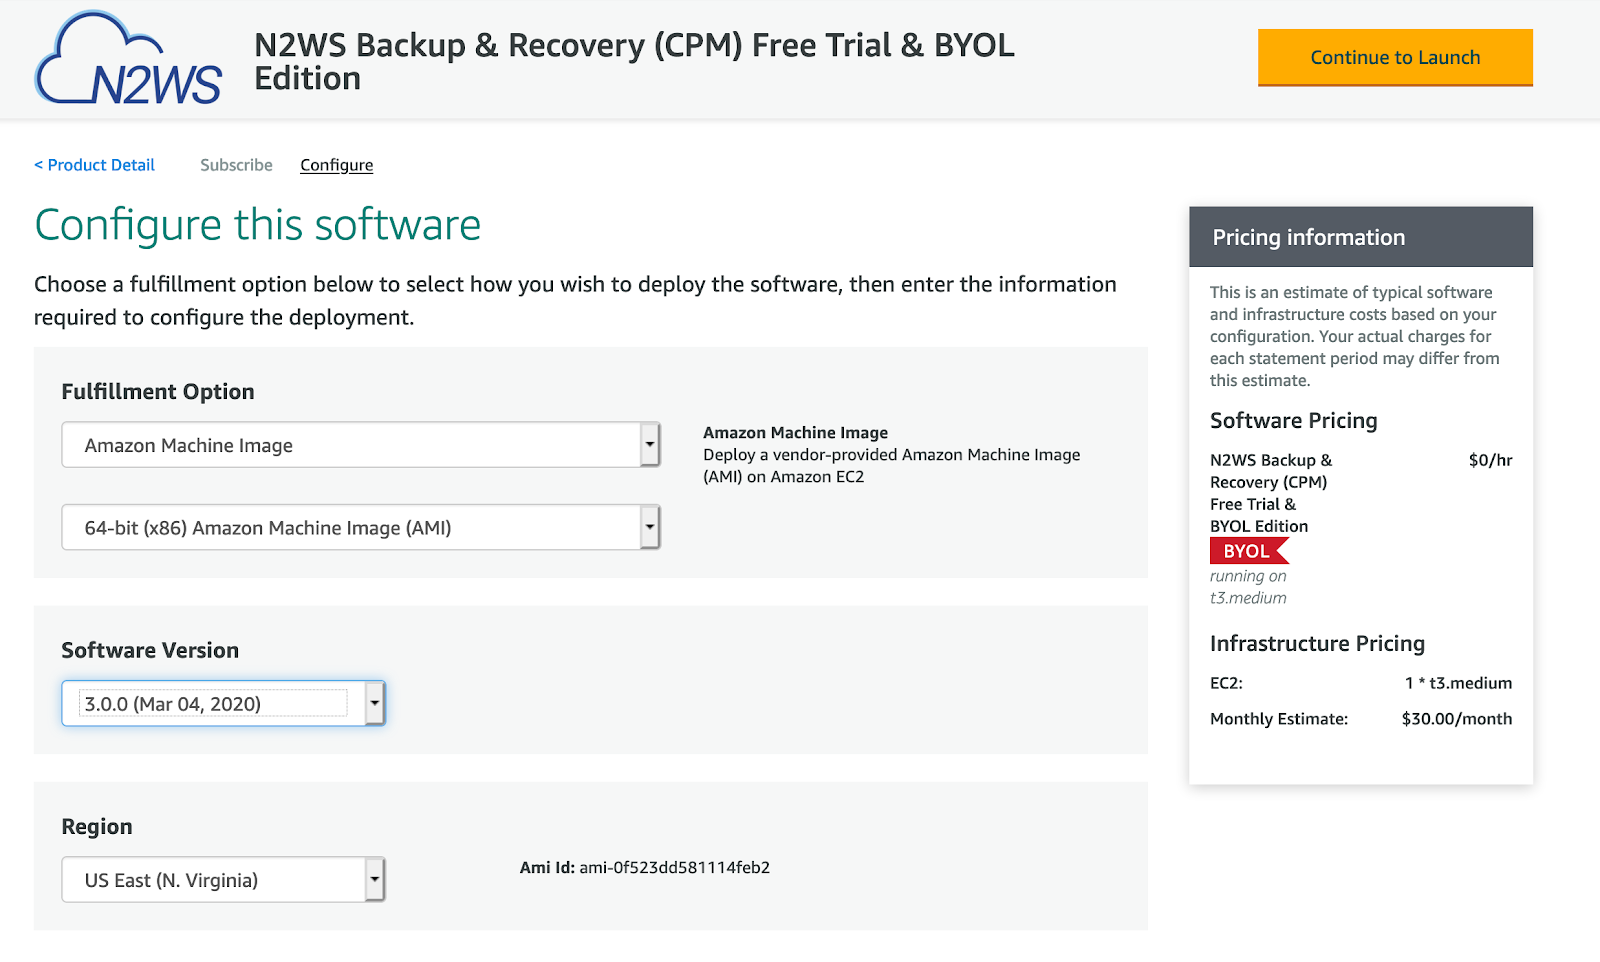
After you enter your networking details (such as VPC and key pair), you will get a notification stating that your instance is being deployed on AWS, as shown in the screenshot below.

Now, switch to the AWS console and open the IP address of your N2WS EC2 instance in your browser. If you have used N2WS Backup and Recovery before, you know that now is the time to quickly configure the server.
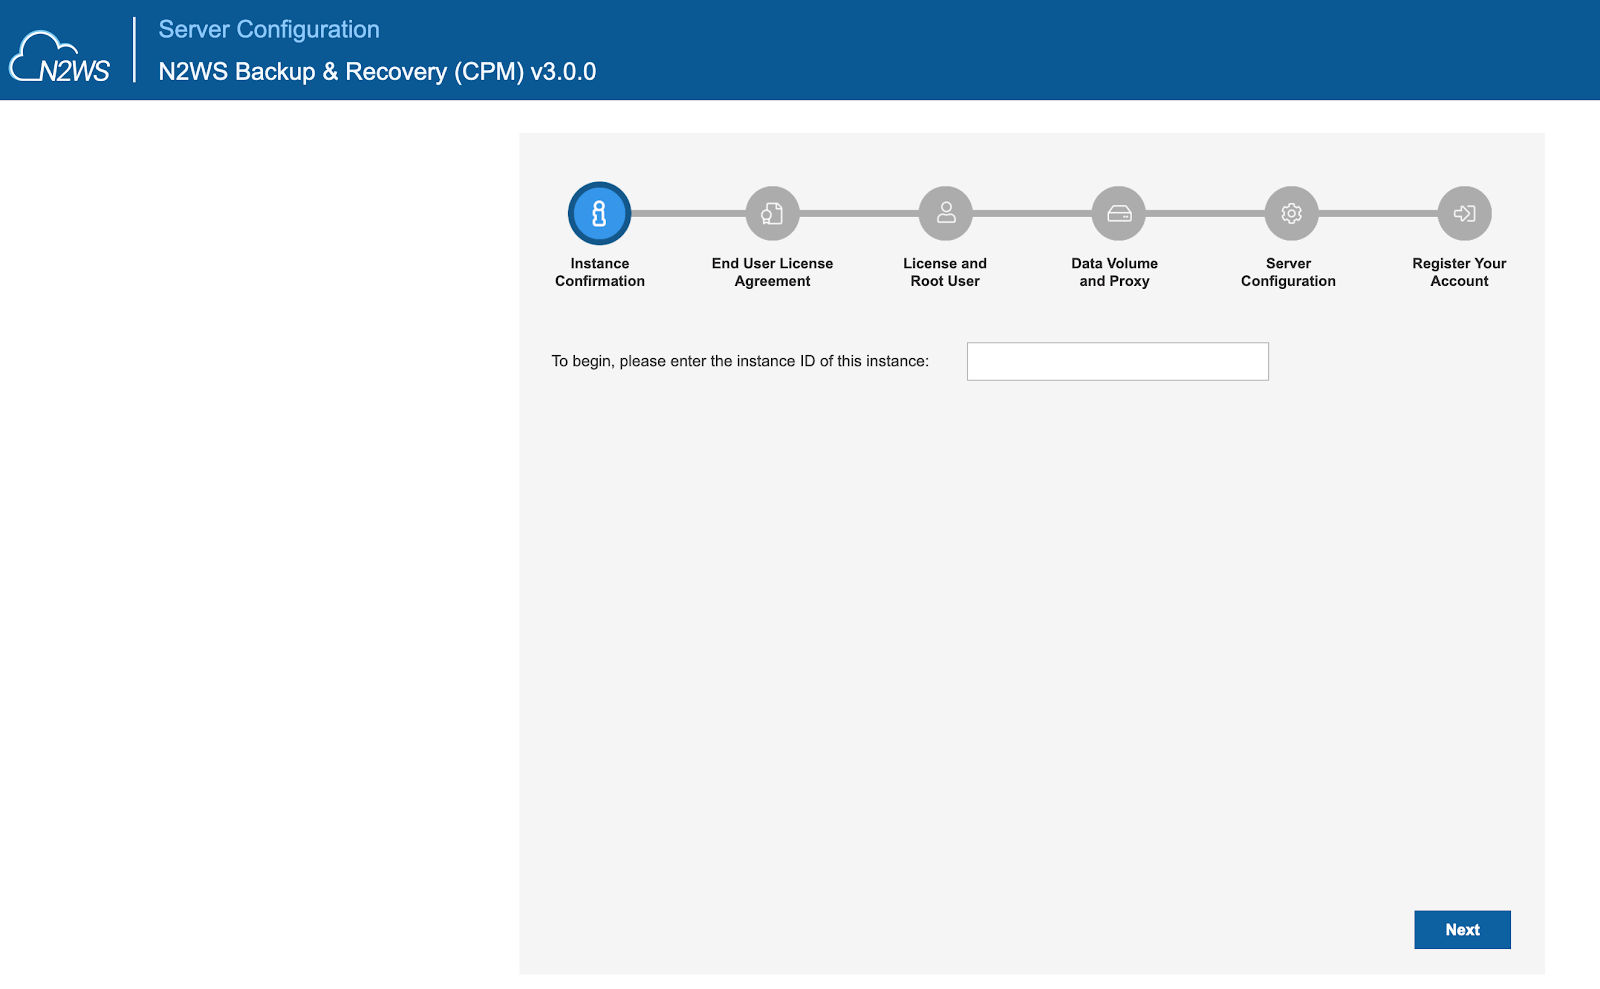
This process requires a few simple steps: providing your instance ID (as proof that you are the owner of the server), agreeing to an end user license agreement, and creating a root user for the server. Here, you will also choose between starting with the free trial or using your existing license. In this tutorial, we’ll be using the free trial edition.
Don’t forget to attach an IAM role to your instance, giving it permissions (preferably administrator permissions) that will enable it to handle all of the tasks for you. If you don’t have the IAM role attached, you’ll get a warning before you’re able to proceed with the configuration.
After this, the server configuration will begin. It takes a couple of minutes to complete. When it’s done, you will see the login screen.
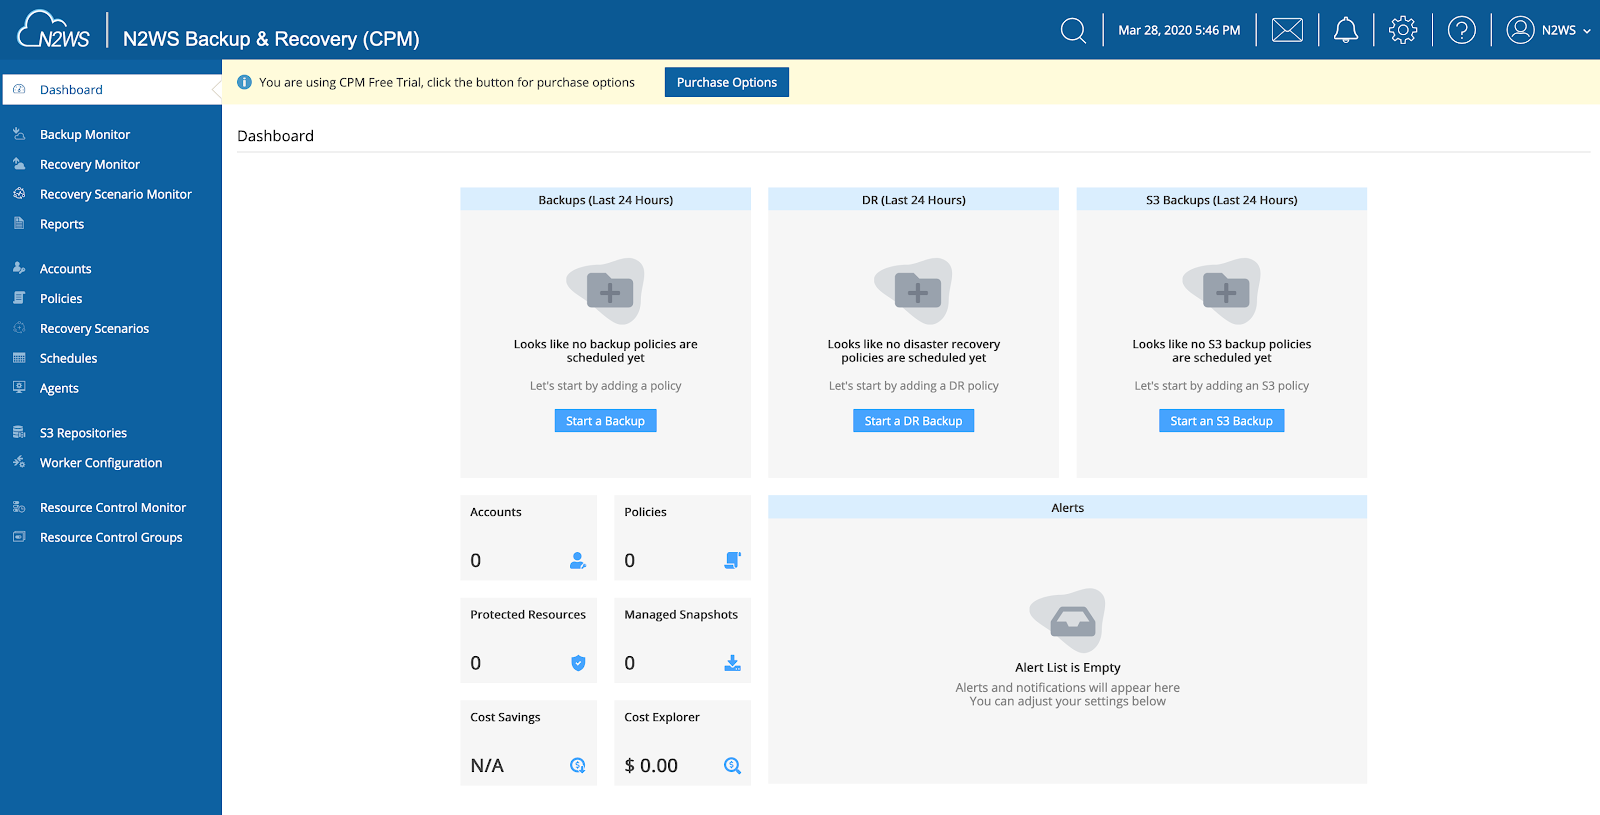
Use the username and password you chose during the configuration, and you’ll be greeted with the new and improved N2WS Backup and Recovery.
For existing N2WS customers
Already an N2WS customer? Our short video guide will show you how to perform an upgrade from a previous version. Our documentation page will also guide you through this process.
The First Glance
The first thing you’ll notice is our re-engineered UI and dashboard. Aesthetics are not the only improvement here. You now have a streamlined navigation experience, with zero toggling needed. You can also monitor all important metrics from this dashboard. Intuitive sidebars give you quick access to alerts, tasks, settings, and support. You should see insights into future cost savings and real-time snapshot costs as well. At this point, all of these are empty, since we’re looking at a clean setup of the tool.
Begin archiving to AWS Glacier
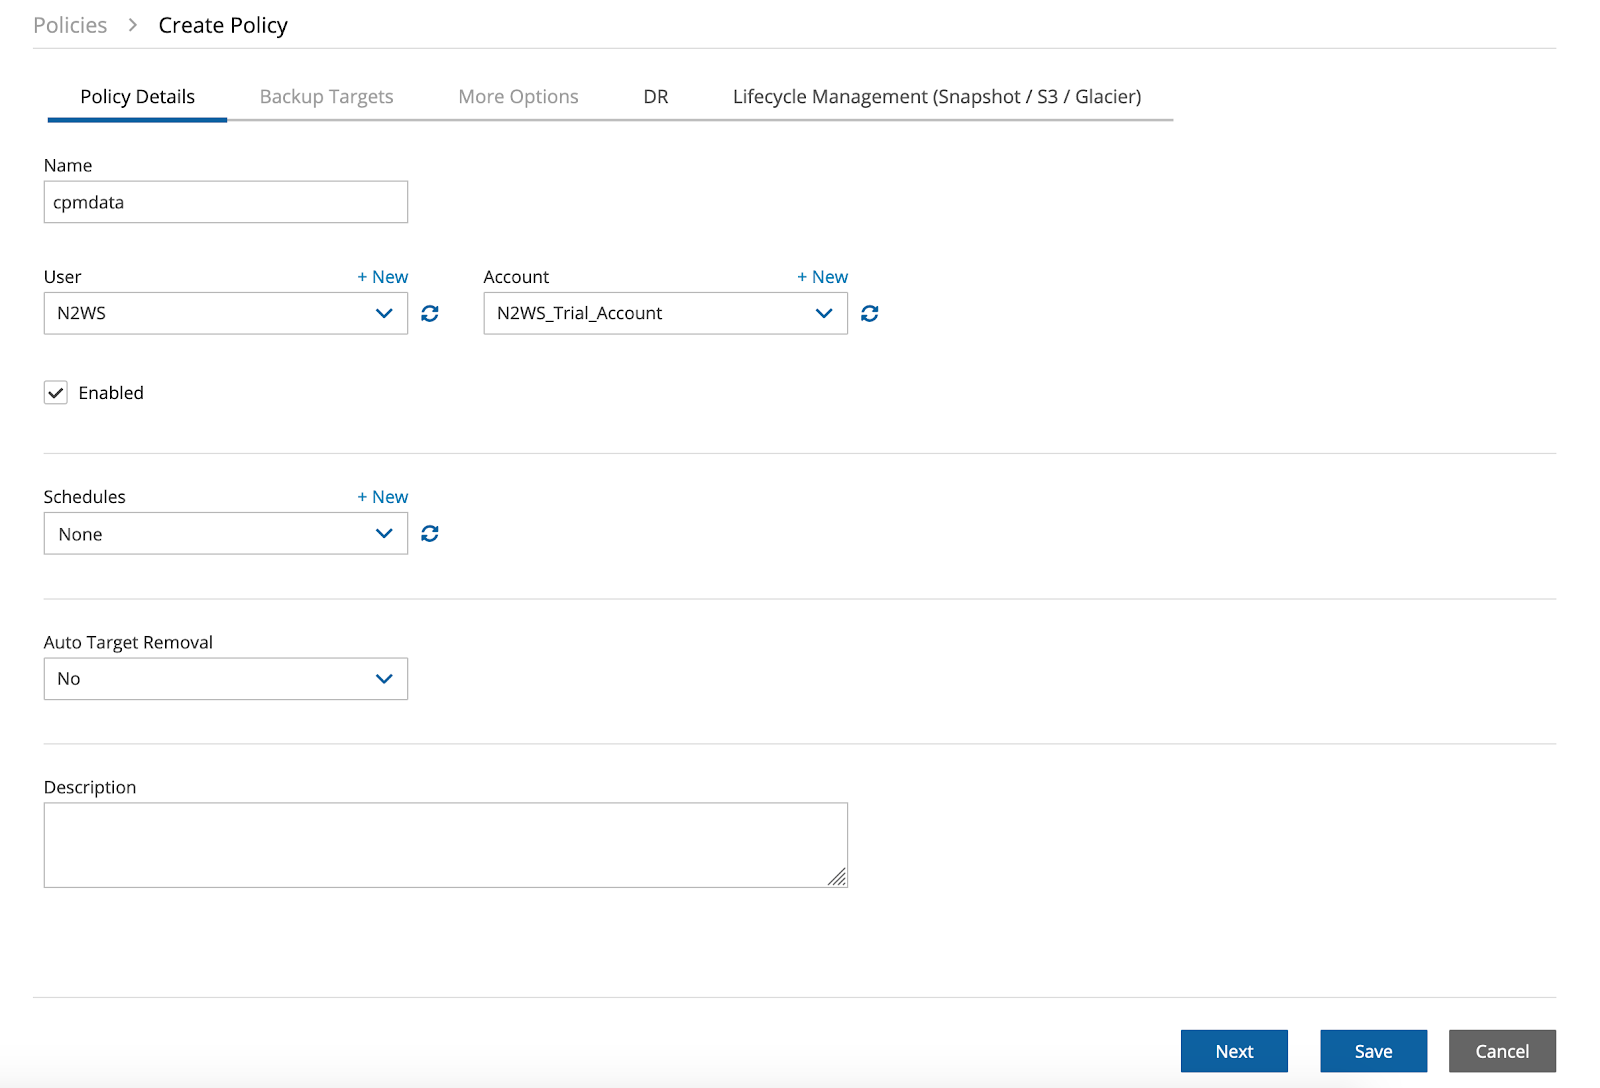
Before you can start backing up your data and archiving it to Glacier, you need to prepare a couple of things. First, you need to create an account. Then, you will create a “cpmdata” policy. The “cpmdata” policy is a special policy that backs up the N2WS Backup & Recovery data. It is required in order to use any Amazon S3 feature, and in case of any failure, it will be used for the recovery process to regain access to the repository. If you try to skip this step, and for example go straight to creating a repository, you will receive a message like this.

After “cpmdata” policy is in place, you need to create the repository to be used, configure workers, and finally you will be creating the policy itself – this time the one that will store data into the repository. So let’s start.
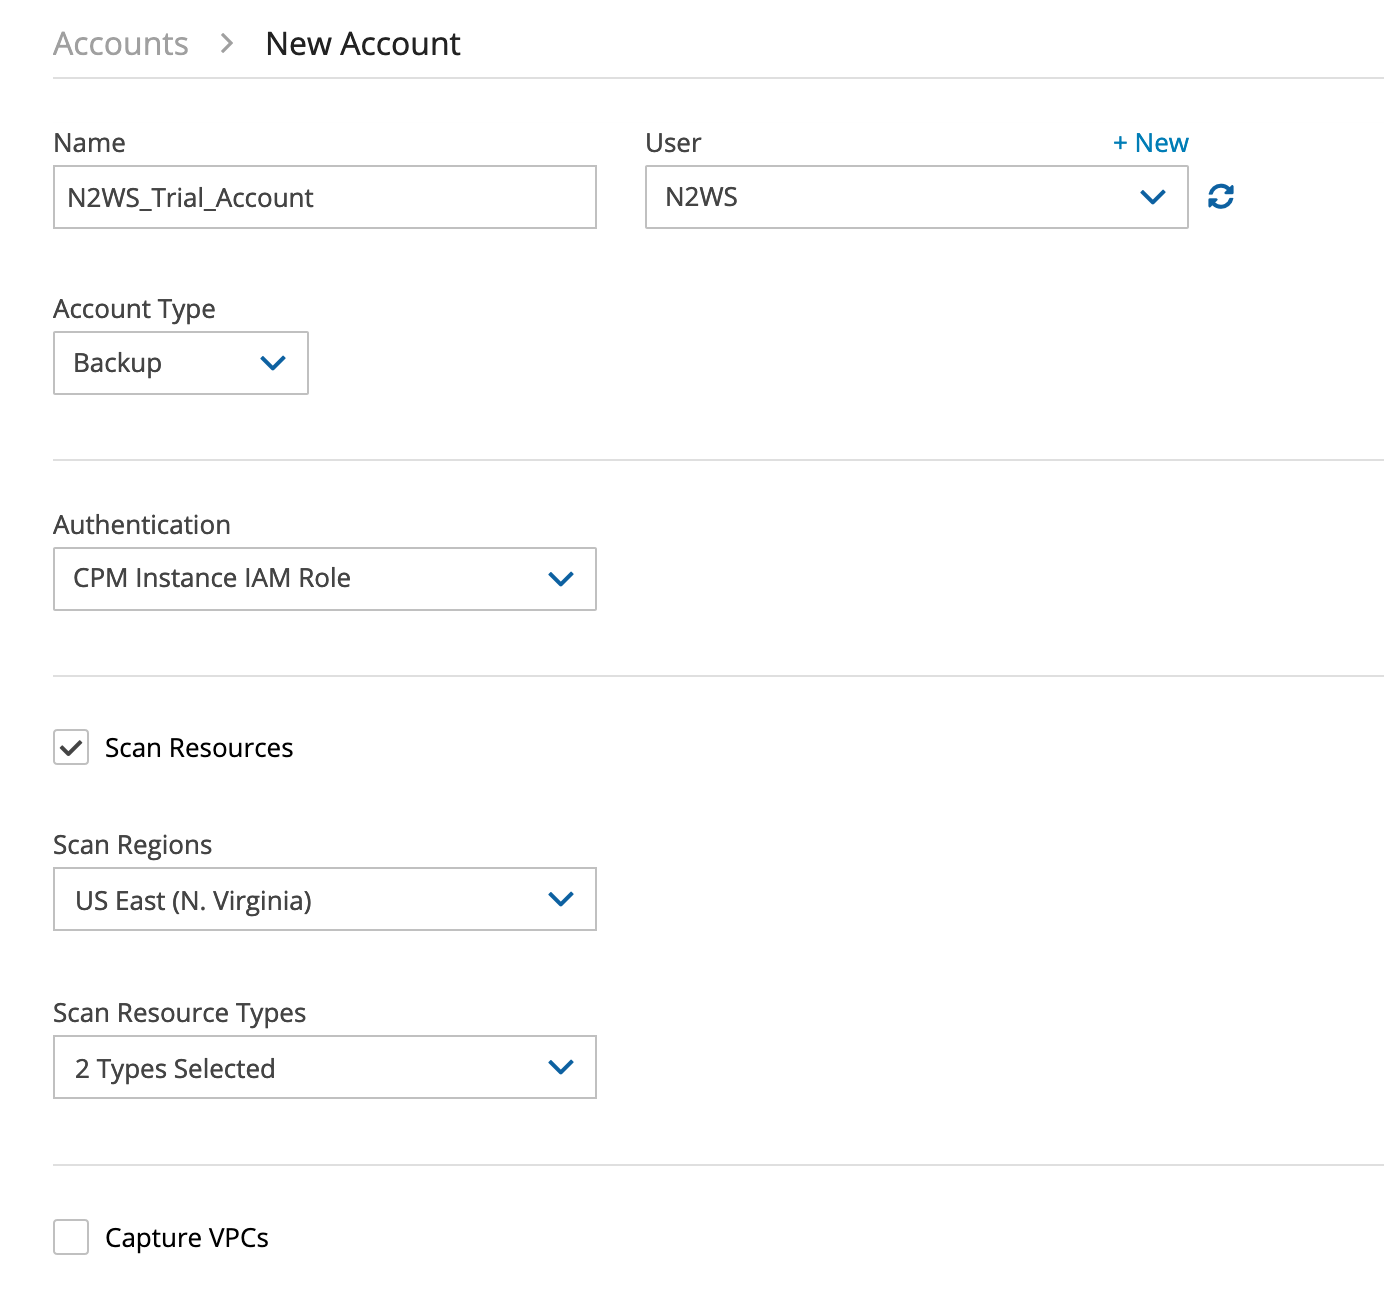
Let’s create an account. Open the “Account” on the sidebar, and fill in the details. You will be notified that you haven’t defined any accounts yet.
Click the underlined text to create a new account. Then, name your account, pick a user (the one created during the server configuration), and pick your account type (your options are Backup and Disaster Recovery). You can also pick an authentication method. The preferred option here is N2W Instance IAM Role.
Check the box to scan for resources and capture VPCs if you’d like as well.
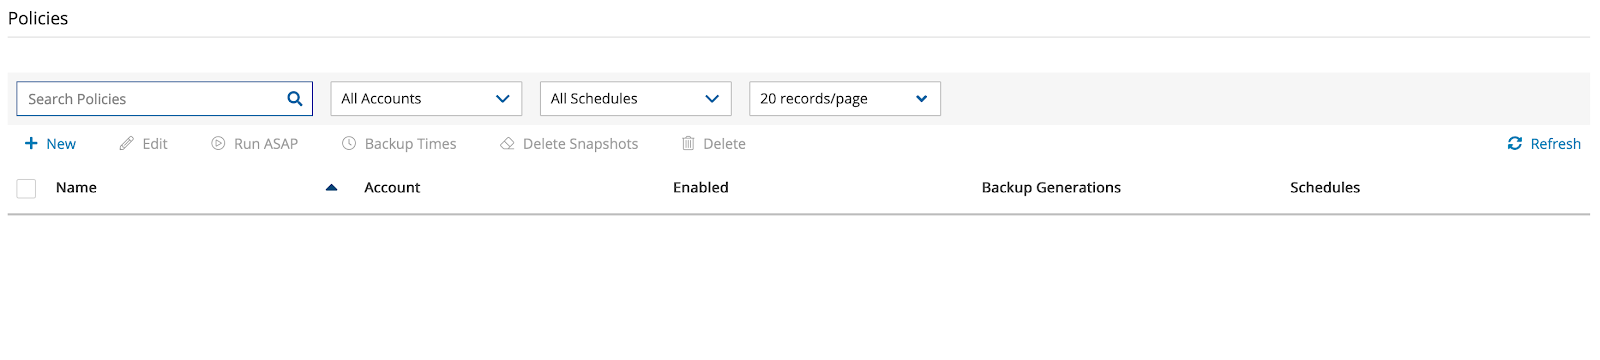
Now that we you the account in place, you can go and create a “cpmdata” policy”. Open Policies on the sidebar, and click on New.
Now create a “cpmdata” policy.
After you have taken care of that, it’s time to create an S3 repository.
You need to choose the S3 bucket to be used as a repository for your backups. Use the sidebar to open “S3 Repositories.”
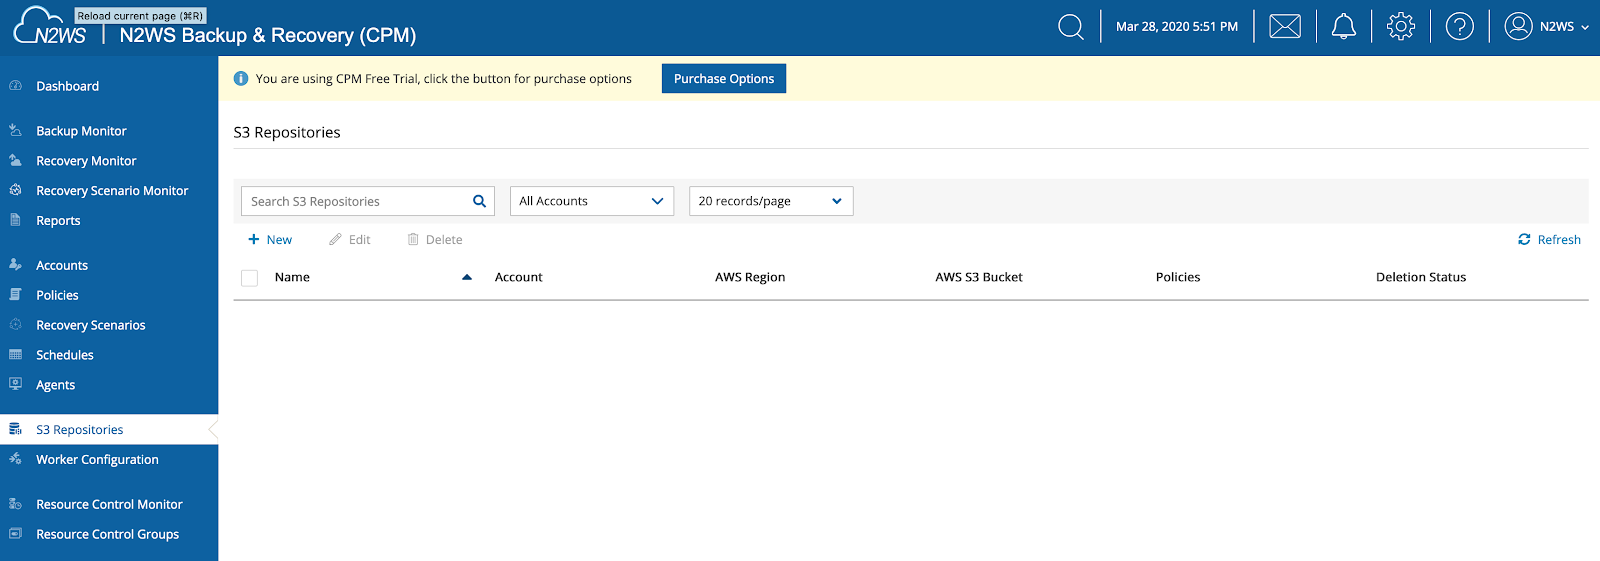
Click on the new, and fill in the details, making sure to pick the correct region, as well as the S3 Bucket Name.
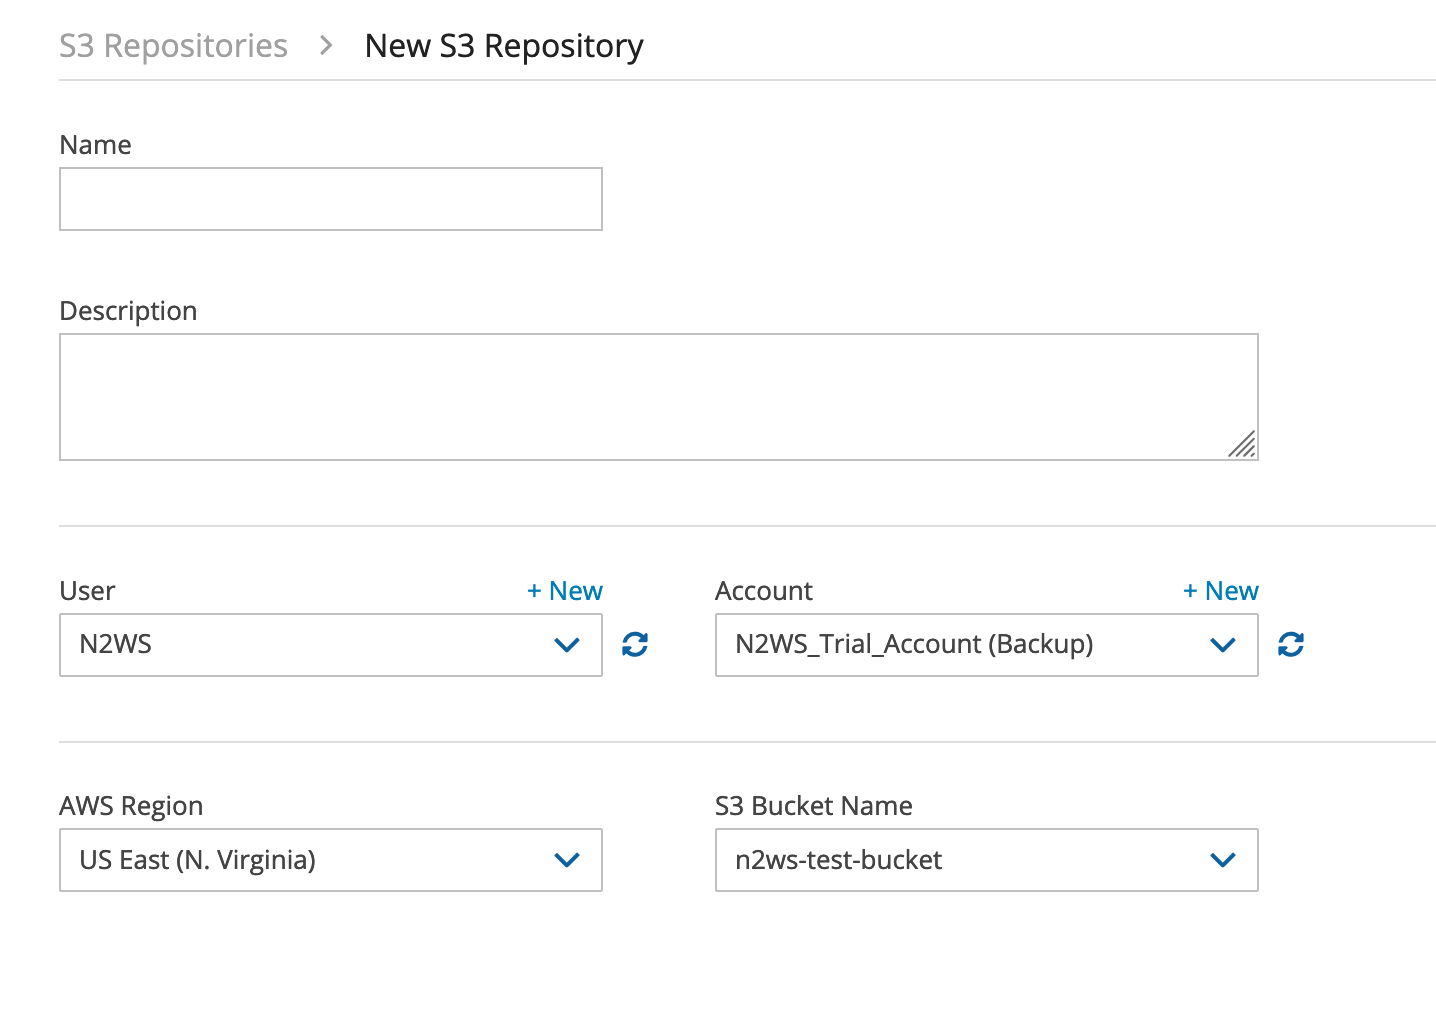
Note that you need to have already created the S3 bucket for this repository. You also need to have enabled encryption on it; otherwise, you will get an error message.

One of the last remaining things to do is to configure a worker that will be used for backup jobs. Workers are actually EC2 instances that will be provisioned to handle the backing up of your data, so properly configuring them (networking, security groups, etc) is very important.
Open the worker configuration tab on the sidebar, and click on “New.”
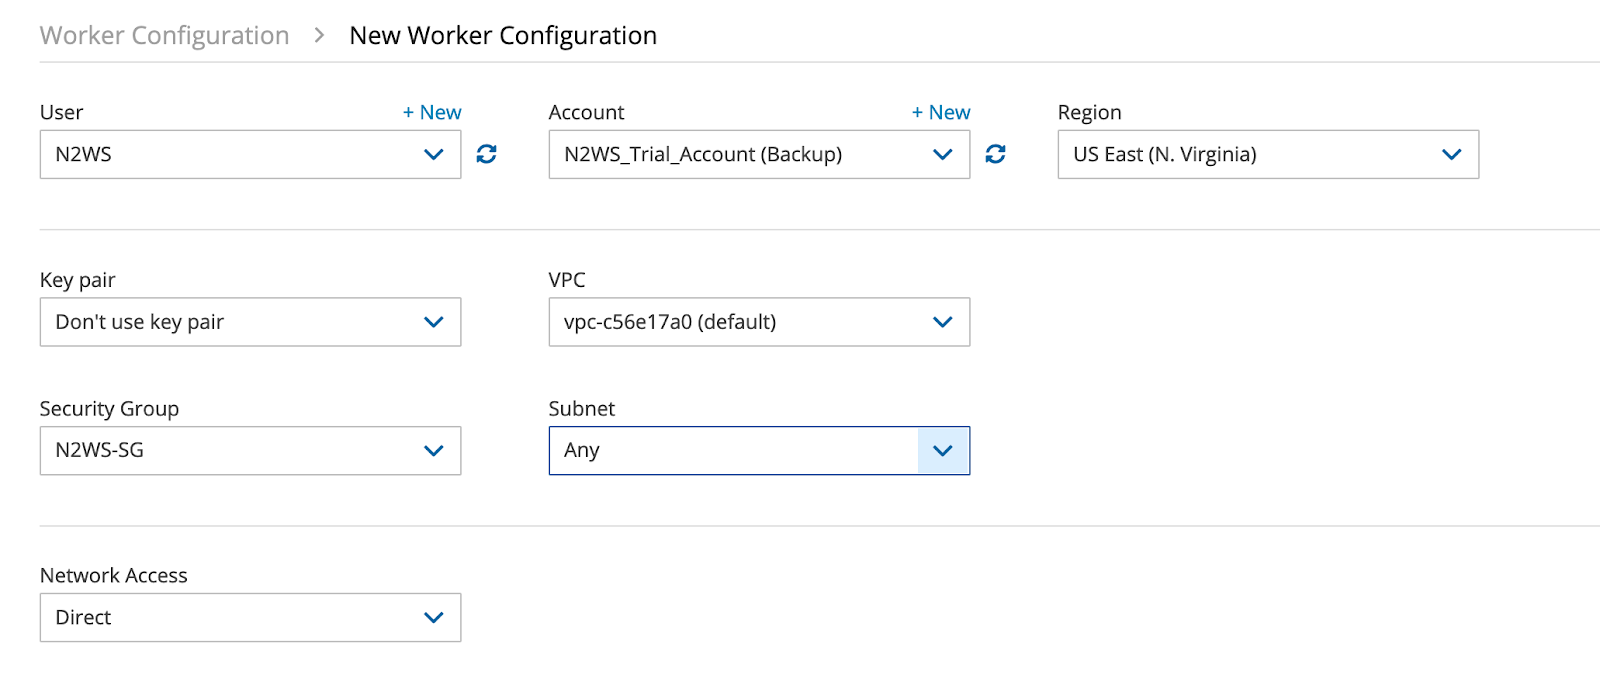
Populate your desired options, again making sure you pick the correct region and a VPC, especially if access is limited.
Now that everything else is ready, let’s finalize this by creating the necessary policy, the one that will be used to backup your actual data.
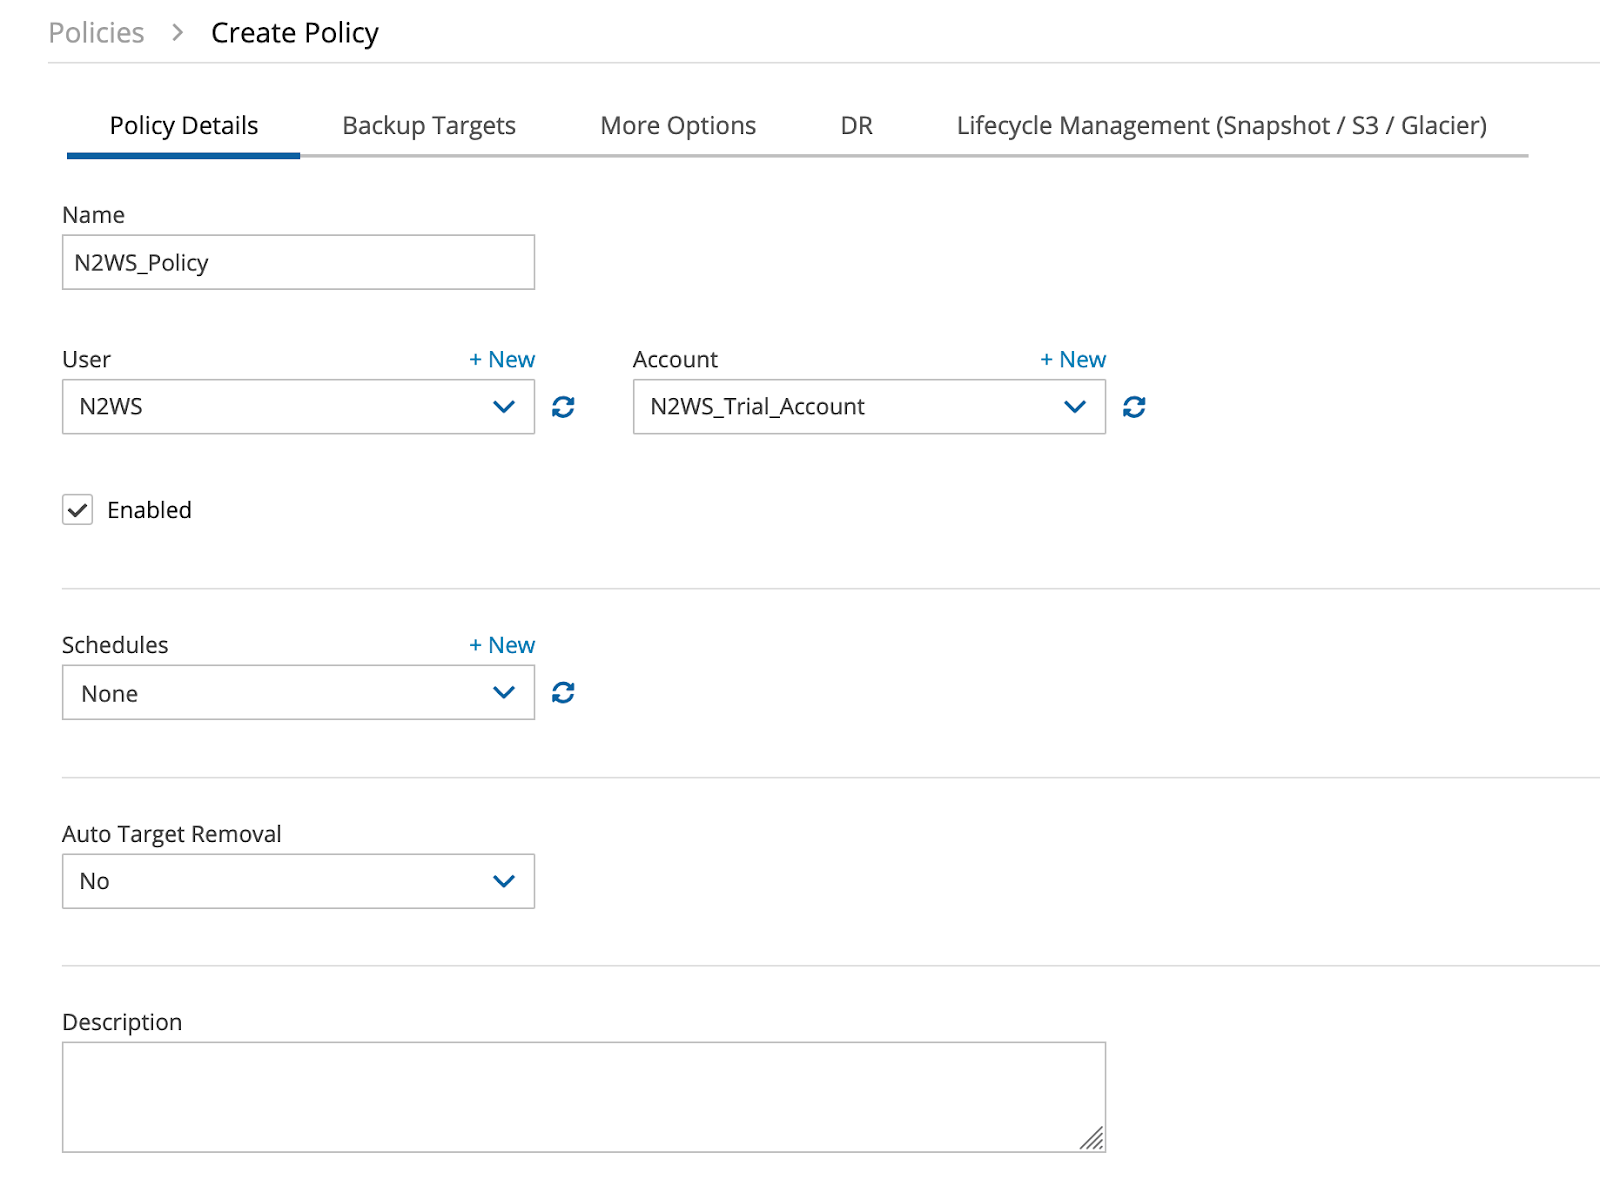
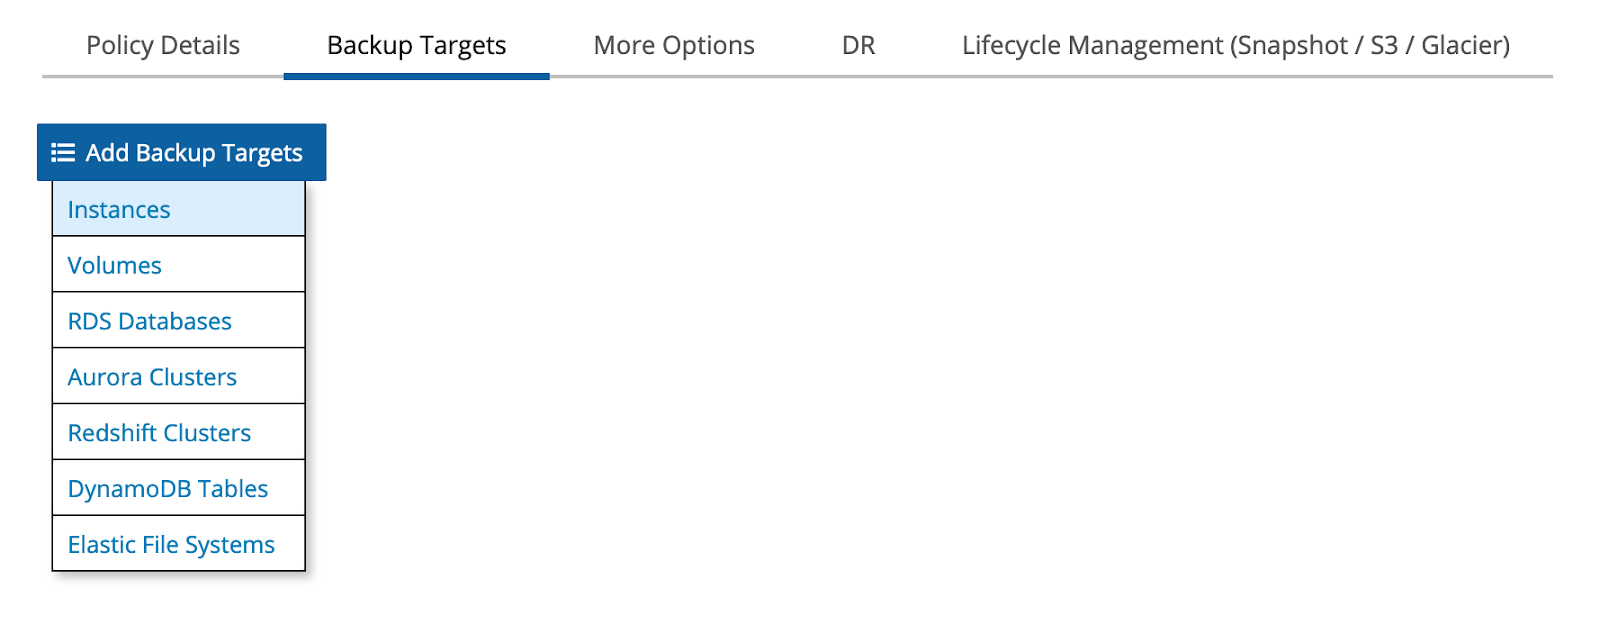
This is the most important step. First, name a policy and choose the backup target (the second tab). Here, we’ll opt for an instance as our backup target:
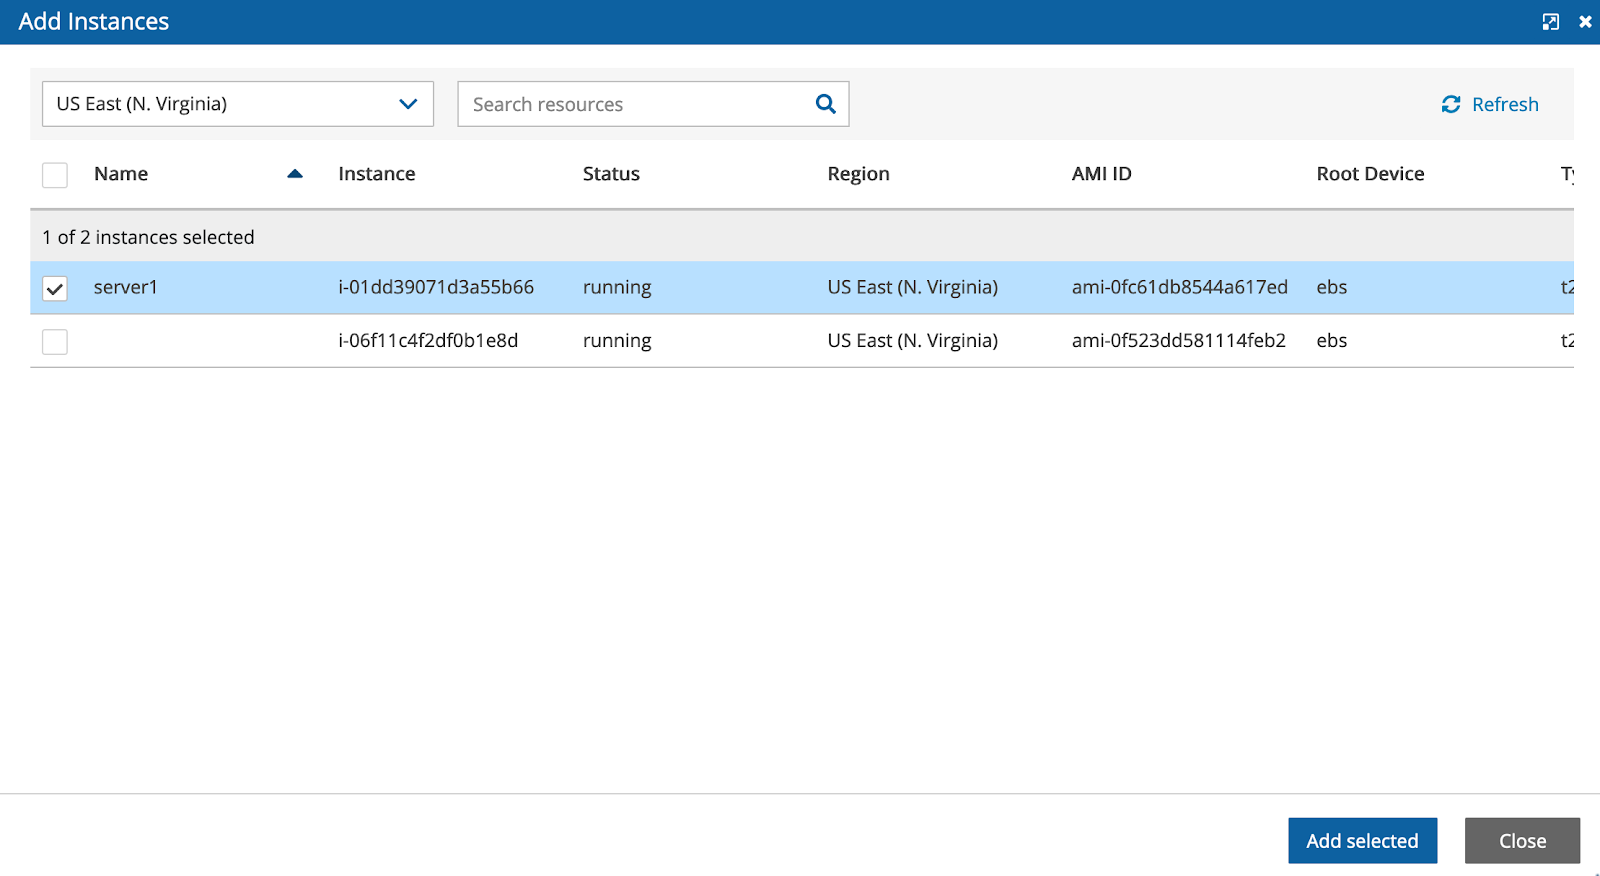
Additionally, you need to choose a server that you want to back up.
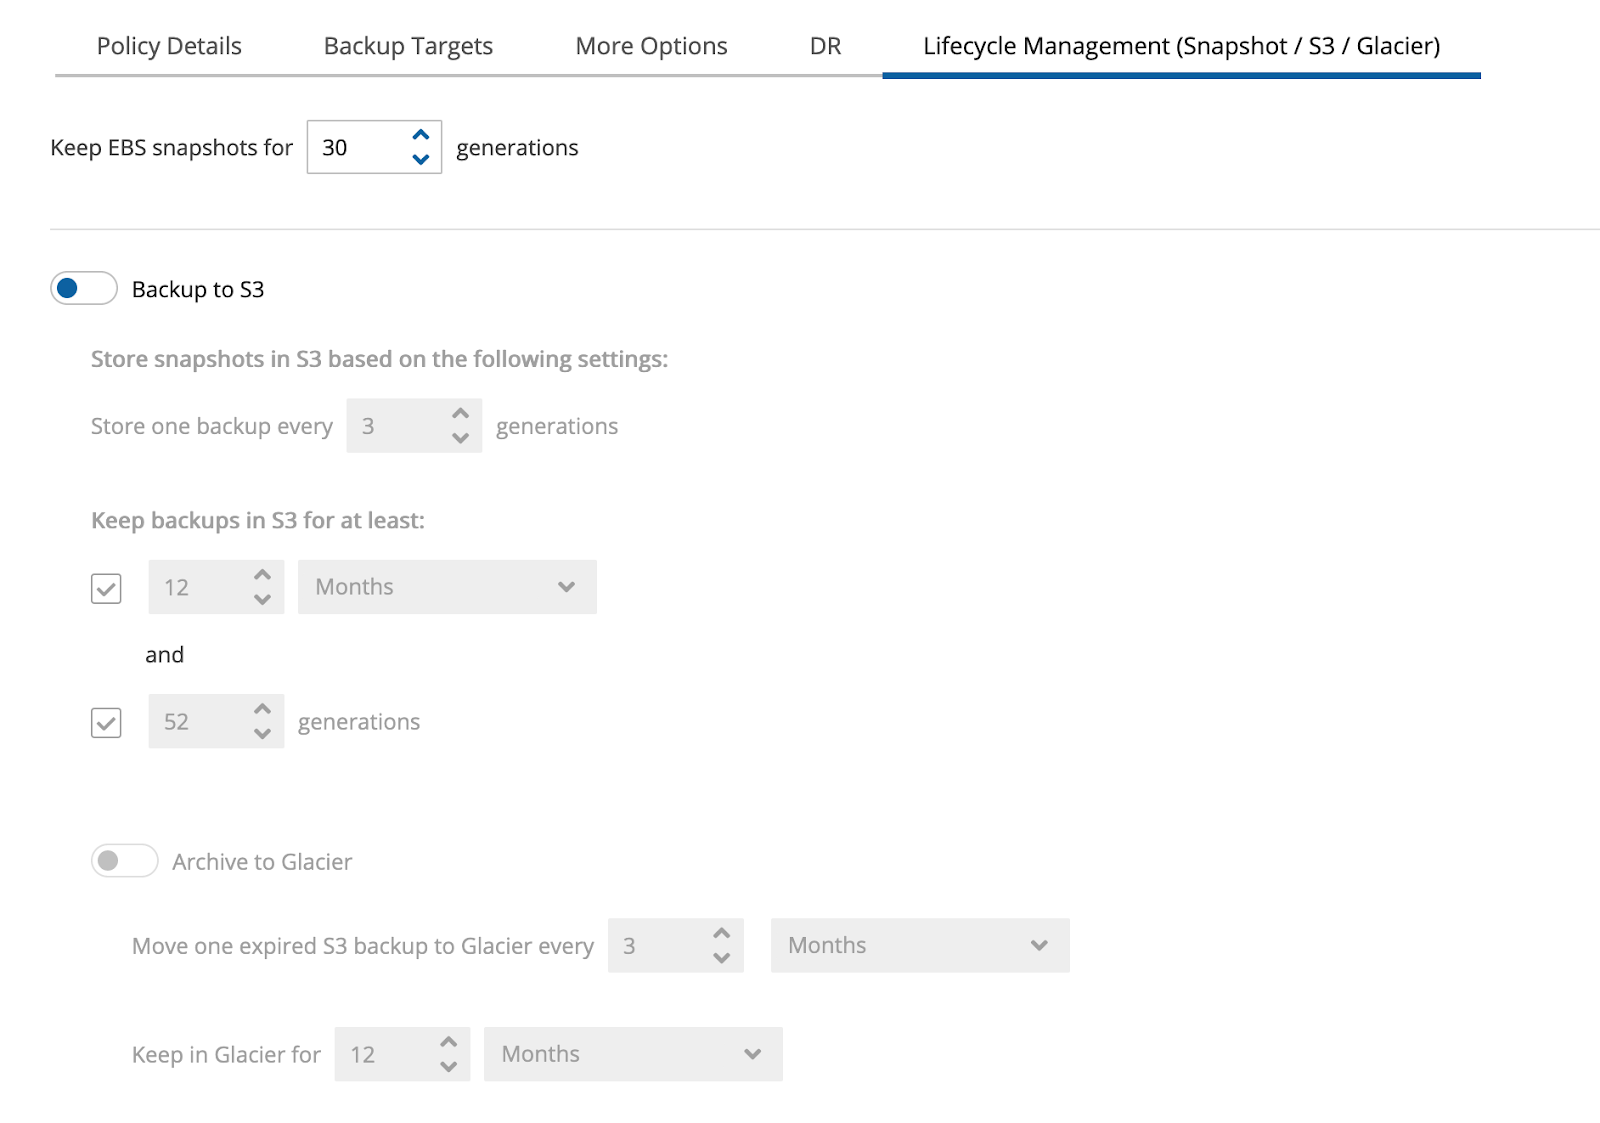
Then open the last tab, “Lifecycle Management (Snapshot / S3 / Glacier).”
To start your backup, enable “Backup to S3,” which is a prerequisite for cloud data archiving to Glacier. Make sure you pick the settings that meet your needs. For example, you might want to store Amazon S3 backups every 3 generations for 2 months, as illustrated below.
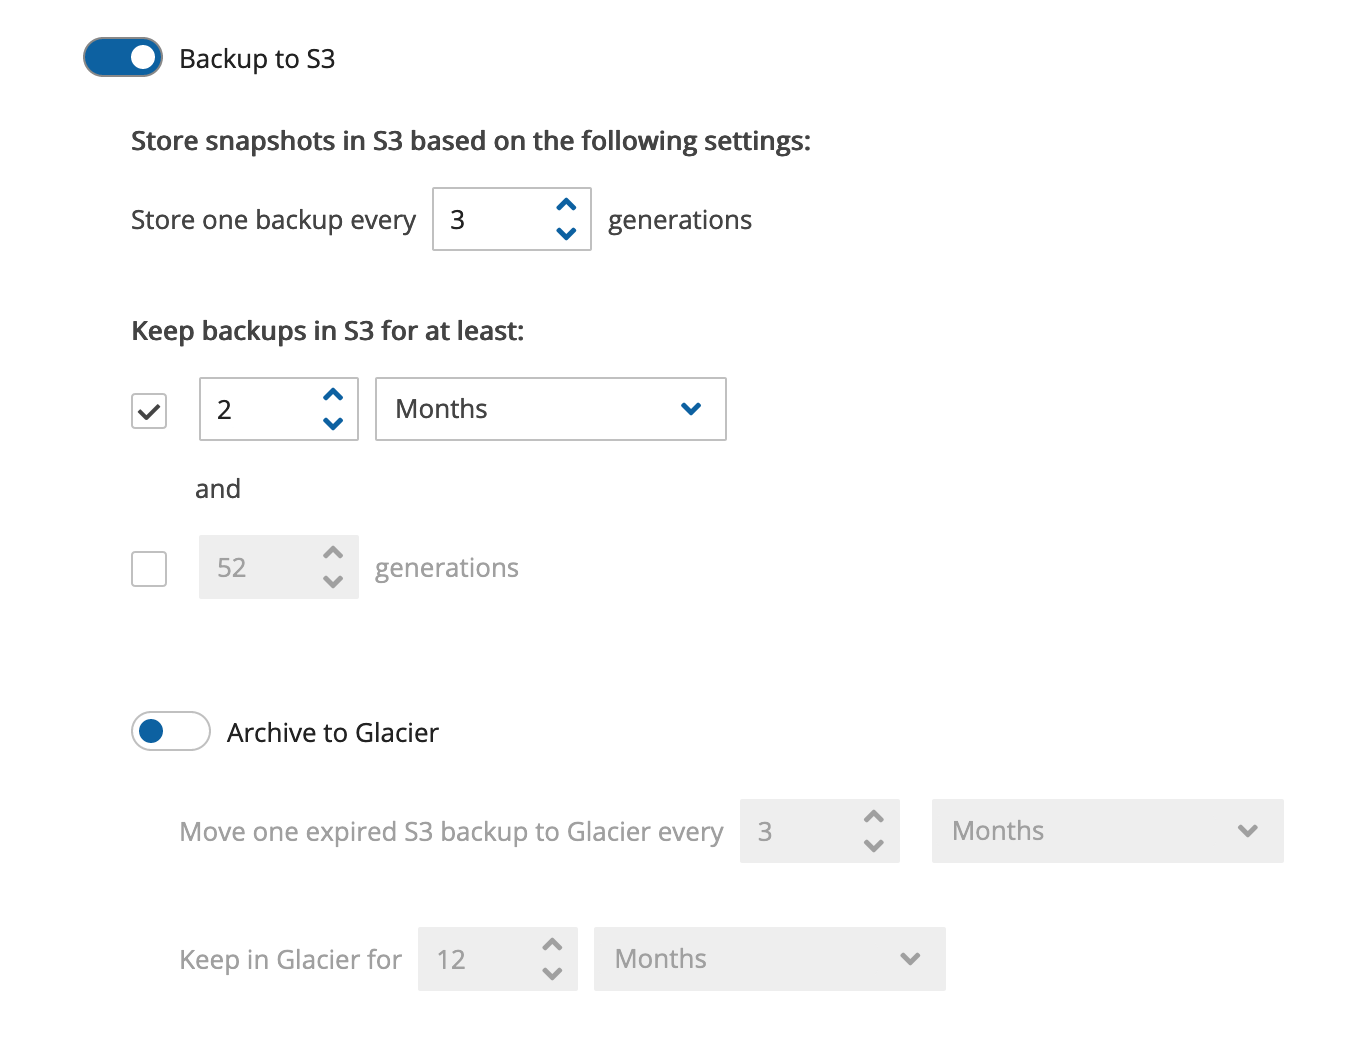
Now enable “Archive to Glacier.” Here, let’s use the defaults of moving expired Amazon S3 backups to Glacier after 3 months and storing them in Glacier for a full year. It is important to note that ‘a full year’ is counted from the creation time of the original backup (not from the moment it was moved to Glacier).
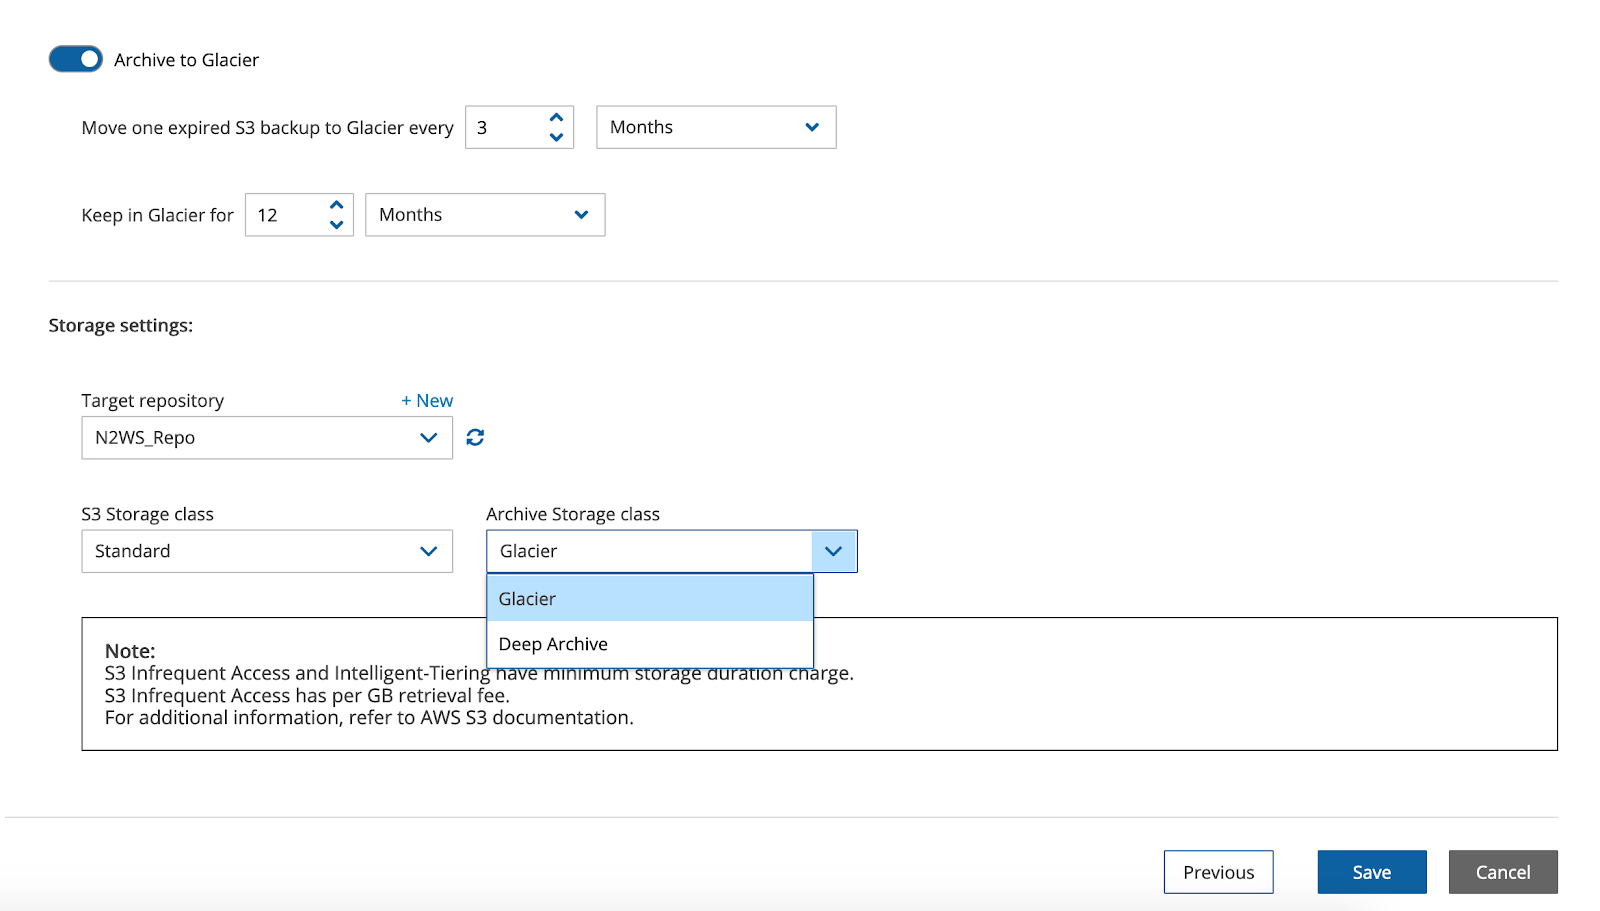
In the screenshot above, you’ll notice that you can pick a target repository (use the one you just created) and storage classes for both S3 and archive storage. Depending on your use case, you might want to change the S3 class to Infrequent Access, or even Intelligent Tiering (note this does involve additional AWS charges). Alternatively, you might want to use Glacier Deep Archive instead of regular Glacier.
Once you click “Save,” you are ready to start backing up your data.
All that is left to do is test everything. Open your policy, and click on “Run ASAP.” Now, when you open the Backup Monitor in your sidebar (a single pane of glass where you can monitor your backup progress), you’ll see that the status has changed to “In Progress.”

After your backup is done, the lifecycle will activate, and your backup will be stored in an S3 repository. You can follow the progress of that as well.

The process is now complete. Based upon the preset schedule and configuration that you established, the backups will be transitioned to Glacier.

Why should you use Glacier/Intelligent Tiering on AWS?
Many current regulations require long-term data storage. Banks, school systems, and medical institutions, for example, are often mandated to store data for many years—a process that can incur huge costs. There are many other use cases for colder storage options and it only makes sense for these institutions to take advantage of services like Amazon S3 and Amazon Glacier.
S3 Standard tier storage prices run $0.023 per GB stored per month. Back in early 2019, N2WS released a version which included support for storing snapshots to Amazon S3. AWS Glacier, on the other hand, costs only $0.004 per GB per month. The difference between these two can be enormous when you consider the amount of data being stored and the length of time it’s being stored for. There are many use cases and considerations for Glacier and given this potential savings, if your policies and needs allow you to take advantage of cold storage, there’s no reason not to do so.
S3 Intelligent Tiering is a new addition to Amazon S3. It’s used to automatically optimize storage costs based on actual need. It monitors data access patterns, and, without creating any operational overhead, it moves your data from one tier to another, ensuring the lowest possible costs for your business. For a small monthly fee, S3 Intelligent Tiering will designate your data as either “frequently used” or “infrequently used” and store it accordingly. If your data access patterns change, your data will be moved to another storage tier to better reflect its use. S3 Intelligent Tiering does the thinking for you, making it a great feature to use along with N2WS Backup and Recovery.
Try it out: Archive to Glacier now
Our vide tutorial will guide you through Archive to Amazon Glacier with just a few clicks.
With the recent release of v3.0, N2WS has added many new efficiency booster features, not to mention a slick, intuitive (and fun) user interface. The Archive to Glacier feature included in this release is probably the most significant recent addition to the product, and we highly recommend running through the steps in this guide to make sure you implement it properly right away.
If you haven’t yet tried N2WS Backup and Recovery for your business, you can do so today with a 30-day Free Trial (automatically converts to Forever Free Edition).